How to Adjust a Soft-Close Drawer That Does Not Close All the Way
Ever had a soft-close drawer that stubbornly remains half-open, especially after a kitchen remodel or a built-in upgrade? I remember the moment I first experienced this frustration—standing in my kitchen in dismay as a sleek, modern drawer refused to close completely, leaving my countertop looking imperfect and my day just a little bit more stressful. It’s one of those small issues that can feel surprisingly aggravating, especially when you’ve invested so much time and money into a beautiful, customized space.
Those soft-close drawers are meant to glide smoothly and shut gently—it’s one of the simplest ways to elevate your kitchen’s vibe. But when they misbehave, it can throw off the entire aesthetic and functionality of your cabinets. The good news? Usually, a quick adjustment is all it takes to get things back on track. Today, I’ll walk you through how to troubleshoot and fix a soft-close drawer that won’t close all the way, so you can avoid unnecessary replacements or calls to the pros.
Why Your Soft-Close Drawer Might Be Stopping Short
First things first, let’s understand what could be causing the problem. There are a few common culprits—misaligned slides, debris in the track, or worn-out dampers. Early on, I made the mistake of blindly tightening the hinge screws without checking the alignment, which only made the problem worse. Trust me, a little patience and a systematic approach go a long way. Did you know that the proper adjustment can restore your drawer’s smooth operation without replacing any hardware? According to expert tips from industry leaders, most soft-close issues are solvable with simple tweaks.
So, let’s get into how you can fix it. Whether you’re a seasoned DIYer or just starting out, these steps will help you diagnose and resolve the issue efficiently.
Are you tired of that half-open drawer ruining your sleek kitchen look? Do you worry about damaging the soft-close mechanism further by trying to fix it yourself? Rest assured, I’ll share some tried-and-true methods that will save you time and money. And if you’re curious about how to upgrade your entire cabinetry, I recommend checking out [this comprehensive guide](https://artisancabinetworkz.com/transform-your-kitchen-with-custom-cabinets-expert-guide-for-2025) for tips on transforming your space with custom cabinetry.
With these insights, you’re well on your way to restoring your drawers to perfect function. Let’s dive into the step-by-step fixes to get those drawers closing softly and smoothly again.
Assess the Alignment of Your Drawer
Begin by pulling out the drawer and inspecting the alignment. Use a level or straight edge against the front face to check if the drawer sits flush with the cabinet frame. I once faced this issue when my drawer was skewed by just a millimeter—adjusting the slides remedied the problem instantly. Misaligned slides cause the soft-close mechanism to engage prematurely, stopping the drawer before it fully closes.
Clean and Lubricate the Tracks
Remove the drawer and carefully clean the tracks and rollers with a damp cloth to remove dust, debris, or kitchen grease that can hinder smooth movement. After cleaning, apply a silicone-based lubricant to the rollers and slides. I once ignored this step, and my drawer kept sticking, but a quick clean and lubricate fixed it right away. This maintenance prevents unnecessary resistance that activates the soft-close damper too early.
Check and Adjust the Dampers
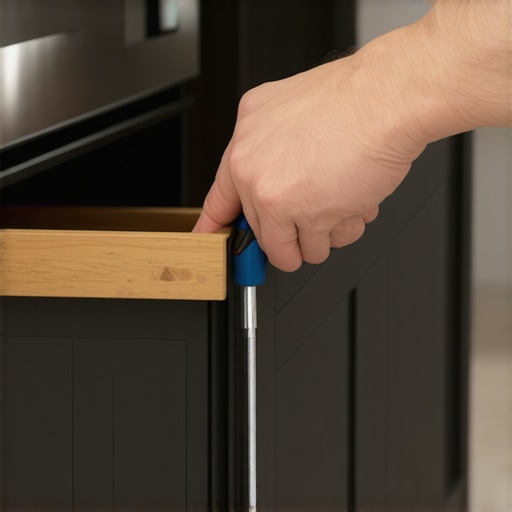
Locate the soft-close damper, usually attached near the rear of the slide. Many models have an adjustable screw or a damper with a sliding mechanism. Turn the adjustment screw clockwise to slow the closing speed or counterclockwise to make it close sooner. In my own kitchen project, I had to fine-tune the damper slightly to match the weight of my custom drawer front. Proper adjustment ensures the damper engages at the right moment, preventing the door from stopping short.
Verify the Hardware is Secure
Inspect all mounting screws on the slides and damper. Loose screws can cause misalignment or uneven operation. Tighten any loose screws with a screwdriver, but avoid overtightening—this can warp the slide or damage the frame. I learned this after overtightening caused the slide to bind, impeding closure. Keeping hardware secure guarantees the mechanisms work as intended.
Test and Fine-Tune the Closure
Reinsert the drawer into its track and gently close it. Observe where the soft-close engages. If it still stops prematurely, revisit the damper adjustment—small turns make big differences. Test repeatedly, making micro-adjustments until the drawer closes smoothly and fully. This iterative process might take a few minutes but guarantees a perfect fit.
Ensure Proper Weight Distribution
Finally, check that the load within the drawer isn’t causing imbalance. Overfilled or unevenly distributed weights can interfere with soft-close operation. Distribute heavier items evenly, and consider removing excess weight if needed. I once overloaded a drawer with heavy cookware, which threw off the mechanism—it was a simple fix once I redistributed the items.
Remember, many soft-close issues are rooted in misalignment or debris. Regular maintenance, such as cleaning the slides and checking hardware, can keep your drawers operating flawlessly. For more ideas on maximizing storage and creating a sleek kitchen, explore this guide.
When it comes to upgrading your kitchen with built-ins and custom cabinets, many homeowners fall prey to misconceptions that can hinder their project’s success. One prevalent myth is that more storage space always leads to better organization. In reality, increasing storage without considering accessibility and usage frequency can create clutter rather than convenience. For instance, dedicating deep cabinets solely for seldom-used items can complicate retrieval and hinder workflow.
Furthermore, there’s a tendency to believe that all custom solutions are prohibitively expensive or overly complex. While custom cabinetry and built-ins do require an initial investment, they offer tailored functionality that off-the-shelf options often can’t match. Strategically designed storage with proper hardware choices, like soft-close hinges and pull-out trays, can significantly enhance usability. As discussed in some expert guides, misalignment or poor hardware selection are common advanced mistakes that diminish longevity and ease of access.
A common trap is underestimating the importance of integrating storage solutions during the initial planning phase. Neglecting to incorporate features like hidden compartments or multi-use drawers can limit future flexibility. For example, incorporating vertical dividers or specialized inserts can maximize space efficiency, especially in small or awkwardly shaped kitchens. A study from the National Kitchen & Bath Association emphasizes that early planning greatly impacts the overall functionality and aesthetic coherence.
From my own experience, rushing through the planning stage often leads to costly adjustments later. It’s worth investing time upfront to analyze your specific needs and usage patterns. For instance, having a dedicated baking zone with built-in storage can streamline culinary prep, making your kitchen more enjoyable and efficient. To explore innovative ideas tailored to your space, I recommend reviewing this comprehensive guide on custom cabinets and built-ins.
Looking to optimize every inch? Remember, the goal is to create a seamless, functional space. Avoid the mistake of overloading cabinets or neglecting hardware quality, which can increase wear and tear over time. Properly planned storage solutions not only improve aesthetics but also enhance daily usability. Want more tips on how to choose the right hardware or design features? Check out this article.
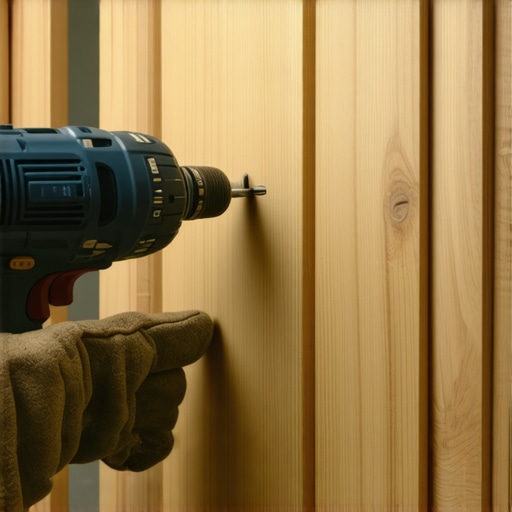
Making smarter choices today can save you headaches tomorrow. Have you ever fallen into this trap? Let me know in the comments.Maintaining your built-ins, custom cabinets, and storage systems is crucial to ensuring they remain functional and visually appealing over the years. One of my go-to tools for ongoing maintenance is a high-quality cordless drill with a set of precision bits. I use it not just for initial installation but for tightening loose screws or making quick adjustments as components shift over time. This allows me to avoid costly repairs and keep everything aligned perfectly. Additionally, a soft microfiber cloth combined with a gentle cleaning solution like a mixture of water and a few drops of mild dish soap helps me remove dust and greasy residues without damaging finishes. For stubborn spots, a plastic scraper proves invaluable, especially when dealing with dried-on grime without scratching surfaces.
A digital level is another must-have. I rely on it to verify the flatness of shelves and the proper alignment of doors and drawers. Even small deviations can cause soft-close mechanisms to misfire or create uneven gaps. Routinely checking these ensures everything operates smoothly. Personally, I calibrate my level tools regularly by referencing a known flat surface, which increases measurement accuracy.
For lubrication, I favor silicone spray lubricants over petroleum-based oils—they’re cleaner and provide longer-lasting slides. Applying a lightweight layer along the tracks quarterly minimizes resistance and prevents squeaks, especially in humid conditions where wood and hardware may expand slightly. I also keep a small set of replacement hardware, such as screws and hinges, handy. Over time, these can wear out or get stripped, and having spares saves me from project delays.
Looking ahead, I predict that smart maintenance—using sensors to monitor humidity, temperature, and hardware wear—will become more mainstream. This proactive approach could alert homeowners before issues become visible, ensuring long-term durability.
How do I keep my cabinetry functioning at its best? Incorporate regular check-ups and use specialized tools to spot potential problems early. I encourage you to try calibrating your drawer slides with a precision level or applying dedicated lubricant to keep everything gliding seamlessly. Want to perfect your storage systems? Head over to this resource for professional advice on maintaining and upgrading your storage solutions effectively.
Lessons That Changed My Approach to Kitchen Storage and Built-ins
One of the most eye-opening realizations I had was that proper hardware maintenance can extend the life of my custom cabinets significantly. Worn dampers and misaligned slides aren’t just minor annoyances—they can lead to costly replacements if ignored. Another insight was the value of regular cleaning and lubrication, which keeps soft-close mechanisms functioning smoothly and prevents premature failure. Lastly, understanding that even small adjustments—like tweaking damper screws—can make a world of difference in drawer performance taught me to approach repairs patiently rather than rushing into expensive fixes.
Tools and Resources That Elevate My Kitchen Remodeling Game
For anyone serious about creating a seamlessly functional kitchen, I can’t recommend the comprehensive guide on transforming your kitchen with custom cabinets. It offers invaluable insights into maximizing space with innovative storage solutions and selecting hardware that lasts. Additionally, I rely on my digital level and silicone lubricants, both of which have become staples in my maintenance toolkit. The app-based guides and tutorials from trusted sources like this site have transformed my DIY approach, making it easier and more accurate. Incorporating these resources ensures my built-ins stay sleek and functional for years to come.
Your Next Step: Redefine How You See Storage
Embrace the journey of optimizing your space with confidence. Remember, a well-maintained soft-close system is just the start—think about how clever storage solutions can change your entire kitchen experience. From hidden compartments to smart hardware choices, your improvements can be both practical and aesthetically pleasing. Don’t hesitate to experiment—each small upgrade brings long-term benefits that make every meal prep or clean-up effortless. What’s your biggest challenge when it comes to kitchen storage or cabinetry? Share your story below and let’s learn from each other’s experiences.