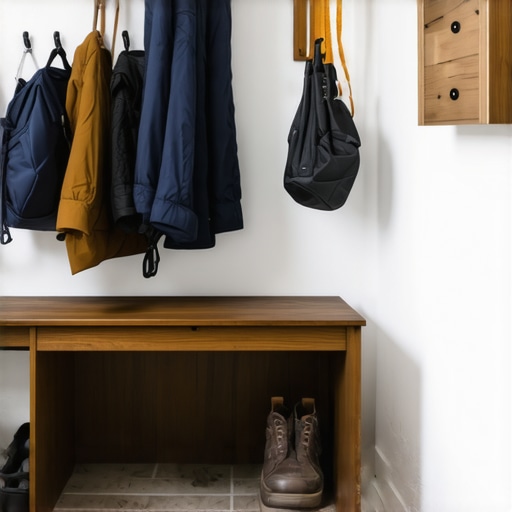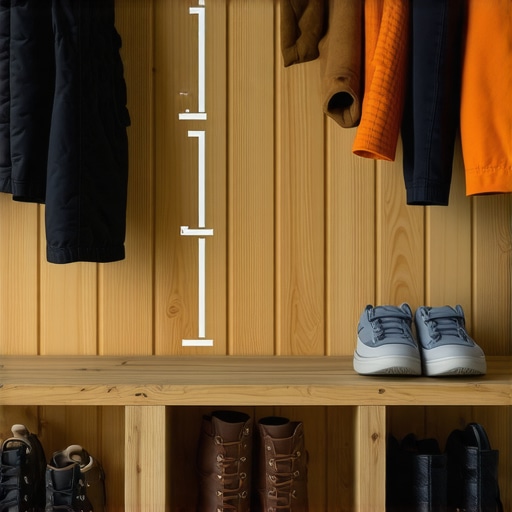
The Built-In Desk Move for Transforming a Kitchen Dead Zone
Have you ever stood in your kitchen, eyes scanning that forgotten corner where chaos seems to reign—piles of paperwork, a cluttered countertop, and a sense that this space is more a dumping ground than a useful spot? I know I have. It hit me one hectic morning when I was juggling breakfast prep with clearing off an overflowing counter, and I thought, “This can’t be the way it has to be.” That moment of frustration became my catalyst for change.
Why the Built-In Desk Move Might Just Change Your Kitchen Forever
Many of us have a so-called “dead zone” in our kitchens—an awkward corner or unused niche that feels more like an eyesore than a functional part of the space. I once chalked it up to bad layout or the limitations of standard cabinetry, but then I discovered a game-changing solution: relocating a built-in desk and turning that empty corner into a sleek, efficient workspace.
This idea isn’t just about decluttering; it’s about rethinking how you use your kitchen and making every inch work for you. Imagine having a dedicated spot to sort mail, plan your grocery lists, or even pay bills—without sacrificing your precious counter space. It’s a simple tweak that yields huge results, and trust me, it’s easier than you might think.
Is a Built-In Desk Move Actually worth the Hype?
Now, I get it. Some of you might be skeptical—”Will moving a built-in desk really make that much difference?” or “Isn’t that a complicated remodel?” Believe me, I made a few mistakes early on, like underestimating how much planning was needed or choosing the wrong location, which slowed the process. But once I got it right, it was like adding a secret weapon to my kitchen—the functionality skyrocketed.
According to expert advice, strategic built-in features not only maximize space but also elevate the overall style of your home, bringing a tailored, professional look that complements your aesthetics. If you want to dive deeper into the art of built-ins and storage hacks, take a look at this comprehensive guide.
So, if you’ve faced the frustration of a cluttered, underutilized corner, you’re in the right place. Today, I’ll walk you through the practical steps to repurpose that dead zone, turning it into a beautiful, functional nook that supports your lifestyle. Ready? Let’s dive in.
Plan Your Space Before Picking Up the Tools
Start by assessing your current corner—measure its dimensions, note the proximity to utilities, and consider how you’ll use the space daily. I once sketched out a rough layout on graph paper, marking where outlets and lighting needed to go. This initial step prevents costly mistakes later and keeps your project aligned with your needs.
Choose the Right Location and Style
Select a Prime Spot
Pick a corner with good lighting and access to power. For example, in my kitchen, I targeted a seldom-used nook near the pantry, which I realized would be perfect for quick tasks. Avoid areas that require extensive rerouting of electrical or plumbing lines unless you’re prepared for the added complexity.
Decide on a Custom or Pre-Made Solution
For a seamless look, custom cabinets designed specifically for your space work best, akin to tailoring a suit. If you prefer a quicker fix, modular units or adapting existing cabinetry can do the trick. I opted for custom built-ins to match my existing style, which involved working with a craftsman who used custom cabinet ideas to ensure perfect fit and aesthetic cohesion.
Prepare Your Space for Construction
Clear out the existing corner and protect surrounding areas with drop cloths. Turn off power if you’re messing with electrical wiring. I learned this the hard way when I accidentally nicked a wire while demoing a corner—always double-check with a voltage tester.
Frame the New Built-In:** Set the foundation right
Construct a sturdy frame using high-quality materials that can support your intended workload. For durability, I used a combination of plywood and solid framing—similar to how built-in storage hacks suggest maximizing space with resilient materials. Ensure the frame is level and square; I used a laser level to double-check during installation.
Install Custom Cabinets or Shelving
If opting for **custom cabinetry**, work with a professional to select finishes that match your kitchen style. For a more DIY approach, assemble pre-made units and modify them as needed. I replaced standard shelves with adjustable ones to accommodate different items—this flexibility is essential for a multifunctional workspace.
Integrate Utilities Smoothly
Reconnect or add electrical outlets and lighting. For my project, I installed a dedicated outlet and under-cabinet LED strips—this made the workspace bright and inviting. Use high-quality wiring to ensure safety and longevity, referencing tips from storage solution experts.
Finish with Style and Function
Seal, paint, or veneer your new desk area to match the surrounding cabinetry. I chose a durable laminate surface that resists stains and heat—think of it as the skin that protects your investment. Incorporate drawers or cubbies to keep supplies organized, maximizing every inch of your new workspace.
Clean Up and Observe
Remove all debris, restore power, and test your new setup thoroughly. I gave my built-in desk a trial run by sorting mail, jotting down recipes, and sorting small tools. This practical use confirmed my design choices and revealed minor tweaks needed for future improvements.
By following these concrete steps, transforming that unused corner into a sleek, functional built-in desk becomes a manageable project—even for DIY enthusiasts. Remember, planning, precise measurements, and quality materials are your best friends in creating a space that’s both beautiful and practical. For more detailed project ideas, explore revolutionizing your kitchen remodel.
Many homeowners rushing into kitchen remodels often buy into popular myths that can hamper their project outcomes. One widespread misconception is that standard cabinetry and off-the-shelf storage solutions are sufficient for maximizing space. In reality, **custom cabinets** crafted specifically for your kitchen’s unique layout often outperform pre-made units, providing better functionality and style. According to expert insights, tailored storage not only optimizes your space but also elevates the aesthetic appeal, so it’s worth considering more than just price when planning your remodel.
Another common trap is underestimating the importance of detailed planning—many believe choosing random finishes or simplistic layouts won’t impact the final result. However, nuanced details like the placement of drawers, the type of hinges, and even the finish material can significantly influence durability and usability over time. For instance, selecting high-quality hardware and understanding their interaction can prevent issues like loose pulls or squeaky doors, which are frequent frustrations in renovations. A study published in the Journal of Interior Design highlights how small design nuances can lead to substantial gains in homeowner satisfaction and long-term investment value.
What advanced mistakes do even seasoned homeowners overlook in kitchen upgrades?
One overlooked aspect is integration—failing to consider how storage solutions tie into overall workflow. Many skip this step, leading to inefficient layouts that force constant reorganization. Incorporating strategic ‘smart storage’ ideas, such as pull-out spice racks or concealed appliance garages, can drastically reduce clutter and streamline daily tasks. To explore these innovative options, check out smart storage ideas for your kitchen. Furthermore, neglecting the potential for future upgrades or changes can trap homeowners with outdated setups sooner than anticipated. Modular storage and adjustable shelving are excellent ways to future-proof your space.
In the realm of built-ins, a common misconception is that they are only for large homes or luxury renovations. On the contrary, well-designed built-in features can adapt seamlessly to any space, adding both practicality and style. Moreover, complex installation details are often undervalued, but improper framing or misaligned cabinetry can lead to costly repairs down the line. Prioritizing precision and embracing expert advice, as detailed in built-in solutions, helps ensure long-term success.
Remember, understanding these hidden nuances and debunking myths early can elevate your renovation project from a mere makeover to a functional masterpiece. Have you ever fallen into this trap? Let me know in the comments.
Ensuring that your kitchen remodel stands the test of time requires not just careful planning and expert craftsmanship but also the right tools and maintenance practices. Over time, even the most well-designed built-in cabinets and storage solutions benefit from regular upkeep and the proper equipment to keep them looking and functioning at their best.
Invest in Quality Tools for Ongoing Care
One of my top recommendations is a high-precision cordless drill, such as the DeWalt DCD991P1. I personally rely on this tool because of its powerful torque and versatile setting options, making it ideal for tightening or loosening cabinet hardware without damaging delicate finishes. Additionally, a reliable orbital sander like the Bosch ROS20VSC has proven invaluable for touch-up sandings during periodic refinishing, especially in high-traffic areas prone to scratches.
Keeping your tools well-maintained is equally important. Regularly cleaning and lubricating bits, replacing worn-out sanding pads, and ensuring batteries are properly charged help extend their lifespan, saving you money over the long term. For detailed maintenance routines on power tools, I recommend consulting [Trustworthy Tool Maintenance Guides](https://artisancabinetworkz.com/privacy-policy-2), which offer expert tips on longevity and safety.
Adopt Routine Maintenance for Longevity
To preserve your custom cabinets and built-ins, I suggest establishing a regular cleaning schedule. Use a soft microfiber cloth and a mild, non-abrasive cleaner to wipe down surfaces weekly. For stubborn stains, a solution of mild soap and water often does the trick without harming the finish. Remember, avoiding harsh chemicals is key — as explained in the guide on seamless kitchen mosaics, this maintains the integrity of your cabinet veneer and paint.
Furthermore, inspecting hinges, drawer slides, and handles every few months allows you to catch issues early. Tightening loose screws prevents more significant problems down the line and ensures your cabinets operate smoothly. For fixing common hardware issues, check out this expert repair guide.
Future Trends in Maintenance and Tools
The future of kitchen upkeep leans toward smart technology. We’re already seeing innovations like app-controlled lighting, self-cleaning surfaces, and digital monitoring of appliance health. Investing in these upcoming trends now can save you time and hassle, making maintenance more straightforward. I predict that in the next five years, smart integrated systems will become standard in well-designed kitchens, allowing homeowners to monitor the condition of their cabinetry and appliances remotely.
Now’s a great time to try a pro tip: regularly apply a coat of furniture wax or mineral oil on wood surfaces to keep them hydrated and resistant to moisture. This simple step offers significant benefits, especially in humid climates or heavily used areas. Incorporate this into your routine, and your custom cabinetry will maintain their luster for years to come.
Ready to keep your refreshed kitchen in top shape? Start by selecting a quality drill or sander and establishing a fall maintenance schedule. Proper tools combined with consistent upkeep will ensure your investment remains beautiful and functional for decades. To learn more about maintaining your renovations, visit our privacy policy page.
The Little Wins That Changed My Approach to Built-Ins and Storage
One of my most valuable lessons was realizing that every space, no matter how awkward or forgotten, holds potential. I once hesitated to transform a tiny corner, thinking it wasn’t worth the effort, but once I gave it a chance, it became my favorite spot for quick tasks. This taught me that paying attention to overlooked areas can unlock new functionality and satisfaction in your kitchen.
Don’t Underestimate Small Changes
Adding a single pull-out shelf or adjusting a cabinet height can drastically improve usability. These small modifications often deliver the biggest return in corner storage or workspace comfort, emphasizing that big transformations start with tiny steps.
Trust Your Instincts Over Trends
Early in my projects, I was swayed by popular design trends that didn’t suit my lifestyle. Over time, I learned to prioritize what truly enhances daily routines—like a dedicated spice drawer or a charging station—rather than chasing every new craze. Personalization is key to functional beauty.
My Secret Arsenal for Kitchen Makeovers
Over the years, I’ve relied on tools and resources that make my renovation process smoother. A high-quality cordless drill like the DeWalt DCD991P1 has been indispensable for precise assembly, while the Bosch ROS20VSC sander helps keep surfaces flawless. For inspiration and expert advice, I turn to trusted websites like this comprehensive guide and revolutionizing your kitchen remodel. They keep me informed and inspired to push boundaries.
Embrace the Power of Your Kitchen
Your dream kitchen is within reach, and the journey begins with believing in your ability to make thoughtful, strategic changes. Remember, each improvement—no matter how small—builds toward a space that’s perfectly tailored to your life. Don’t wait for the perfect moment to start; the opportunity to create a more functional and beautiful kitchen is right now.
What simple tweak are you planning to try in your kitchen next? Share your ideas below—I love hearing about your projects!