The Secret to Mounting Heavy Hardware on Fragile Slab Doors
It was a typical Saturday when I decided to upgrade my kitchen hardware. I’d finally chosen that sleek, modern handle set I’d been eyeing, only to realize halfway through that my brand-new, delicate slab doors weren’t built to handle heavy-duty mounting. The screws cracked, the doors wobbled, and I felt that sinking frustration that only comes from damaging something so seemingly simple. That moment was my wake-up call: simple tasks like hanging hardware shouldn’t feel like a high-wire act.
The Real Challenge: Heavy Hardware Meets Fragile Doors
Many homeowners face exactly this dilemma—how to securely mount substantial hardware on delicate, slab-style cabinet doors. The common mistake? Underestimating the strength needed or choosing the wrong mounting technique. When I first started, I thought I could just drill and screw my way through it. Turns out, that’s a recipe for split doors, loose handles, and endless headaches. After messing up a few doors early on, I discovered that not all mounting methods are created equal, especially when it comes to lightweight or fragile materials.
The good news? There are practical, proven solutions to this problem that don’t require replacing your cabinetry or risking costly damage. In fact, with just a bit of planning and the right materials, you can confidently install heavy hardware that stays sturdy and looks great.
Are you tired of worrying about whether your new pulls will make your cabinet doors sag or crack? If so, you’re not alone. Many DIY enthusiasts and even seasoned renovators overlook this critical step, often due to a lack of awareness about the proper mounting techniques. But don’t worry—I’ve been there, and I’m here to help you avoid the same mistakes.
For instance, I initially thought I could just rely on standard screws, but I learned that using specialized anchors or mounting plates is key—especially for thin or fragile surfaces. Early in my experience, I made the mistake of ignoring the material strength of my doors, which only led to more damage. That’s why I dedicated time to research and test different approaches, and I’ve compiled everything into easy-to-follow steps.
In this post, I’ll guide you through the best practices rooted in real-world experience to ensure your hardware is both beautiful and securely mounted. Whether you’re refurbishing your existing cabinets or planning a full remodel, these tips will save you time, money, and frustration.
Before we dive into the solutions, let’s address one of the biggest fears I hear from homeowners: “Will this really work on my fragile slab doors?” Spoiler alert: yes, with the right techniques, it’s entirely doable. For a deeper look at how custom cabinets and well-thought-out storage solutions can complement your hardware upgrade, check out [this comprehensive guide](https://artisancabinetworkz.com/the-ultimate-guide-to-custom-cabinets-for-a-stylish-kitchen-overhaul). Now, let’s explore how you can confidently install even the heaviest hardware without risking further damage.
Strengthen Your Mounting Points
Begin by assessing your cabinet doors’ material and thickness. For delicate slab doors, avoid standard screws alone. Instead, use wall anchors or toggle bolts designed for thin surfaces. When I installed new handles on my glass-like MDF doors, I first drilled small pilot holes, then inserted plastic expansion anchors, which distributed the load and prevented cracks. This approach significantly improved the handle’s stability and minimized the risk of damage.
Select the Right Hardware
Opt for mounting plates, backplates, or heavy-duty brackets that spread the weight across a larger area. These components attach to the door’s interior or the frame, reducing stress on the surface. During my project, I added mounting plates behind the handles, which allowed me to use longer screws without penetrating the front surface. This method is especially crucial for thin, hollow, or delicate materials. For more insights on choosing the best hardware, visit expert tips on storage solutions.
Use Appropriate Drilling Techniques
Always pre-drill with a bit slightly smaller than your screws to prevent splitting. Clamp your door securely to prevent slipping. When I tackled my project, I used painter’s tape over the drilling area to keep the surface from splintering. Drill slowly and steadily, applying consistent pressure. This ensures clean holes and prevents stress fractures, especially on delicate surfaces like veneer or painted finishes.
Position for Balance and Support
Mark your drilling points carefully, ensuring they’re evenly spaced and aligned. Consider the door’s thickness and balance the load accordingly. To distribute weight further, install multiple attachment points for larger hardware. I found that spreading the handles across different points of the door reduced wobble and strain, extending their lifespan. For complex layouts, designing a template or using a jig can help maintain precision—more on that at drilling techniques for perfect holes.
Apply Secure Fasteners and Verify
Insert the appropriate screws, tightening firmly but avoiding over-tightening, which can crack the material. After installation, test the handles’ stability with gentle force. If you notice any wobbling, tighten the screws further or add supplementary anchors. This hands-on step ensures your hardware stays firm regardless of daily use, saving you from future repairs or replacements.
Final Touches to Protect Your Investment
Once installed, consider applying a clear sealant or touch-up paint around the hardware to prevent moisture ingress and corrosion, especially in humid kitchens. Regularly check the mounting points and re-tighten if needed. Proper installation techniques like these mitigate the risk of damage and ensure your hardware remains both functional and stylish for years to come.
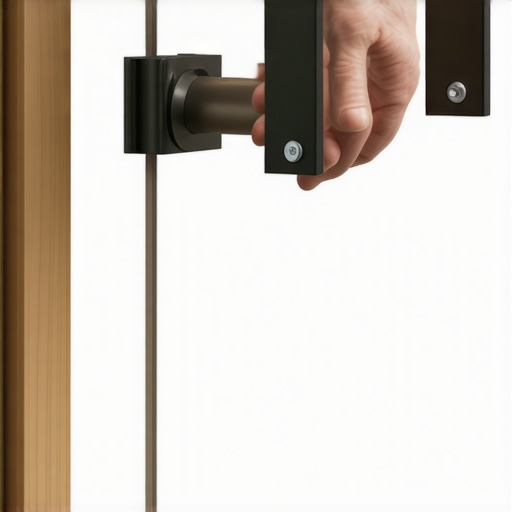 Many homeowners and even some professionals fall into common traps when designing and installing custom cabinets, but understanding the subtle nuances can make all the difference. Contrary to popular belief, opting for the most elaborate design or the latest trend isn’t always the best choice. Instead, focusing on functionality, material compatibility, and long-term maintenance often yields more satisfying results.
One of the biggest myths is that larger or more ornate cabinets automatically increase a home’s value. While aesthetics matter, the real value lies in how well the storage solutions integrate with daily routines. Over-customizing without considering user behavior can lead to impractical layouts and underused spaces. For example, installing tall, inaccessible upper cabinets may look stunning but often result in underutilized areas that could be optimized with lower, more accessible storage options.
Be cautious of the “one-size-fits-all” approach. Every kitchen has unique dimensions, lighting, and workflow patterns. Ignoring these factors can cause costly mistakes later. Incorporating thoughtful design elements, such as built-ins that complement your existing space, requires a keen eye for detail and understanding of spatial relationships. For instance, the placement of a hidden charging station within a built-in can enhance functionality without compromising style. Discover more about integrating such innovative storage solutions here.
Additionally, many assume that selecting materials like MDF over solid wood is a sacrificial choice. In reality, modern manufacturing techniques and advances in finishing make high-quality MDF a durable and cost-effective alternative, especially for painted surfaces. According to expert cabinet makers, choosing the right material involves considering humidity levels, wear-and-tear, and aesthetic goals, not just initial cost.
A common ‘oops’ is neglecting proper hardware installation, which can compromise the entire cabinet’s function over time. Heavy or improperly mounted hardware can cause doors to sag or drawers to jolt out of alignment. Utilizing the right mounting techniques and hardware ensures longevity and smooth operation—details often overlooked by those eager to finish quickly. Learn more about avoiding these pitfalls in joinery mistakes.
What about the advanced concern of moisture management and substrate stability? For example, in high-humidity areas, particleboard or MDF might swell, leading to structural issues. Experts recommend using moisture-resistant materials or implementing proper sealing techniques. An understanding of these nuances can prevent costly repairs and extend your cabinetry’s lifespan.
Incorporating built-in storage should be about enhancing the home’s overall harmony and workflow. Cutting corners or rushing the process often results in a mismatch between design and function. Engaging with experienced designers and understanding these hidden aspects can turn a standard remodel into a personalized sanctuary.
Have you ever fallen into this trap? Let me know in the comments. Remember, perfection in custom cabinets isn’t just about aesthetics; it’s about mastering the subtleties that truly elevate your space.To ensure your custom cabinetry and storage solutions remain in top shape over the years, investing in the right tools and adopting proper maintenance routines is crucial. First, I swear by a high-quality orbital sander. It allows me to quickly smooth out any surface imperfections or scratches that might occur during installation or regular use, helping prolong the cabinet finish’s lifespan. Coupled with a reliable vacuum attachment, it keeps dust minimal and work efficient. For delicate touch-ups, a fine foam brush or a small-detail brush kit is invaluable; they let me apply stain or sealant precisely without mess or waste.
When it comes to hardware maintenance, a specialized cleaning cloth, like a microfiber cloth slightly dampened with a gentle cleaner, helps keep handles and hinges free of grime—especially important in kitchens where grease and fingerprints are common. For tightening and adjusting hinges or drawer slides, I recommend a magnetic head screwdriver. Its convenience prevents stripped screws and allows quick adjustments, which I find essential during long-term care or when modifications are needed.
In terms of long-term results, periodic lubrication of moving parts can prevent squeaking and ensure smooth operation. A silicone-based spray, applied sparingly, is my go-to for hinges and slides. Moreover, checking fasteners once a year can prevent loose handles or wobbly shelves—something I’ve learned the hard way by ignoring this simple step.
Looking to the future, the trend is moving toward smart maintenance solutions. I predict integrated sensor technology that can detect moisture levels or structural shifts will become standard, especially in high-humidity environments. This can alert homeowners before small issues escalate into costly repairs, aligning with innovations like the moisture sensors detailed by professional furniture engineers.
How do I maintain custom cabinets and storage solutions over time?
Regular cleaning with gentle cleaners, periodic hardware checks, and timely lubrication are key. Incorporating these routines into your maintenance plan keeps everything functioning smoothly and looking pristine for years.
One advanced tip I encourage you to try is installing a magnetic, contactless door or drawer sensor that can send alerts if movement or opening occurs unexpectedly. This simple addition can greatly extend the lifespan of your hardware by preventing undue stress and unnoticed damage. For ideas on integrating sophisticated storage solutions seamlessly, explore this article on modern storage innovations. Remember: maintenance is not just about fixing problems but proactively preserving your investment and enjoying your beautiful kitchen space hassle-free.
The Hidden Lessons Behind My Cabinet Conundrums
One vital insight I uncovered was that patience and prepared tools trump rushing through installation. Rushing often leads to mistakes, like stripped screws or cracked surfaces. I also realized that visualizing the entire process beforehand—like sketching your drill points—can save a lot of headaches later. Lastly, I learned that sometimes, investing in quality hardware and mounting accessories pays off by reducing future repairs and enhancing aesthetics. These lessons stem from my personal mishaps and successes, emphasizing that meticulous planning and the right materials make all the difference in achieving professional results.
Tools and Resources That Changed My Approach
If you’re serious about safe and secure hardware mounting, certain tools make all the difference. I rely on a high-quality cordless drill with variable speed settings for precise control. A set of fine-tip screwdrivers helps me tighten hardware without damaging delicate surfaces. For selecting hardware and mounting solutions, I trust expert advice on storage solutions which offers insights tailored to fragile cabinetry. Additionally, I consult comprehensive guides on custom cabinetry fundamentals, ensuring every choice enhances both form and function.
Your Next Step: Elevate Your Kitchen Game
Remember, installing heavy hardware on delicate cabinet doors isn’t just a task—it’s an opportunity to elevate your entire kitchen aesthetic and functionality. Take your time, select the right materials, and use the tools that give you control. With dedication and informed choices, you can transform your space into a masterpiece of design and durability. Don’t hesitate to start your project today—your dream kitchen is within reach. What’s the biggest challenge you face when installing new hardware? Share your thoughts below and let’s troubleshoot together.