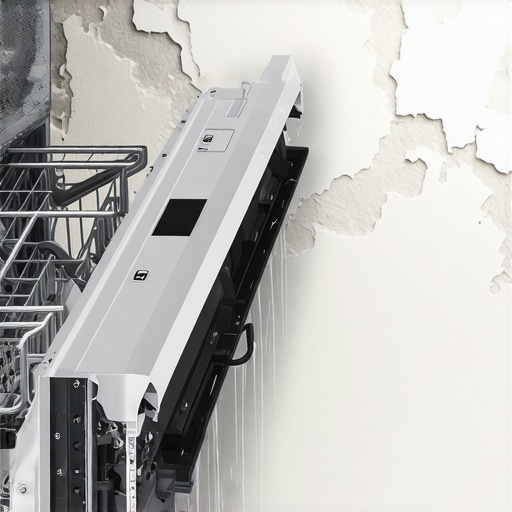
Why You Should Never Place a Dishwasher Directly Against a Wall
I remember standing in my first ‘completed’ kitchen, hands on my hips, feeling like a genius. I had managed to squeeze every single appliance into the layout with surgical precision. To save a few inches for my dream pantry, I pushed the dishwasher right up against the far wall. It looked tight, modern, and incredibly efficient. But three months later, the smugness vanished. I noticed the paint on my wall was blistering, and the side of my beautiful [custom cabinets](https://artisancabinetworkz.com/the-ultimate-guide-to-custom-cabinets-for-a-stylish-kitchen-overhaul) was starting to swell from the heat. I’d made the rookie mistake of prioritizing aesthetics over physics, and it nearly cost me my entire renovation budget. Today, I’m going to save you from that same headache by explaining why that tiny gap—the one you probably want to delete—is actually the most important part of your kitchen design.
Your Walls Simply Can’t Handle the Steam
Putting a dishwasher flush against a wall is a recipe for structural disaster. When your machine runs its drying cycle, it vents an incredible amount of hot, moist air. Without a proper buffer, that steam has nowhere to go but directly into your drywall or the side of your cabinetry. If you’re currently [innovative storage solutions for modern kitchen remodels](https://artisancabinetworkz.com/innovative-storage-solutions-for-modern-kitchen-remodels), you have to plan for ‘breathing room.’ I’ve seen homeowners ignore this only to find black mold growing behind their units within a year. It’s a visceral, expensive mess that a simple two-inch filler strip could have prevented.
Is that extra filler strip really worth the lost space?
You might be worried that adding a gap will ruin the flow of your kitchen or waste precious real estate. I thought the same thing. However, that gap allows you to install a proper side panel, which is crucial for [how to conceal the seam where the cabinet end panel meets the wall](https://artisancabinetworkz.com/how-to-conceal-the-seam-where-the-cabinet-end-panel-meets-the-wall). According to the National Kitchen & Bath Association (NKBA), standard guidelines suggest that a dishwasher needs at least 2 inches of clearance from a perpendicular wall to allow the door to open fully and to protect the surrounding surfaces from thermal expansion. I once skipped this and couldn’t even open my dishwasher door past the door casing on the adjacent wall—talk about an embarrassing ‘lightbulb moment.’ Have you ever noticed your kitchen walls feeling damp after a heavy load of dishes? If so, you might already be seeing the early warning signs of a ‘flush-mount’ failure. In the next section, we’ll dive into the specific ways you can mask these gaps without sacrificing that high-end look.
Get the Perfect Dishwasher Gap Without Looking Like an Amateur
The goal is to make the gap look intentional, like a sophisticated shadow line rather than a measuring mistake. Think of it as elbow room at a crowded dinner table; without it, nobody can move comfortably, and eventually, someone gets bumped. You achieve this by installing a vertical filler strip between the dishwasher and the wall. This strip isn’t just a piece of scrap wood; it’s the bridge that connects your heavy appliances to your custom cabinets as a game changer in your kitchen remodel journey. By planning for this buffer early, you ensure the appliance looks integrated into the design rather than jammed into a corner as an afterthought.
The Magic of the Two Inch Filler Strip
When you are dealing with a perpendicular wall, you need a minimum of 2 inches. Most dishwasher doors have handles that protrude, or the door itself is slightly wider than the internal tub to ensure a seal. I once worked on a project where we used a 1-inch filler because the homeowner was desperate for a wider sink cabinet. On paper, it worked. In reality, the dishwasher door rubbed against the door casing every single time it opened, eventually stripping the paint off the trim. We eventually had to use how to scribe a bench to a stone wall without any gaps techniques to shave down the adjacent wood, but the result never looked quite right. Stick to the 2-inch rule. It gives you enough space to handle scribe work, which is where you trim the wood to follow the slight curves and wonkiness of your home’s walls.
Build a Proper Shield with Return Panels
You cannot just leave the side of the dishwasher exposed to the bare wall. You need a return panel or a finished end. This is a piece of cabinetry material that matches your doors and boxes, creating a structural pocket for the dishwasher to slide into. If you are aiming for modern kitchen remodels featuring custom cabinets and built-ins, this panel should be secured to the floor and the underside of the countertop. It acts as a thermal shield. Without it, the heat from the drying cycle radiates directly into the wall, which is exactly why your cabinet paint bubbles near the stove and how to prevent it becomes a reality for many homeowners—heat and moisture are the natural enemies of any wood finish.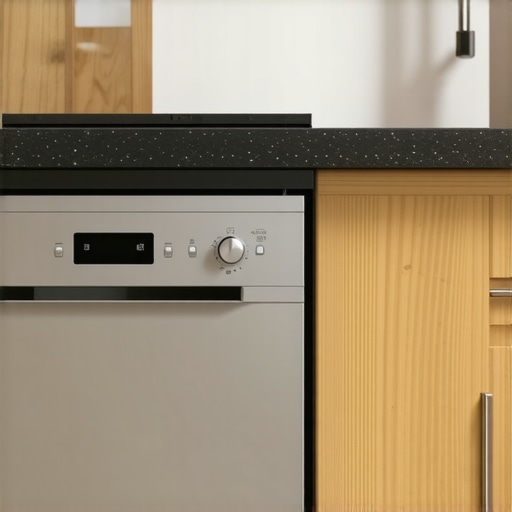
Stop Steam Damage Before It Starts
Even with a gap, steam is incredibly persistent. It’s like a ghost that can find its way through the smallest cracks. To protect your investment, you should apply a moisture barrier to the underside of your countertop and the edges of the adjacent panels. Most high-end installers use a specialized aluminum foil tape for this. I learned this the hard way after a budget install resulted in the why your soft close slides are failing and the quick cleaning fix becoming a secondary issue to the actual rotting of the cabinet floor. If your cabinetry uses why plywood box construction still wins over furniture board in wet areas, you have a better chance of survival, but why take the risk? Use the tape and ensure your custom cabinets stay as crisp and structurally sound as the day they were installed. Always check that the dishwasher is leveled properly within this new pocket to prevent the door from torquing, which can cause internal leaks over time.While we’re on the subject of precision, let’s talk about a major industry myth: the idea that solid wood is always superior. Everyone thinks they want 100% solid wood everything, but in reality, that’s often a recipe for disaster in a kitchen. For instance, why plywood box construction still wins over furniture board in wet areas is a topic I find myself explaining to clients weekly. Solid wood expands and contracts significantly more than high-quality plywood. If you build a large pantry box out of solid slabs, it will likely pull itself apart within two years due to seasonal humidity shifts. The real expertise lies in knowing when to use engineered stability over natural beauty to prevent panels from bowing.
Don’t Let Cheap Hinges Ruin a Five-Figure Investment
Then there’s the ‘Oops’ factor—the hidden trap of hardware weight ratings. I’ve seen homeowners invest in beautiful custom cabinets ideas that transform your homes style only to pair them with standard-duty slides. They load up a deep drawer with 80 pounds of heavy cast iron pans, and suddenly the real reason your cabinet drawer slides are grinding becomes painfully obvious. High-end cabinetry is a system, not just a set of boxes, and your hardware needs to be the engine that can actually handle the payload. If you are going for a heavy-duty setup, ensure your expert tips on selecting storage solutions for a perfect kitchen upgrade include checking the dynamic load capacity of every runner.
Why does the wood grain direction matter on my pantry doors?
It’s a question I get from the most detail-oriented clients. Most people assume grain direction is just an aesthetic choice, but it’s actually a structural one. In our discussions about innovative storage solutions for modern kitchen remodels, we often emphasize how vertical grain on tall doors helps resist bowing. If you cross-grain a large panel, you’re asking for a door that won’t shut flat during a humid July. According to the U.S. Forest Products Laboratory, wood is hygroscopic and moves significantly across the grain but very little along its length. By aligning the grain vertically, we minimize the visible movement, ensuring how to pick the right wood grain direction for tall pantry doors is a decision that keeps your kitchen looking crisp for decades.  I’ve spent years fixing these high-end mistakes that could have been avoided with ten minutes of planning during the design phase. Have you ever fallen into this trap where you prioritized the look of a specific material over how it actually behaves in a functional kitchen? Let me know in the comments. We’re all here to learn from each other’s dusty lessons and ensure the next renovation is the last one you’ll ever need.
Stop Eyeballing Your Hardware Installations
I’ve seen more beautiful kitchens ruined by a crooked handle than by bad paint choices. If you’re investing in transform your kitchen with custom cabinets expert guide for 2025, you cannot rely on a tape measure and a prayer. I personally swear by the True Position Drill Guide. It’s a specialized jig that locks into place, ensuring every single pull is identical to the millimeter. Using this tool isn’t just about speed; it’s about preventing the heartbreak of a misdrilled hole in a finished door that took six weeks to arrive. This is the one tool you need for perfectly aligned cabinet knobs every time. When you use a mechanical stop instead of a pencil mark, you eliminate the human error that turns a high-end project into a DIY-looking mess. 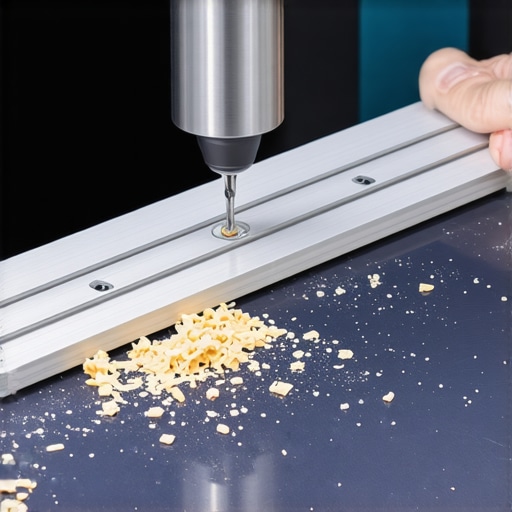
How do I maintain my custom cabinets and built-ins over time?
Longevity isn’t a happy accident; it’s a maintenance schedule. Every six months, I perform a ‘hinge audit.’ Most modern setups use European concealed hinges, and because houses settle, those doors will eventually drift. Learning how to adjust European hinges for a perfectly level door reveal is a skill that takes five minutes to learn but keeps your kitchen looking brand new for a decade. While you’re at it, check the movement of your drawers. If things feel sticky, it’s usually just dust buildup in the grease. Understanding why your slow close hinges are suddenly sluggish and how to clean them prevents you from forcing a mechanism and snapping the internal plastic dampers.
The Professional Secret to Preserving the Finish
We need to talk about cleaning, because the ‘all-natural’ vinegar solution you found on Pinterest is probably eating your lacquer. According to the Architectural Woodwork Institute (AWI), high-performance finishes like post-catalyzed lacquers are chemically resistant, but they aren’t invincible. Acidic cleaners can break down the topcoat over time, leading to that sticky feeling near the handles. I only use a highly diluted, pH-neutral dish soap and a microfiber cloth. This is especially critical if you have a white kitchen, as harsh chemicals can actually accelerate the chemical reaction that causes yellowing. If you’re worried about the long-term look, checking out the real reason your white painted cabinets are turning yellow will help you spot environmental triggers like UV exposure or cooking oils that are often overlooked.
Where Kitchen Design is Heading in 2025 and Beyond
I’m seeing a massive shift toward ‘active’ storage. We are moving away from static boxes and toward creating seamless kitchen remasters with built-in storage solutions that include integrated charging stations and motorized lift systems. In the next few years, smart storage solutions for small kitchens in 2025 will likely feature AI-driven inventory tracking inside the pantry itself. My advice? Scale your project by focusing on the infrastructure now—ensure your cabinets have the depth and the structural integrity to support these future tech additions. Go grab a screwdriver this weekend and perform that ‘hinge audit’ I mentioned. It’s the easiest way to instantly ‘level up’ the feel of your home.
Lessons I Paid for in Sawdust and Tears
I’ve learned that the smallest oversight—like a missing 1/8-inch shim—can haunt you for years. First, never assume your floor is level; even in brand-new builds, slabs can dip, which is why I always check that every base cabinet needs adjustable feet on uneven concrete. Second, your pantry isn’t just a box; it’s a structural unit, and you will eventually thank yourself for knowing why every tall pantry needs a fixed middle support shelf to prevent the sides from bowing under the weight of a hundred cans. Finally, don’t ignore the ‘summer swell.’ Wood is alive, and giving your doors room to breathe is the only way to avoid the heartbreak of a stuck drawer in August.
#IMAGE_PLACEHOLDER_E#
The Essential Toolkit for a Lifetime of Straight Cabinets
To get professional results, you need more than just a hammer. I trust the NKBA design standards for clearance rules, but for the actual build, I rely on a few specific tools. A high-quality laser level is non-negotiable for creating seamless kitchen remasters with built-in storage solutions. I also keep a stash of GRK cabinet screws because standard drywall screws will eventually snap under the shear force of a heavy upper cabinet. For long-term maintenance, a simple bottle of pH-neutral wood cleaner will save your finish from the degradation caused by typical grocery-store sprays.
It is Time to Build Something That Lasts
Your kitchen should be a source of pride, not a list of chores. By focusing on these hidden structural details, you are moving beyond simple decorating and into true craftsmanship. Whether you are installing a full suite of custom cabinets or just upgrading your hardware, the effort you put into the ‘invisible’ work is what defines the quality of the ‘visible’ results. Don’t be afraid to slow down and get it right the first time; your future self will thank you for the lack of repairs. If you find yourself stuck or need professional eyes on your design, feel free to reach out to us for guidance on your next project. Have you ever discovered a hidden problem like steam damage or a bowing shelf after it was already too late? Let me know in the comments below!