How to Choose the Right Glue for Cabinet Crown Molding
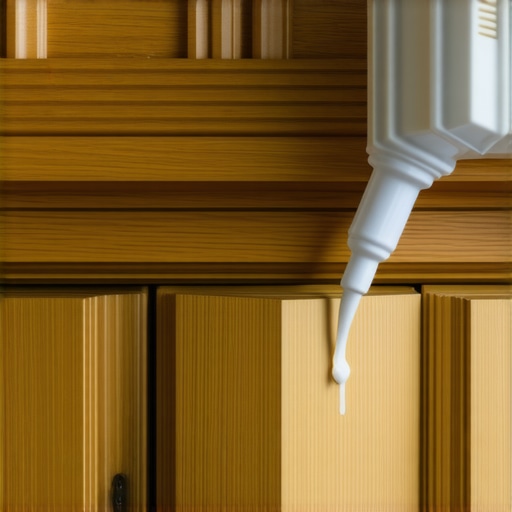
I was three days into a “quick” kitchen remodel when the realization hit me: I had no idea what I was doing with the crown. I had spent thousands on custom cabinets, and there I was, watching my expensive maple molding slowly sag because the glue I used didn’t have enough “tack.” I’d opted for the cheapest yellow wood glue in the junk drawer, and it was currently dripping down the face of the cabinet like a slow-motion car crash. It’s a gut-wrenching feeling to see your hard work literally slide out of place. This project was supposed to be the crowning jewel of my built-in storage solutions, but instead, I was covered in sticky residue and regret. Today, I am going to save you from that 2 AM headache by showing you exactly which adhesives will keep those corners tight and your sanity intact.
Stop Letting Your Crown Molding Joints Pull Apart
The problem with crown molding isn’t just the tricky compound angles; it’s the physics. When you are installing crown molding on sloped ceilings or even standard uppers, gravity is your constant enemy. If the glue doesn’t grab immediately, you’re left fighting every piece with your hands, head, and shoulders while you reach for the nailer. Most homeowners think they can just nail it and walk away, but nails eventually loosen as the house settles. Glue is what makes those miters look like a single, solid piece of wood for the next twenty years. Whether you’re wrapping built-ins and storage hacks or finishing a stylish kitchen overhaul, the bond matters more than the fastener. Have you ever stood back to admire your work only to see a gap opening up right before your eyes?
Is Specialized Cabinet Glue Actually Worth the Hype?
You might be wondering if you really need a $15 bottle of CA glue or a high-strength polyurethane when the $4 yellow glue has worked for your birdhouses. The short answer is yes. Crown molding often deals with end-grain-to-end-grain connections, which are notoriously weak and prone to “starving” the joint. According to the Forest Products Laboratory, wood can expand and contract significantly based on seasonal humidity, meaning your glue joint needs to be stronger than the wood fibers themselves to prevent structural failure. In my early days, I ignored this. I figured a few extra brad nails would compensate for a weak bond. Spoiler alert: they didn’t. Within a month, the changing seasons caused the wood to move, and those “perfect” corners opened up into ugly black gaps. If you want your cabinet crown molding to meet the ceiling without a visible seam, you need a glue that acts as a structural weld.
Get Your Surfaces Ready for a Real Bond
Before you even touch the glue bottle, you have to realize that wood glue doesn’t stick to kitchen grease. In my own kitchen remodel project, I once tried to glue a return piece over a cabinet I’d already been cooking near for a week. The bacon grease had formed an invisible barrier, and the molding literally slid off like it was on a waterslide. This is why your Indianapolis kitchen cabinet paint quote includes a mandatory de-greasing step; any surface contamination kills your bond. Clean the top edge of your custom cabinets with denatured alcohol or a dedicated degreaser before the first drop of adhesive hits the wood. If you are working on modern kitchen remodels featuring custom cabinets and built-ins, the finish is often so slick that a light scuff-sanding with 220-grit paper is necessary just to give the glue some “teeth” to grab onto. Without that mechanical bond, you’re just floating wood on a layer of slick chemicals.
The Hybrid Glue Trick That Saves Your Arms
I call this the “instant-gratification” technique. You apply a standard wood glue to the center of the miter for the long-term structural hold, but you leave small gaps for a few drops of Cyanoacrylate (CA) glue. The wood glue is the marathon runner, but the CA glue is the sprinter that holds the piece in place for the first 30 seconds so you don’t have to grow a third arm while reaching for your nailer. When I was installing built-ins and storage hacks in a tight corner, this trick allowed me to set the corners perfectly without the “walking” effect that happens when you try to nail a wet, sliding joint. This level of precision is similar to the secret to hanging inset doors without leaving a gap; it’s all about controlling the movement during the critical first few seconds of contact.
Stop the Seasonal Gap Before It Starts
Wood is alive and it breathes. If you don’t account for the fact that your cabinet doors are warping in the summer heat, your crown will eventually fail. The crown molding at the top of your uppers acts like a giant bridge across the room. If the glue is too brittle, the natural expansion of the house will snap that bond like a dry twig. I prefer using a glue that penetrates deep into the grain of your stylish kitchen overhaul materials. For the most stubborn miters, I’ve even used a thin bead of polyurethane glue, which expands slightly to fill the microscopic voids in the wood fibers. This is the same logic used when you need to scribe a bookshelf to a brick fireplace without gaps—you need the material to conform and bond to an imperfect surface to create the illusion of a perfect fit. If you see a bead of glue squeeze out, don’t wipe it with a wet rag immediately; let it skin over and chisel it off to avoid staining the surrounding wood.One of the most pervasive myths I encounter in the field is that silicone is the magic fix for every gap in a modern kitchen remodel featuring custom cabinets and built-ins. In my experience, silicone is actually the enemy of a professional finish. Because it is chemically inert to most wood finishes, it creates a surface that no paint or stain can ever touch again. If you accidentally get a smear of it on your face frames, you will see fish-eyes in your topcoat that look like tiny, incurable craters. This is why you should never use silicone for cabinet joinery. Professionals stick to paintable caulk or wood-specific fillers that actually take a finish. If you want expert tips on selecting storage solutions for a perfect kitchen upgrade, start by throwing that tube of bathroom silicone out of your workshop.
Stop Pinning Your Floors Under Heavy Islands
Everyone wants their kitchen to look seamless, but one of the biggest oops factors I see involves the order of operations. Many homeowners believe that installing the flooring across the entire room before the cabinets arrive is the most efficient route. However, why luxury vinyl plank should not be trapped under your base cabinets is a matter of thermal physics. According to the National Wood Flooring Association (NWFA), floating floors must be able to expand and contract as the room temperature fluctuates. If you pin that floor down with three thousand pounds of stylish kitchen overhaul cabinetry and a granite-topped island, the floor has nowhere to move. It will eventually buckle or separate at the seams, ruining a multi-thousand dollar investment.
Does Your Wall Have the Backbone for a Floating Vanity?
When moving beyond standard uppers to more complex built-ins that elevate your living rooms functionality, you have to look behind the drywall. An advanced mistake I often see is attempting a sleek, modern floating look without checking the framing. This is why your floating vanity needs structural blocking before the tile is even a thought. Standard 2×4 studs are rarely enough to prevent a heavy cabinet from bowing the wall over time. You need horizontal blocking—solid wood bridges between the studs—to distribute the torque and weight. I have walked into too many bathrooms where the grout lines are cracking because the vanity is literally pulling the tile off the wall. It is these hidden nuances that separate a weekend project from a seamless kitchen remaster with built-in storage solutions. We often think more cabinets equal a better kitchen, but over-stuffing a floor plan can lead to dead zones. Using smart storage ideas to maximize your kitchen space this year means prioritizing flow over sheer volume. Have you ever fallen into this trap or noticed your perfect remodel starting to sag? Let me know in the comments.Once you have cleared the hurdles of structural blocking and floor plan logic, the focus shifts to the long game of durability. The difference between a DIY look and a professional seamless kitchen remaster often comes down to one tool: a self-leveling cross-line laser. If you are trying to find the high point of a floor with a standard bubble level, you are already behind. A laser allows you to project a perfect grid across the room, ensuring the proper way to shim cabinets on a high spot in the floor is accurate to within a sixteenth of an inch. Without this level of precision, your custom cabinets should feature dovetail drawers, but those drawers will never glide perfectly if the boxes are racked even slightly during installation. I also swear by a dedicated cabinet hardware jig; free-handing handles is a recipe for disaster. Using a template ensures the best way to drill holes for new cabinet hardware stays consistent across forty different doors.
How do I maintain my custom cabinets over time?
Maintenance is less about a weekly scrub and more about environment. According to technical bulletins from the Kitchen Cabinet Manufacturers Association (KCMA), wood is highly sensitive to rapid changes in temperature and humidity. You must maintain a home humidity level of 35% to 50% to prevent the wood from swelling or shrinking. This is the real reason your soft-close drawers are sluggish in winter; the wood has moved, and the tolerances are tight. Additionally, understanding why your white cabinets are turning yellow—which is usually a mix of UV exposure and grease buildup—can help you choose the right cleaning routine. Avoid harsh chemicals; a simple microfiber cloth with a drop of mild dish soap is all you need to protect that expensive finish.
The Rise of Modular Custom Cabinets
Looking toward the future, the trend is moving away from static boxes and toward high-tech modularity. In custom cabinets for 2025, I expect to see more living storage systems. We are starting to integrate magnetic interior tracks that allow you to move drawers and shelves without tools, much like innovative storage solutions for every room in the house. This flexibility means you can organize your kitchen tools for efficiency today and completely reconfigure the layout five years from now as your family grows. My best advice? Don’t wait for a full remodel to start practicing good habits. My challenge for you: Grab a bottle of denatured alcohol today and clean the tops of your upper cabinets. You will be shocked at the grime that has settled there, and clearing it off is the first step in ensuring your next crown molding or hardware upgrade actually lasts.
What I Learned After Fixing Forty Fumbled Miters
In the world of high-end carpentry, the difference between a master and an apprentice isn’t just the tools; it’s the understanding of how materials behave long after the check has cleared. One major lightbulb moment for me was realizing that a ‘dry fit’ is often a lie. You might have a perfect corner without glue, but the moment you introduce moisture from an adhesive, the wood fibers swell just enough to push that miter apart. Always test your clamping pressure before the glue goes on. Additionally, I learned that you should never trust a house to be square. Even in a brand-new kitchen remodel, the floors will have undulations. Mastering the proper way to shim cabinets on a high spot in the floor is the only way to ensure your crown molding doesn’t look like a roller coaster at the ceiling line. Finally, remember that while aesthetics matter, the internal joinery is the soul of the piece. This is why I always insist that your custom cabinets should feature dovetail drawers; they provide the mechanical strength that glues alone cannot match over decades of heavy use.
The Gear That Actually Lives in My Tool Vest
I don’t believe in buying every gadget on the shelf, but there are three things I never step onto a job site without. First is a high-quality Cyanoacrylate (CA) glue kit with an activator spray; it is the only way to handle delicate returns and small moldings without splitting the wood with nails. Second, I rely on a professional-grade hardware template. Using a dedicated jig is the best way to drill holes for new cabinet hardware with zero margin for error. If you are off by even a thirty-second of an inch, your eye will catch it every time you walk into the room. Lastly, I recommend keeping a copy of Bob Flexner’s ‘Understanding Wood Finishes’ in your shop. It’s the bible of durability and will teach you more about protecting your investment than any YouTube tutorial ever could.
#IMAGE_PLACEHOLDER_E#
Build Something That Outlasts the Season
Woodworking and remodeling are forms of legacy building. When you take the time to degrease your surfaces, choose the right structural adhesives, and shim your boxes to a laser-perfect line, you aren’t just installing boxes—you are creating the backdrop for a lifetime of family dinners and morning coffees. Don’t be afraid to slow down. The ‘quick’ fix is almost always the one you’ll be repairing three years from now. If you’re ready to look ahead at the next wave of design and functionality, dive into my transform your kitchen with custom cabinets expert guide for 2025 to see how these techniques are evolving. Your home deserves the patience of a craftsman. Have you ever had a perfectly glued joint pop open during a change in seasons, or did you manage to seal it for good?