Why Your White Cabinets Are Turning Yellow and How to Prevent It
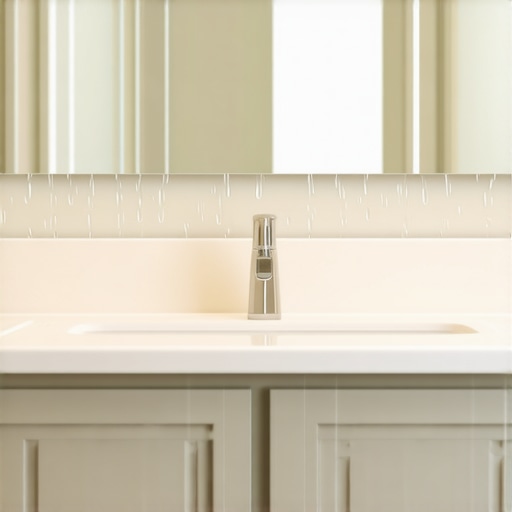
I remember standing in my kitchen last Sunday morning, steaming mug of coffee in hand, when the sun hit my upper cabinets at just the right angle. My heart sank. Those “crisp” white doors I bragged about during our kitchen remodel journey weren’t crisp anymore. They looked… tired. A sickly, buttery shade of yellow was creeping across the shaker panels like a bad tan. It’s a gut punch when your investment starts to fail, especially when you’ve put so much heart into choosing the perfect custom cabinets. I felt like I’d let my kitchen down. Today, I’m going to show you exactly why this happens and, more importantly, how to stop the fade before your kitchen looks like a relic from the seventies. We are going to get those cabinets back to their former glory together.
The Sneaky Culprits Turning Your Kitchen Yellow
When I first started DIY-ing my storage, I made the classic rookie error: I thought paint was just paint. I grabbed a gallon of “premium” wall paint for my built-ins, thinking I was being smart and saving a few bucks. Why using standard interior paint on your kitchen cabinets is a five-year mistake became a lesson I learned the hard way when the finish turned amber within two seasons. Most people don’t realize that the real reason your white painted cabinets are turning yellow often comes down to the chemical makeup of the finish itself. If your cabinets are near a window, UV rays are literally cooking the finish. If they aren’t near a window, certain oil-based paints can actually yellow *because* of the lack of light—a weird quirk known as “dark yellowing.” According to a study by the American Coatings Association, the oxidation of oil-based binders is a primary driver of this discoloration over time, which is why choosing a high-quality waterborne acrylic or a post-catalyzed cabinet lacquer is so vital. It’s not just about the color; it’s about the chemistry.
Can’t I Just Scrub the Yellow Away?
It’s the first thing everyone tries. You grab the heavy-duty degreaser and a sponge, hoping it’s just grease from too many Tuesday night taco sessions. Sometimes, you’re right—cooking oils and steam can leave a film that mimics yellowing. But if the yellowing is inside the finish, no amount of elbow grease will fix it. Have you noticed a specific corner or one particular door that seems to be changing faster than the rest? It’s frustrating, right? We’re going to look at how to tell the difference between “kitchen grime” and “finish failure” so you don’t waste your Saturday scrubbing for nothing. Ensuring you have the right proper way to prep cabinets is half the battle, but understanding the “why” is what saves your sanity and your wallet.
Run the Five-Minute Degreasing Test First
Before you panic and reach for a paintbrush, you need to know if the yellowing is “environmental” or “chemical.” I once spent a grueling Saturday afternoon attacking a corner cabinet with a scrub brush, convinced it was just a decade of accumulated bacon grease. I scrubbed until my knuckles were raw, only to realize the yellow wasn’t on the paint; it was the paint itself. This is exactly why your indianapolis kitchen cabinet paint quote includes a mandatory de-greasing step—you have to rule out the surface grime before you can diagnose the finish failure. Take a soft microfiber cloth and a mild detergent or a specialized cabinet cleaner. Clean a small, inconspicuous area. If the yellow wipes away, you’re in luck; it’s just grease. If the color remains stubbornly buttery, your finish has oxidized.
Look Behind Your Magnets to Spot UV Damage
UV rays are the natural enemy of modern kitchen remodels featuring custom cabinets and built-ins. To confirm UV damage, pull off any magnets, calendars, or decorative items that have been hanging on your cabinet doors for a few months. If the area behind the object is bright white and the surrounding wood is yellowed, you have a light-fastness issue. This is common in kitchens with large south-facing windows. The sun acts like a slow-motion oven, baking the resins in the coating.
Ditch the Hardware Store Paint for Professional Lacquer
If the degreasing test failed, you are looking at a repaint. But don’t just grab a bucket of “Cabinet-Grade” paint from a big-box store. To prevent this from happening again, you need to understand the difference between pre-catalyzed and post-catalyzed cabinet lacquer. Post-catalyzed lacquers contain a chemical hardener added right before application, creating a much more durable, non-yellowing shield than standard water-based house paints. It’s the gold standard for the ultimate guide to custom cabinets for a stylish kitchen overhaul because it resists the oxidation that turns white doors into a yellow mess.
Strategic Layout Hacks to Protect Your Finish
Sometimes, the heat from your appliances is the silent killer. I remember a client who couldn’t figure out why only one specific drawer front was turning amber. It turns out she kept her high-heat toaster directly under that cabinet. Learning the 3 best ways to hide a toaster on a small countertop isn’t just about aesthetics; it’s about heat management. When you are planning smart storage ideas to maximize your kitchen space this year, keep heat-producing appliances away from your white-painted surfaces. Using innovative storage solutions for modern kitchen remodels, like pull-out appliance garages or heat-shielded zones, can extend the life of your white finish by years. Proper ventilation and distance are the two simplest ways to keep those whites looking crisp.Yellowing isn’t the only ghost in the machine when it comes to a failing kitchen finish. Sometimes, the issue starts long before the first coat of lacquer is even sprayed. Most homeowners believe that if they invest in a high-end custom cabinets as a game changer in your kitchen remodel journey, the layout and durability are automatically guaranteed. I’m here to tell you that’s a myth. In my experience, even the most expensive cabinetry can fail functionally if you prioritize ‘pretty’ symmetry over real-world physics. For instance, did you know that moisture and temperature fluctuations cause wood to expand and contract at different rates? According to a study by the Forest Products Laboratory, wood is hygroscopic, meaning it acts like a sponge. This is why solid wood door panels still need room to breathe in summer. If your finisher didn’t account for this ‘breathing room,’ your crisp white paint will inevitably crack at the joints, exposing the raw wood to grease and UV rays that accelerate yellowing.
Stop Sacrificing Function for Symmetry
We’ve all seen those Pinterest-perfect kitchens where every cabinet door is the exact same width. It looks great in a photo, but it’s often a functional nightmare. One of the biggest ‘oops’ factors I see in modern kitchen remodels featuring custom cabinets and built-ins is the overuse of narrow, vertical storage. While they look sleek, why narrow spice pull-outs are often harder to use than you think becomes apparent the moment you try to fit a Costco-sized oregano bottle into a three-inch gap. Instead of forcing symmetry, focus on expert tips on selecting storage solutions for a perfect kitchen upgrade that prioritize your specific workflow. Have you ever fallen into this trap? Let me know in the comments.
Does Your Wood Grain Direction Actually Affect the Finish?
It sounds like a detail only a master carpenter would care about, but it’s vital for a long-lasting white finish. When we revolutionize your kitchen remodel using built-ins and creative storage, we have to consider the orientation of the grain. If a tall pantry door is constructed with the grain running horizontally against a vertical frame, the internal tension will eventually telegraph through the paint. This creates ‘micro-fractures’ in the finish that trap kitchen oils and turn yellow far faster than a smooth, well-planned surface.
The Trash Can Mistake That Destroys Your Cabinet Finish
If there is one absolute ‘trap’ to avoid, it is the placement of your waste. It’s common to see a pull-out bin tucked away right next to the stove for convenience. However, why your garbage pull-out should never be next to the oven is a lesson in thermodynamics. The constant heat from the oven door accelerates the decomposition of organic waste, releasing acidic gases that can actually soften the chemical bonds in your cabinet lacquer. Over time, this makes the paint sticky, yellowed, and prone to peeling. When planning innovative storage solutions for modern kitchen remodels, keep your heat sources and your waste bins far apart. It’s a small nuance that saves your high-end finish from an early grave.
The One Tool I Swear By for Perfect Hardware Alignment
After years of tweaking modern kitchen remodels featuring custom cabinets and built-ins, I have realized that even the most expensive kitchen looks like a disaster if the knobs are off by even a sixteenth of an inch. When I am finishing a project, I do not eyeball anything. I rely on a high-precision aluminum drilling jig. If you are doing this yourself, the one tool you need for perfectly aligned cabinet knobs every time is a dedicated cabinet hardware jig that clamps to the door. I personally use the True Position Drill Guide because it eliminates the risk of the drill bit walking across your expensive finish. It is about removing human error from the equation so your custom cabinets as a game changer in your kitchen remodel journey do not end up with unwanted ‘extra’ holes.
How do I keep my custom cabinets working like new for a decade?
Maintenance is not just about cleaning; it is about mechanical upkeep. Every six months, I do a ‘walk-through’ of my kitchen. I check for sagging doors and grinding sounds. If you hear a screech, why your soft-close slides grind and the quick lubrication fix usually involves a tiny amount of dry silicone spray—never use heavy grease which attracts dust. For sagging doors, learning how to adjust European hinges for a perfectly level door reveal is a skill that takes five minutes to learn but saves your kitchen’s aesthetic. According to Blum’s technical specifications for their Tandembox systems, these slides are tested for 100,000 open/close cycles, which roughly equates to 20 years of standard kitchen use—but only if the weight limits are respected and the hardware remains aligned.
Smart Finishes and the Future of Kitchen Storage
Looking ahead to 2025 and beyond, we are seeing a massive shift toward ‘self-healing’ finishes and antimicrobial topcoats. These new coatings can actually close up micro-scratches with a little heat from a hairdryer. This is a massive win for built-ins and storage hacks for a sleek functional kitchen because it reduces the long-term yellowing caused by surface damage trapping oils. I predict that within the next five years, we will see sensor-integrated storage that alerts your phone if a drawer slide is experiencing too much friction or if a leak is detected under the sink. We are moving toward a ‘proactive’ kitchen rather than a ‘reactive’ one. If you are feeling overwhelmed by the technical side of your project, I highly recommend checking out some expert tips on selecting storage solutions for a perfect kitchen upgrade to ensure your hardware choices match your lifestyle. I want you to try one thing this weekend: grab a screwdriver and check the tightness of your hinge plates. It is the easiest way to prevent a door from eventually pulling away from the cabinet box. If you find something that looks beyond a simple fix, do not hesitate to contact us for a professional evaluation.
3 Myths About Custom Cabinets That Held Me Back
When I first started obsessing over high-end kitchen design, I fell for several common misconceptions that nearly ruined my own projects. First, I used to think that the most expensive paint was a ‘shield’ against everything. I learned the hard way that even the best finish will fail without the proper way to prep cabinets. Second, I believed that sunlight was the only culprit for yellowing. It turns out that heat from a simple toaster can be just as damaging. Finally, many homeowners assume that high-end custom cabinets as a game changer in your kitchen remodel journey are maintenance-free. In reality, your cabinets are living, breathing pieces of furniture that require minor seasonal adjustments to stay perfect. #IMAGE_PLACEHOLDER_E#
My Essential Cabinet Care Toolkit
To keep your kitchen looking like it was just installed yesterday, you don’t need a massive workshop. I swear by a few specific items. I always keep a bottle of dry silicone spray on hand to address why your soft-close slides grind and the quick lubrication fix, which keeps drawers gliding silently. For hardware, I never ‘eyeball’ a new handle; I use the one tool you need for perfectly aligned cabinet knobs every time to ensure precision. Lastly, for those minor door misalignments that happen as your house settles, I recommend mastering the how to adjust European hinges for a perfectly level door reveal. These three tools and skills will save you thousands in professional service calls over the life of your kitchen.
Take Back Your Kitchen’s Glow
Your kitchen should be a source of pride, not a source of stress. Whether you are dealing with a bit of yellowing or planning a full modern kitchen remodels featuring custom cabinets and built-ins, remember that knowledge is your best defense against wear and tear. Don’t be afraid to get hands-on with your maintenance. Small, proactive steps like checking your hinges or moving a heat-producing appliance can extend the life of your finish by years. If you ever find yourself facing a cabinet crisis that feels too big to handle, you can always contact us for expert guidance. You’ve put the work in to create a beautiful space; now, let’s make sure it stays that way for a generation. Have you ever noticed your white cabinets shifting color over the years? Let me know below.