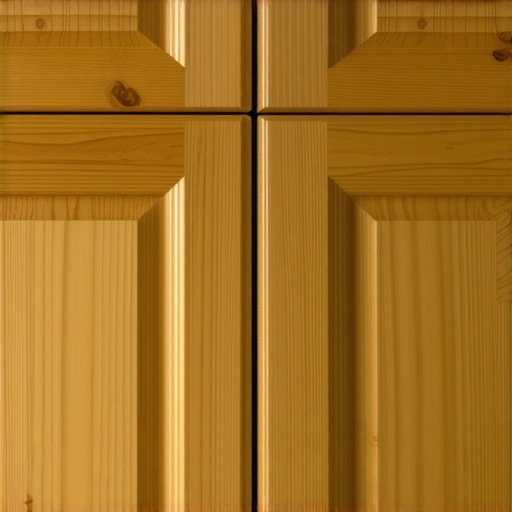
The Secret to Hanging Inset Doors Without Leaving a Gap
I remember standing in my kitchen at 2 AM, squinting at a set of cabinet doors that refused to cooperate. I had poured my heart into this remodel, but the gaps around my beautiful inset doors were uneven, making the whole room look amateur. It felt like a betrayal. You spend all this time picking the perfect finish, only for a 1/8-inch tilt to ruin the vibe. I realized then that the difference between a ‘home project’ and a masterpiece isn’t the wood—it’s the reveal.
Stop Fighting Your Cabinet Gaps
When I first started building custom cabinets, I made the classic rookie mistake of thinking I could just ‘eyeball’ the fit. I didn’t account for the fact that solid wood door panels still need room to breathe as seasons change. According to the National Hardwood Lumber Association, wood can expand significantly based on humidity levels, which can turn a ‘perfect’ gap into a stuck door by July. Today, I’m going to share the exact shim-and-pivot method that saved my sanity. We are going to fix those wonky lines and give you that high-end look without the frustration. Have you ever spent hours turning a screwdriver only to make the door look worse?
Is Perfect Alignment Truly Achievable for a DIYer?
A lot of people think you need a master’s degree in joinery to get those crisp, even lines. It’s a common fear—that you’ll spend hundreds on hardware and still end up with a sagging door. But the secret isn’t in the strength of your arm; it’s in the precision of the hardware. Mastering how to adjust European hinges is the closest thing to magic in the woodworking world. If you can use a screwdriver, you can get a professional reveal. The real trick is knowing when to stop turning. We’re going to look at the 5-minute hinge adjustment that solves 90% of your alignment problems before they even start. It’s time to move past the ‘good enough’ stage and into the realm of perfection.Think of your European hinge like a 3D joystick. Most people see a plate with screws and start cranking randomly, which is the fastest way to strip a hole and end up with a door on the floor. Instead, look for the ‘magic three’ screws that control every axis of movement.
Master the Three Screws of Destiny
The front screw controls the side-to-side gap, allowing you to move the door toward or away from the cabinet edge. The back screw handles the depth—this is your best friend if your doors are hitting the frame when they open. Finally, the middle screw, which usually requires you to slightly loosen the mounting plate, manages the vertical height. If you can balance these three, you can fix a door that is sagging or overlapping its neighbor in minutes. I once spent three hours on a modern kitchen remodel featuring custom cabinets and built-ins just because I didn’t realize the floor was sloping a full inch over six feet.
Why Your Floor is Your Hinges Worst Enemy
Alignment starts at the ground, not the hinge. If your base cabinets aren’t perfectly level, the boxes will rack, turning a square opening into a trapezoid. No amount of hinge turning can fix a crooked box. I had to learn the proper way to shim a cabinet on a slanted slab floor the hard way, using a pack of cedar shims and a laser level to ensure the boxes were plumb. If your reveal looks perfect on the left but hideous on the right, check the cabinet base first. A slight tweak with a shim can often snap the doors back into alignment without touching a single screwdriver.
Tweak Your Drawer Fronts Without Redrilling
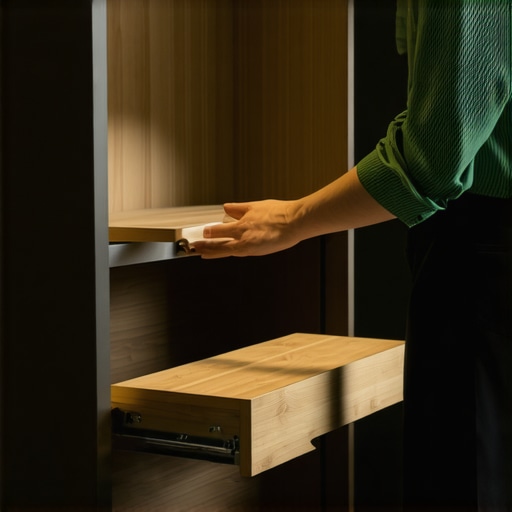
When you are dealing with drawer fronts, the frustration doubles because they carry weight. If you’ve ever pulled a drawer only to see it tilted, you likely missed why your drawer fronts are crooked and the adjuster screw fix. High-end drawer slides come with tiny plastic tabs or thumbwheels behind the drawer face that allow you to tilt and shift the front without redrilling. This is vital for innovative storage solutions for modern kitchen remodels, especially when using the drawer within a drawer move. I remember a project where we had to build a custom dog bowl drawer that doesnt splash. Because of the weight of the water, the front sagged instantly, and only those micro-adjuster screws saved the look of the entire island.
Protect Your Alignment from Heavy Loads
Your shelves and storage habits also impact how well your doors stay aligned. If a shelf bows, it can exert outward pressure on the cabinet sides, subtly warping the box. That is why you should design your pantry with adjustable shelf tracks rather than fixed pegs. This setup allows you to stop your pantry shelves from bowing under heavy cans. In a previous client’s home, we found that stacking 40 pounds of cast iron on a standard shelf had pulled the cabinet walls inward. We swapped the setup for the best way to organize heavy dutch ovens in a deep drawer, which moved the weight to the floor-mounted base. If you notice your hardware is starting to feel ‘crunchy,’ it is often a sign of debris or misalignment; knowing why your drawer slides are grinding and how to clear the ball bearings can save you from a full hardware replacement later on.Most homeowners believe that the path to a dream kitchen involves filling every empty wall with a cabinet box. I used to think the same until I realized that high-density storage is actually the enemy of high-performance cooking. This is a common trap in innovative storage solutions for modern kitchen remodels; we get so obsessed with ‘where things go’ that we forget ‘how things feel.’ In my experience, a kitchen that is 100% cabinets feels claustrophobic and often leads to dead corners that swallow your expensive small appliances whole. It is much better to utilize smart storage ideas to maximize your kitchen space this year by leaving room for the eye to rest and the arms to move.
Stop Trusting the Lazy Susan
One of the biggest myths I love to challenge is the necessity of the corner Lazy Susan. Everyone says they are essential, but they are actually a nightmare for organization because items inevitably fly off the rotating tray and get jammed in the back. If you want a truly functional corner, you should skip the lazy Susan and install Lemans pull-outs instead. These allow you to bring the entire contents of the cabinet out into the light without the ‘centrifugal force’ mess.
Does Your Kitchen Height Actually Fit Your Body?
This is the level of nuance that separates a basic install from a custom masterpiece. The National Kitchen & Bath Association (NKBA) suggests that while 36 inches is the standard counter height, it is not a universal law. If you are an avid baker or over six feet tall, a uniform height can actually cause chronic back pain. I frequently advocate that your kitchen island should be two inches taller than your perimeter counters to create a more ergonomic prep station. It’s these subtle shifts that make a kitchen feel like it was built specifically for you rather than a generic blueprint.
The Construction Trap Most Homeowners Ignore
Let’s talk about the ‘Oops’ factor that ruins cabinets from the inside out: joinery. I see people spending thousands on paint but settling for cabinets held together by finish nails and a prayer. If you want your kitchen to last thirty years, you need to understand why your cabinet boxes should be stapled, glued, and screwed. Mechanical fasteners are the only thing standing between your heavy quartz countertops and a structural collapse. Furthermore, never let a contractor use silicone for structural bonds; you should never use silicone for cabinet joinery because it lacks the shear strength required for wood-to-wood movement.
Avoid These Silent Hardware Killers
Another mistake is assuming all fasteners are created equal. Many installers try to save time by using the same gun for everything, but you should avoid using standard nails for cabinet crown molding or backing. Over time, the vibration of daily use will cause those smooth nails to ‘back out,’ leaving gaps in your trim. That’s why we stopped using nails for cabinet backing and switched to screws. A screw bites into the wood and stays there, even when the house settles or the humidity fluctuates. Have you ever fallen into the trap of choosing ‘pretty’ over ‘sturdy’? Let me know in the comments below.Transitioning from the structural integrity of the box to the day-to-day usability requires a shift in focus toward precision tools. I never start a hardware install without my dedicated aluminum drill guide. It is the one tool you need for perfectly aligned cabinet knobs every time, ensuring that your pulls don’t look like they were installed during a power outage. Without a jig, you are gambling with your expensive door faces, and in a high-end creating seamless kitchen remasters with built-in storage solutions, there is zero margin for error. If you miss your mark by even a millimeter, the eye will catch it immediately because of the surrounding vertical lines.
Use This One Tool for Flawless Hardware
When I am working on built-ins and storage hacks for a sleek functional kitchen, I also rely heavily on a high-quality laser level rather than a traditional bubble level. According to the Architectural Woodwork Institute (AWI) Quality Standards, premium-grade cabinetry should maintain a maximum gap tolerance of 1/32 of an inch. You simply cannot hit those numbers with old-school tools. A laser allows you to project a perfectly level line across an entire room, ensuring your wall cabinets and your island are on the exact same plane.
How do I maintain my custom cabinets over time?
Long-term maintenance is less about cleaning and more about listening to the mechanics of your kitchen. If you start to hear a gritty or scraping sound when you open a drawer, it is a sign of debris in the tracks. Knowing why your soft close slides grind and the quick lubrication fix can prevent you from needing to buy entire new rail sets. Additionally, keep an eye on your natural finishes. If you notice moisture buildup, knowing how to remove stubborn water rings from natural wood cabinet surfaces early will save the lacquer from delaminating. Every six months, I recommend checking the area around the dishwasher and sink. Steam and drips are the silent killers of wood, and knowing how to reinforce a sink base cabinet for a 100 pound cast iron sink helps you build in the necessary protection against moisture-heavy environments.
Future-Proof Your Kitchen with Smart Hardware
Looking ahead, I predict a major shift toward ‘active’ cabinetry. We are already seeing the integration of motorized push-to-open sensors and internal LED lighting that triggers via proximity. This means your maintenance schedule will soon include checking a battery or a sensor rather than just tightening a screw. To stay ahead of the curve, ensure your current modern kitchen remodels featuring custom cabinets and built-ins include accessible wiring channels. My best advice for right now? Don’t wait for a door to sag so low it scrapes the frame. Grab a screwdriver this weekend and use that ‘magic three’ hinge adjustment method I mentioned earlier to pull your reveals back into alignment. It’s the easiest way to make an old kitchen feel brand new again.
Three Lies Big-Box Stores Tell You About Cabinetry
Over the years, I have seen too many homeowners fall for the ‘showroom glow’ only to regret it six months later. First, price does not always dictate performance. I have opened up ‘luxury’ cabinets only to find particle board where there should be plywood. Second, soft-close hardware is not a band-aid for a poorly built box. If the cabinet is racked or out of square, those fancy hinges will wear out twice as fast. Finally, the best custom cabinets ideas that transform your homes style are the ones that prioritize the ‘bones’ of the unit over the trendiness of the paint. Real longevity comes from the joinery, not the top coat.
The Gear That Saved My Professional Reputation
If you want to achieve professional results, you have to stop using homeowner-grade tools for precision work. Here are the three items I never walk onto a job site without:
- Bosch GLL25-10 Self-Leveling Laser: This ensures your perfect kitchen upgrade starts on a perfectly level plane across the entire room.
- Kreg Cabinet Hardware Jig: This eliminates the ‘heart attack’ moment of drilling into a $200 door face only to realize your measurement was off by a hair.
- FastCap 2P-10 Adhesive: This is a lifesaver for small molding fixes where a traditional nail gun might split a delicate piece of trim.
Build a Kitchen That Lasts Thirty Years
Your kitchen is more than just a collection of boxes; it is the engine room of your home. When you view custom cabinets as a game changer in your kitchen remodel journey, you are making a commitment to quality that survives the weight of heavy cast iron and the constant motion of a busy family. Don’t be afraid to take your time with those final hinge adjustments. That 1/8-inch gap might seem small, but once it’s fixed, the entire room will finally feel like the masterpiece you intended it to be. Which part of the alignment process feels the most intimidating to you—dialing in the European hinges or getting the base boxes level? Let me know in the comments below!