Why Your Floating Vanity Needs Structural Blocking Before the Tile
I will never forget the sharp, heart-sinking snap that echoed through my master bathroom just three weeks after I finished what I thought was a perfect renovation. I had spent hours obsessing over the finish of my rift sawn oak bathroom vanity, but I had completely ignored what was happening behind the drywall. I assumed two or three studs would be enough to hold the weight. I was wrong. Watching a hairline crack spider-web across my brand-new tile because the vanity started to sag was a lesson I paid for in both tears and a very expensive repair bill. It turns out, beauty is only skin deep, but structural integrity goes all the way to the 2x4s. Have you ever stood in your bathroom and felt a pang of anxiety wondering if your floating furniture is actually secure?
Stop Your Vanity from Ripping Out the Drywall
Many homeowners treat a floating vanity like a heavy picture frame, but the physics are much more demanding. When you choose custom cabinets that hang off the floor, you are creating a massive lever. A standard 48-inch vanity can easily weigh 150 pounds empty. Add a heavy stone countertop, a sink full of water, and the inevitable weight of someone leaning on the edge while they wash their face, and you are suddenly asking your wall to support over 300 pounds of cantilevered pressure. This is why the cabinet backing move is so critical; it provides a solid surface for the mounting screws to bite into, regardless of where the studs are located. If you don’t reinforce the wall before the tile goes up, you are essentially gambling with your plumbing.
Is structural blocking actually worth the extra effort?
I get it. When you are knee-deep in a kitchen remodel or bathroom gut-job, adding more wood to the wall feels like a chore you can skip. You might think that the tile itself adds strength or that heavy-duty anchors will save the day. They won’t. According to the National Kitchen & Bath Association (NKBA), wall-hung fixtures must be anchored to structural members or solid blocking to meet basic safety and performance standards. Tile is brittle; it has zero structural
Rip Out the Drywall Before the Cabinet Arrives
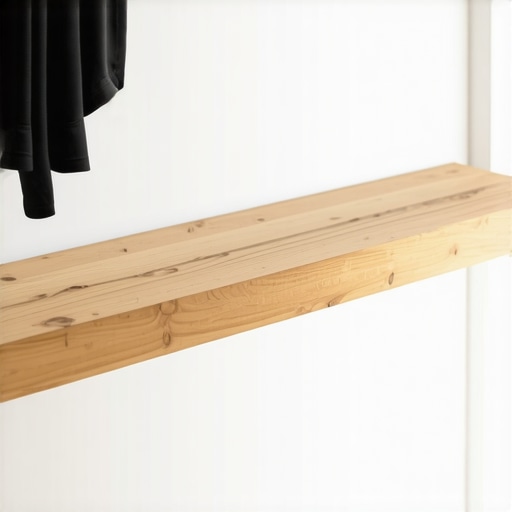
To get this right, you have to be willing to look behind the curtain. If you are in the middle of a custom cabinets as a game changer in your kitchen remodel journey, you already know that layout is everything. For a floating vanity, the ‘layout’ includes the internal skeleton of your wall. You need to install horizontal 2×6 or 2×8 pressure-treated blocking between your vertical studs. This creates a solid wooden ‘belt’ at the exact height where your vanity mounting rail will sit. I remember a project in a tight guest bath where I tried to use 2×4 scraps because that is all I had on hand. I ended up missing the mounting holes by half an inch and had to drill through the back of a pristine cabinet just to find the wood. It looked terrible and felt flimsy. Now, I always over-engineer. By using wider lumber, you give yourself a four-to-six-inch margin of error for your mounting screws, which is a lifesaver when you are trying to align the plumbing.
Force the Blocking to Take the Weight
Standard wood screws are for picture frames; structural screws are for cabinetry. When you are securing that blocking, do not just ‘toe-nail’ it with thin nails. Use pocket-hole screws or heavy-duty 3-inch construction screws driven through the studs and into the ends of the blocking. This ensures that when the vanity pulls forward, the force is distributed across the entire wall frame rather than just pulling on a few threads of metal in the drywall. This is the same principle we use when figuring out the best way to support a 15-inch granite overhang. You want the house to hold the weight, not the fasteners alone.
Avoid the Plumbing Trap
The biggest mistake I see DIYers and even some ‘pros’ make is forgetting about the pipes. You spend an hour perfectly level-fitting your blocking, only to realize the sink drain needs to pass through that exact spot. I once had a plumber hack through my beautiful structural blocking with a reciprocating saw because I didn’t leave him a four-inch gap for the waste line. Now, I map out the drain and supply lines first. If your vanity is a part of a larger project involving smart storage solutions for small kitchens in 2025, you know every inch counts. Install your blocking in two tiers—one at the top of the cabinet and one at the bottom—leaving the middle clear for the plumbing. This ‘double-rail’ method provides more stability than a single center board ever could.
Choose Screws That Don’t Snap
Once the wall is closed and tiled, you are flying blind. This is why you must use GRK or structural lag screws to mount the actual cabinet. A standard #8 wood screw has a shear strength that can be surprisingly low. If you are hanging custom cabinets ideas that feature heavy drawers or thick quartz tops, the downward pressure can actually snap the heads off cheap screws over time. I use fasteners with a built-in washer head. This prevents the screw from pulling through the back of the cabinet’s plywood, creating a ‘clamping’ effect that pulls the vanity tight against the tile. It is the difference between a vanity that stays put for decades and one that develops a scary gap at the top after six months.I will never forget the sharp, heart-sinking snap that echoed through my master bathroom just three weeks after I finished what I thought was a perfect renovation. I had spent hours obsessing over the finish of my rift sawn oak bathroom vanity, but I had completely ignored what was happening behind the drywall. I assumed two or three studs would be enough to hold the weight. I was wrong. Watching a hairline crack spider-web across my brand-new tile because the vanity started to sag was a lesson I paid for in both tears and a very expensive repair bill. It turns out, beauty is only skin deep, but structural integrity goes all the way to the 2x4s. Have you ever stood in your bathroom and felt a pang of anxiety wondering if your floating furniture is actually secure?
Stop Your Vanity from Ripping Out the Drywall
Many homeowners treat a floating vanity like a heavy picture frame, but the physics are much more demanding. When you choose custom cabinets that hang off the floor, you are creating a massive lever. A standard 48-inch vanity can easily weigh 150 pounds empty. Add a heavy stone countertop, a sink full of water, and the inevitable weight of someone leaning on the edge while they wash their face, and you are suddenly asking your wall to support over 300 pounds of cantilevered pressure. This is why the cabinet backing move is so critical; it provides a solid surface for the mounting screws to bite into, regardless of where the studs are located. If you don’t reinforce the wall before the tile goes up, you are essentially gambling with your plumbing.
Is structural blocking actually worth the extra effort?
I get it. When you are knee-deep in a kitchen remodel or bathroom gut-job, adding more wood to the wall feels like a chore you can skip. You might think that the tile itself adds strength or that heavy-duty anchors will save the day. They won’t. According to the National Kitchen & Bath Association (NKBA), wall-hung fixtures must be anchored to structural members or solid blocking to meet basic safety and performance standards. Tile is brittle; it has zero structural
Rip Out the Drywall Before the Cabinet Arrives
To get this right, you have to be willing to look behind the curtain. If you are in the middle of a custom cabinets as a game changer in your kitchen remodel journey, you already know that layout is everything. For a floating vanity, the ‘layout’ includes the internal skeleton of your wall. You need to install horizontal 2×6 or 2×8 pressure-treated blocking between your vertical studs. This creates a solid wooden ‘belt’ at the exact height where your vanity mounting rail will sit. I remember a project in a tight guest bath where I tried to use 2×4 scraps because that is all I had on hand. I ended up missing the mounting holes by half an inch and had to drill through the back of a pristine cabinet just to find the wood. It looked terrible and felt flimsy. Now, I always over-engineer. By using wider lumber, you give yourself a four-to-six-inch margin of error for your mounting screws, which is a lifesaver when you are trying to align the plumbing.
Force the Blocking to Take the Weight
Standard wood screws are for picture frames; structural screws are for cabinetry. When you are securing that blocking, do not just ‘toe-nail’ it with thin nails. Use pocket-hole screws or heavy-duty 3-inch construction screws driven through the studs and into the ends of the blocking. This ensures that when the vanity pulls forward, the force is distributed across the entire wall frame rather than just pulling on a few threads of metal in the drywall. This is the same principle we use when figuring out the best way to support a 15-inch granite overhang. You want the house to hold the weight, not the fasteners alone.
Avoid the Plumbing Trap
The biggest mistake I see DIYers and even some ‘pros’ make is forgetting about the pipes. You spend an hour perfectly level-fitting your blocking, only to realize the sink drain needs to pass through that exact spot. I once had a plumber hack through my beautiful structural blocking with a reciprocating saw because I didn’t leave him a four-inch gap for the waste line. Now, I map out the drain and supply lines first. If your vanity is a part of a larger project involving smart storage solutions for small kitchens in 2025, you know every inch counts. Install your blocking in two tiers—one at the top of the cabinet and one at the bottom—leaving the middle clear for the plumbing. This ‘double-rail’ method provides more stability than a single center board ever could.
Choose Screws That Don’t Snap
Once the wall is closed and tiled, you are flying blind. This is why you must use GRK or structural lag screws to mount the actual cabinet. A standard #8 wood screw has a shear strength that can be surprisingly low. If you are hanging custom cabinets ideas that feature heavy drawers or thick quartz tops, the downward pressure can actually snap the heads off cheap screws over time. I use fasteners with a built-in washer head. This prevents the screw from pulling through the back of the cabinet’s plywood, creating a ‘clamping’ effect that pulls the vanity tight against the tile. It is the difference between a vanity that stays put for decades and one that develops a scary gap at the top after six months.
The Myth of Maximizing Every Square Inch
It is a common misconception in the world of high-end design: that filling every square inch of your wall with cabinetry is the best way to ‘maximize’ a space. In my experience, the opposite is often true. Overloading a room with boxes—even expensive ones—can create a claustrophobic ‘coffin effect’ that makes a luxury kitchen feel cramped and unusable. Real expertise lies in knowing where to leave the wall bare to allow the room to breathe. When you [transform your kitchen with custom cabinets expert guide for 2025], the goal isn’t just volume; it is accessibility and ergonomic flow. One of the biggest ‘oops’ factors I see involves corner cabinets. Most homeowners default to the classic Lazy Susan, but these often leave ‘dead’ corners where items fall off and get trapped. I always recommend that you [why you should skip the lazy susan and install lemans pull-outs instead]. These systems use a heavy-duty mechanical arm that brings the shelf out to you, doubling your usable surface area.
Why does your 10×10 layout cost more than the square footage suggests?
This is the question that keeps homeowners up at night during [modern kitchen remodels featuring custom cabinets and built-ins]. They see a price per linear foot and do the math, only to be shocked by the final quote. The nuance here is ‘complexity density.’ A standard base cabinet is affordable, but a sink base with [expert tips on selecting storage solutions for a perfect kitchen upgrade] like integrated tilt-outs and reinforced supports requires significantly more labor. As noted by research in the Journal of Interior Design, ergonomic efficiency is determined by ‘motion-saving’ features, not just wood volume. This is why the [10×10 kitchen remodel math] is usually just a starting point; the real cost is in the engineering that makes the space functional.
Don’t Ignore Your Drawer Clearance
Another trap is the ‘drawer-to-door’ ratio. Many people think doors are more versatile, but in [smart storage solutions for small kitchens in 2025], every base cabinet should be a drawer to prevent you from having to crawl on the floor to find a pot. However, the mistake people make is forgetting the ‘swing’ or mechanical clearance. If you have a deep drawer next to a protruding oven handle, you might find you can’t fully open your storage. I’ve seen beautiful [custom cabinets as a game changer in your kitchen remodel journey] rendered useless because a drawer hit a refrigerator handle by a mere quarter of an inch. Have you ever fallen into this trap of prioritizing looks over actual clearance? Let me know in the comments.
I have learned that even the most expensive modern kitchen remodels featuring custom cabinets and built-ins can look amateur if you do not use the right gear for the long haul. My absolute ‘desert island’ tool is a 360-degree green beam laser level. A bubble level is fine for a picture frame, but when you are trying to how to align cabinet doors when your walls are out of plumb, you need a reference line that doesn’t sag or shift. I once spent four hours chasing a ‘level’ line around a kitchen with a standard 6-foot level, only to find my starting point was half an inch off my finish point. The laser removes the human error and ensures your layout is perfect across twenty feet of wall space. Next to that, I swear by Pony Jorgensen cabinet claws. They don’t just hold things; they align face frames perfectly flush while you drill and fasten, which is the only way to get those custom cabinets ideas that transform your homes style to look like a single seamless unit rather than a series of disconnected boxes.
How do I maintain my cabinet finish for years?
Maintenance is not just about cleaning; it is about managing physics. Wood is a living material that reacts to its environment. You need to understand why your cabinet doors are warping in the summer heat to prevent permanent structural damage. According to the Architectural Woodwork Institute (AWI) Quality Standards, interior wood cabinetry performs optimally when indoor relative humidity is maintained between 25% and 55%. If your home’s climate fluctuates wildly, your beautiful custom cabinets as a game changer in your kitchen remodel journey will shrink, crack, or swell. This expansion is often the real reason your soft close drawers are sluggish in winter. For cleaning, avoid the ‘all-purpose’ chemicals. I have seen high-end finishes ruined by spray-on degreasers that eventually eat through the topcoat. Use a soft microfiber cloth with a drop of pH-neutral soap and follow it immediately with a dry cloth. This is the only safe way to how to clean matte black cabinet hardware without scratches or oily residue.
The Future is Active Storage
I predict that by 2030, our cabinetry will move from ‘passive’ storage to ‘active’ systems. We are already seeing the beginning with integrated LED lighting and motorized lift systems, but soon we will have moisture sensors built into the floor of sink bases. These sensors will alert your phone to a leak before you ever see a puddle, which is a massive upgrade over simply wondering why your sink cabinet needs a drip tray right now. We are also seeing a shift toward internal hardware that monitors wear and tear, telling you exactly why your drawer slides are grinding and how to clear the ball bearings before the mechanism actually seizes up. This weekend, I want you to try one advanced maintenance tip: inspect your sink cabinet for any signs of moisture and install a simple silicone drip tray. It is a five-minute move that can save you thousands in future mold remediation.
Lessons Bought with a Sledgehammer and a Checkbook
After years of installing cabinetry, I’ve realized that the most beautiful kitchen can still fail if the ‘invisible’ work is ignored. One of the biggest lightbulb moments I had was recognizing that weight distribution isn’t optional; it’s the foundational law of every high-end design. You must look beyond the wood and consider how the room actually functions. I learned the hard way that the 10×10 kitchen remodel math is often misleading because it frequently ignores the heavy-duty structural reinforcements required for those massive stone tops. Another deep realization? Always plan for the ‘human factor’—people will inevitably lean on your counters or sit on your vanity edges. If you haven’t built for that extra 200 pounds of pressure, you’re setting yourself up for a heartbreaking repair bill. Finally, never forget that maximizing space with innovative storage solutions for every room requires you to think about vertical clearance and hardware swing just as much as floor space.
#IMAGE_PLACEHOLDER_E#
The Reliable Gear That Actually Survives the Jobsite
If you’re ready to tackle these upgrades yourself, I can’t recommend these specific tools and resources enough. First, invest in structural lag screws (like GRK or SPAX) rather than standard zinc screws; they are the only fasteners I trust to hold a floating vanity for twenty years without snapping. Second, a 360-degree green beam laser level is a total game-changer when you’re trying to achieve built-ins and storage hacks for a sleek functional kitchen that actually look level across a long wall. I also constantly reference the National Kitchen & Bath Association (NKBA) guidelines for safety clearances. These resources provide the ‘why’ behind the ‘how,’ ensuring your project isn’t just aesthetically pleasing, but structurally sound. Finally, for any project involving the ultimate guide to custom cabinets for a stylish kitchen overhaul, using heavy-duty cabinet claws during installation will save your finish from being marred by cheap clamps.
Time to Turn Your Vision into Structural Reality
Creating a space that feels both luxurious and rock-solid is one of the most rewarding things you can do for your home. It’s about taking those smart storage solutions for small kitchens in 2025 and grounding them in the kind of structural integrity that lets you sleep at night. Don’t be intimidated by what’s behind the drywall; embrace it as the secret ingredient to a professional-grade finish. You’ve got the knowledge and the right approach, now go out there and build something that truly lasts. Have you ever started a cabinet project only to find a massive plumbing surprise behind the wall? Let me know in the comments below!