The Vertical Cookie Sheet Divider That Ends the Cabinet Clatter
It happened again last Tuesday. I was just trying to pull out a single cooling rack to let some muffins cool, and *BAM*—the entire stack of heavy baking sheets decided to stage a noisy protest right on my toes. If you’ve ever felt that visceral jolt of frustration when your cabinets sound like a high-school percussion ensemble at 6 PM, you know exactly what I’m talking about. I spent years shoving trays into horizontal piles, thinking I was being efficient with my vertical space. I wasn’t. I was just building a metallic house of cards that threatened my sanity every time I wanted to bake a batch of cookies. Today, I’m going to walk you through how a simple set of vertical dividers can completely revolutionize your kitchen remodel and give you back your peace of mind. Seriously, have you ever stood in your kitchen, staring at a mess of pans, and just felt like walking out? You aren’t alone, and it’s a problem we can fix without tearing the whole room apart. [image-placeholder]
Stop the Baking Sheet Avalanche in Your Kitchen
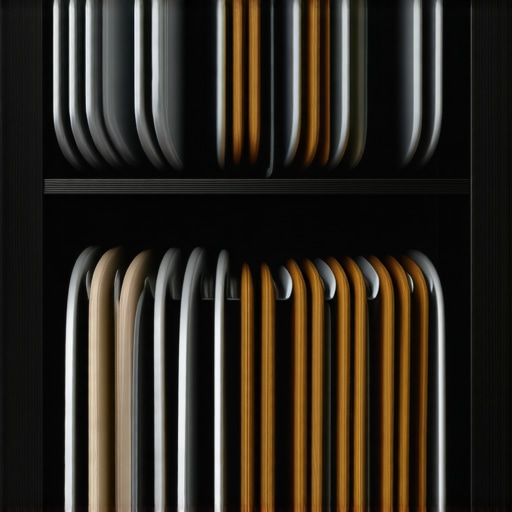
For a long time, I labored under the delusion that the only way to get a truly organized kitchen was to spend five figures on a total overhaul. I was wrong. The real magic happens in the smart storage ideas that target these specific, daily pain points. In my early days of trying to fix my own kitchen clutter, I made the classic mistake of using cheap, spring-loaded tension rods to separate my pans. They looked okay for exactly five minutes. But the moment I leaned my heavy cast-iron griddle against one, the whole thing collapsed like a wet noodle. It was embarrassing, and frankly, a total waste of time and twenty bucks. If you want the best way to store baking sheets, you have to look at verticality. It’s about creating slots that let you slide one item out without disturbing its neighbors. According to the National Kitchen & Bath Association, specialized storage for baking and cooking items is now a top-tier request for modern homeowners. People are finally realizing that a wide-open cabinet is just a mess waiting to happen. By integrating these into custom cabinet ideas, you’re not just cleaning up; you’re increasing the actual value and usability of your home.
Will these slim dividers actually hold my heavy pizza stone?
It’s a fair question to ask, especially if you’ve been burned by flimsy store-bought organizers before. When you see a thin piece of wood or a slender metal rod, it doesn’t exactly scream ‘heavy-duty.’ But here’s the secret: the physics of vertical storage is entirely on your side. When you store a tray vertically, its weight is distributed directly onto the cabinet floor. The divider isn’t ‘holding’ the weight; it’s simply preventing the ‘lean.’ If you incorporate these into innovative storage solutions during a build or a refresh, you can even use specific cabinet depth secrets to ensure even your largest stones fit perfectly without sticking out or hitting the door. We’re going to dive into how to choose the right materials—like sturdy plywood or fixed metal tracks—so you don’t repeat my tension-rod disaster. I’ll show you how to measure for your specific collection because, let’s be honest, your oversized muffin tin isn’t going to fit in a standard slot. Ready to finally end the cabinet clatter for good?To get this right, you have to start with an honest inventory of your ‘offenders’—those oversized items that never seem to fit anywhere. I remember the first time I built a set of dividers for my own kitchen. I was so excited to be organized that I didn’t bother measuring my thickest ceramic pizza stone. I built all the slots exactly two inches wide. When I finally went to slide that stone in, it jammed halfway, and I ended up scratching the finish on my brand-new cabinets. Learn from my haste: measure your widest tray and then add a half-inch of breathing room. This is where smart storage solutions for small kitchens in 2025 really shine—they prioritize the items you actually use daily.
Measure Twice to Avoid the Jam
Start by pulling everything out. Group your items by thickness. Your thin cookie sheets can live in one-inch slots, but that heavy-duty muffin tin or the stone needs more space. If you’re planning a full custom cabinets as a game changer in your kitchen remodel journey, you can actually specify these widths to your builder. If you’re retrofitting, use a simple pencil to mark the bottom of your cabinet where the dividers will sit. You want them close enough to keep the pans upright, but loose enough that you aren’t playing a game of ‘Operation’ every time you want to bake. 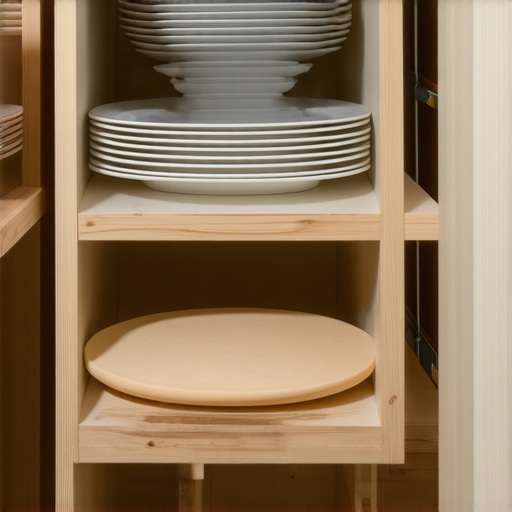
Choose Plywood Over Flimsy Alternatives
The biggest mistake people make is using thin plastic or particle board. Over time, the weight of a leaning cast-iron griddle will bow or snap a weak divider. This is exactly why plywood box construction still beats particle board for kitchens; it has the structural integrity to handle lateral pressure. I recommend using 1/4-inch or 1/2-inch birch plywood. It’s sturdy, looks clean, and doesn’t snag your expensive non-stick pans.
Secure the Tracks Without the Guesswork
You have two main options for securing your dividers: routed grooves or simple wood cleats. If you have a router, cutting a ‘dado’ (a small channel) into the top and bottom of the cabinet is the gold standard for built-ins and storage hacks for a sleek functional kitchen. It creates a seamless look where the dividers just slide into place. If you aren’t ready to break out the heavy power tools, you can use small ‘L’ brackets or even thin strips of wood glued and tacked to the cabinet floor to act as guide rails. The goal is to create a ‘track’ that keeps the divider from sliding side-to-side.
Address the Depth for Large Items
Don’t forget that your cabinet doors need to close. It sounds obvious, but you’d be surprised how often a pizza stone sticks out just a quarter-inch too far. I’ve seen homeowners have to cut holes in the back of their cabinets just to make things fit. To avoid this, utilize the cabinet depth secret for storing large pizza stones and trays. This involves measuring from the back of the face frame to the back of the cabinet box, ensuring your deepest tray has at least an inch of clearance for the door hinges.
I see it all the time in DIY forums: the obsession with “maximum density.” People want to cram twenty slots into a twelve-inch base cabinet. But here is the contrarian truth: over-engineering your storage can actually make your kitchen harder to use. If your slots are too tight, you will end up scraping the non-stick coating off your expensive pans or, worse, fighting to get a heavy griddle out while you are mid-recipe. When planning your expert tips on selecting storage solutions for a perfect kitchen upgrade, remember that air and ease of movement are just as important as the dividers themselves.
The Hinge Trap That Ruins Perfect Planning
You have measured your stone, you have cut your plywood, and you have installed your tracks. Then you go to slide out your largest cookie sheet and—clink—it hits the door hinge. This is the “oops” factor that catches even seasoned renovators off guard. Most European-style concealed hinges protrude about an inch into the cabinet opening. If you place a divider right against the side wall, that slot becomes a “dead zone” for anything taller than the hinge itself. This is why transform-your-kitchen-with-custom-cabinets-expert-guide-for-2025 strategies always suggest a one-inch “buffer” or “spacer” on the hinge side. Have you ever fallen into this trap where a tiny hardware detail ruined a big project? Let me know in the comments!
#IMAGE_PLACE_HOLDER_C#
Does the material choice really affect how my pans age?
Absolutely. Many homeowners assume metal wire racks are the “professional” choice, but in high-end innovative storage solutions for modern kitchen remodels, we often pivot back to wood. According to the Architectural Woodwork Institute (AWI), high-quality plywood offers superior lateral stability compared to thin-gauge wire, which can flex and eventually permanently deform under the weight of heavy cast iron. Furthermore, wood is “softer” on your cookware. Metal-on-metal contact creates micro-scratches that eventually lead to rust or finish failure on your trays. By making the baking center move storing everything below the counter, you ensure these heavy items are easily accessible without the structural failure risks of flimsy wire inserts.
Why Fixed Dados Beat Adjustable Pegs
The common wisdom says to make everything adjustable because “your needs might change.” But for baking sheets, I argue for fixed positions. Fixed dividers, especially those set into routed grooves or “dados,” become a permanent part of the cabinet architecture. They feel solid, they stay silent, and they do not pop out of their holes when you are in a hurry. If you find your current cabinet doors are still making noise, check the reason your cabinet doors are slamming despite having soft close hinges; sometimes it is actually the internal vibration of loose metal organizers rather than the hinges themselves. Making the leap to permanent, built-in dividers is what separates a “tidy” kitchen from a truly custom culinary workspace.
Once you have those vertical dividers in place, the real challenge begins: keeping them functional for the next decade. I have seen too many homeowners invest in a stylish kitchen overhaul only to let the internal hardware accumulate dust and grease. Maintenance is not about deep scrubbing every weekend; it is about understanding how materials like birch plywood and solid wood react to your home’s environment. For instance, the Kitchen Cabinet Manufacturers Association (KCMA) emphasizes that maintaining a consistent indoor humidity level between 30% and 50% is crucial for preventing wood joinery from expanding and binding. If your dividers feel tight in July but loose in January, your home is likely experiencing significant seasonal swings.
Stop the Grime Before It Reaches Your Cabinets
The biggest enemy of a clean cabinet interior is actually the residue on your baking sheets. Even a well-washed pan can have a thin layer of polymerized oil that, over time, transfers to your custom dividers. To prevent this, I recommend applying a thin coat of paste wax to the plywood surfaces of your dividers once a year. This makes the wood slick—so trays slide in effortlessly—and creates a barrier against moisture. If you notice a spill, knowing how to remove stubborn water rings or grease spots immediately will save the finish of your high-end built-in storage solutions. Have you checked the bottom of your cabinets lately for those hidden sticky spots?
How do I maintain my custom storage slots over time?
Maintenance is about more than just cleaning; it is about mechanical upkeep. If you used screws or small cleats to hold your dividers, check them for tightness every time you do a deep clean. Vibration from slamming doors or heavy mixers can loosen hardware over time. If your kitchen features high-tech additions, you might find that your soft-close slides are failing because of a tiny piece of debris in the track. A simple blast of compressed air and a wipe with a microfiber cloth usually fixes the issue. Scaling this logic beyond the kitchen is the next logical step. You can maximize space with innovative storage solutions in areas like the mudroom or even layout a small laundry room using these same vertical slot principles for drying racks or ironing boards.
The Future of Custom Built-In Modularity
I predict that in the next five years, we will see a massive shift away from permanent dividers toward magnetic, modular systems that allow you to reconfigure your slots without tools. However, for now, the stability of a fixed dado remains the gold standard for heavy items. If you are ready to stop the kitchen chaos for good, I challenge you to measure your three largest baking sheets tonight and commit to building just one spacer block this weekend. It is the single most effective way to see how custom cabinets act as a game changer in your daily routine. Don’t let another ‘avalanche’ of pans ruin your evening—take that first measurement now.
The Hardest Lesson I Learned About Cabinet Physics
After years of designing modern kitchen remodels featuring custom cabinets and built-ins, I realized that a kitchen is only as good as it sounds. The biggest insider secret isn’t how the cabinets look, but how they perform under pressure. Most homeowners aim for maximum density, trying to cram every tray into the smallest space possible. However, the real ‘lightbulb moment’ for me was realizing that air space is your friend. If you don’t leave a half-inch of breathing room in each slot, you aren’t organizing; you’re just creating a tighter mess. I also learned that the same vertical principles used here can solve the pot lid nightmare that plagues so many lower cabinets. When you stop the metal-on-metal rattling, the psychological stress of cooking virtually disappears.
My Three Must-Haves for a Pro-Grade Install
You don’t need a professional workshop to refine your kitchen storage, but you do need the right mindset. Whether you are working on kitchen units or built-ins that elevate your living rooms functionality, these are the tools and resources I personally trust:
- A Digital Caliper: Precision is everything. Use this to measure the exact thickness of your pizza stones so your custom slots feel intentional, not accidental.
- Food-Grade Paste Wax: Apply a thin layer to the floor of your divider slots. It reduces friction, allowing heavy cast iron to slide out with a single finger.
- The KCMA Guidelines: I always check the Kitchen Cabinet Manufacturers Association standards to ensure any modifications I make won’t compromise the structural integrity of the base.
Stop Planning and Start Measuring
The transition from a chaotic kitchen to a streamlined culinary workspace doesn’t happen overnight, but it does happen one cabinet at a time. By taking control of your baking sheet storage, you are setting the stage for a more peaceful, productive home environment. If you find yourself stuck on a specific layout challenge or want to see how these storage solutions fit into a larger vision, feel free to contact us for expert advice. You deserve a kitchen that works for you, not against you. Which heavy kitchen item currently causes the most noise or frustration in your house? Let me know below!