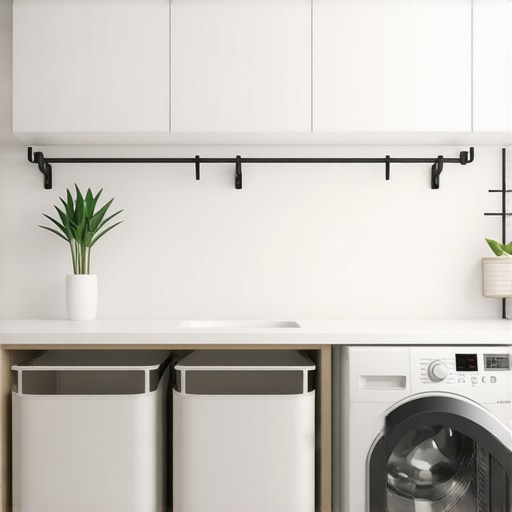
How to Layout a Small Laundry Room to Fit a Drying Rack and Sorting Bins
I remember the day I finally broke. I was squeezed into my 5-by-5 laundry closet, trying to navigate between a mountain of damp jeans and a precarious stack of plastic sorting bins. I tripped, the bins tumbled like a game of Jenga gone wrong, and I ended up sitting on a pile of dirty socks, questioning every life choice that led to that moment. If you’ve ever felt like your laundry room was designed by someone who has never actually done a load of laundry, you aren’t alone. It’s a cramped, humid battleground where we fight for every square inch. But here’s the thing: you don’t need a palatial mudroom to have a system that actually works. Today, I’m going to show you exactly how to layout a small laundry room so you can stop the laundry dance and actually fit a drying rack and sorting bins without losing your sanity.
Stop Doing the Laundry Basket Shuffle
The biggest mistake I made early on—and I still kick myself for it—was thinking I could just buy more floor bins to solve the chaos. I ignored the walls. I ignored the back of the door. I basically treated the floor like it was infinite. It wasn’t. According to data from the American Cleaning Institute, the average family handles about 300 loads of laundry a year. That is a lot of time spent in a cramped space. If your layout isn’t working, those 300 loads feel like 3,000. We need to move beyond the floor-bound approach and start looking at innovative storage solutions that prioritize vertical space. When I finally stopped treating my laundry room like a junk drawer and started treating it like a high-functioning workspace, everything changed.
Can you actually fit sorting bins without tripping over them?
I get the skepticism. When you look at your tiny room, adding more things like sorting bins and a drying rack feels like trying to park a suburban in a bike rack. But the secret isn’t more stuff; it’s smarter placement. I once tried to mount a heavy wooden rack using standard drywall anchors without finding the studs, and let’s just say the cabinet screw mistake isn’t just for kitchens—it will bring your laundry wall down too. By utilizing built-ins and storage hacks, we can create a zone for everything. Have you ever felt like your laundry room was working against you instead of for you?
Verticality Is Your Only Real Friend
In a small room, every inch of floor space is precious real estate. If you have a front-loading washer and dryer, you have a massive opportunity sitting right on top of them. A solid countertop—perhaps a remnant from a kitchen remodel—can provide the perfect folding surface. But the real magic happens above. This is where we integrate the drying rack. Instead of a floor-standing unit that blocks the door, we look at pull-down or accordion-style racks that disappear when the job is done. This is the same logic we use when we try to maximize space with innovative storage in other parts of the home. By getting the hang-dry items off the shower rod and onto a dedicated wall-mounted system, you reclaim the air and the floor. Setting this up requires a bit of planning, but it’s the difference between a room that stresses you out and one that actually helps you get the chores done faster.
Turn Your Machines Into a Functional Folding Station
One of the most effective ways to reclaim space in a cramped laundry room is to bridge the gap over your appliances. If you have front-loading machines, you are sitting on a goldmine of wasted potential. By installing a solid surface—similar to what you’d see in a custom cabinets kitchen overhaul—you create a ‘landing strip’ for clothes. I remember when I first installed a birch plywood top over my washer; suddenly, I wasn’t hunched over a wobbly ironing board to fold shirts. I used a thick slab and secured it with cleats to the wall, making sure it didn’t actually rest on the vibrating machines. 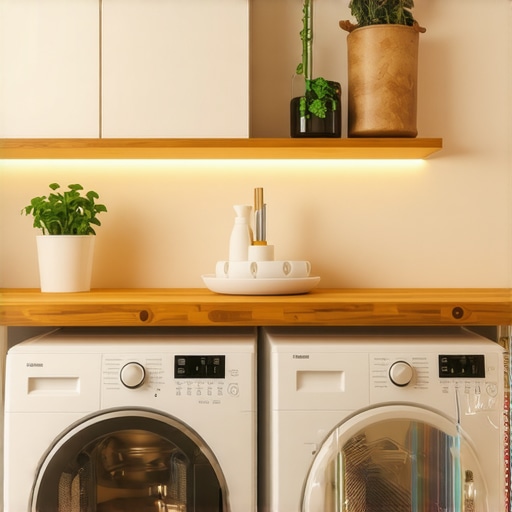 This simple addition provides a flat, clean area to sort, treat stains, and stack towels immediately. However, don’t just grab the cheapest board at the hardware store. I once made the mistake of using a thin furniture board that bowed after just one month of holding heavy detergent jugs. It’s essential to understand how to spot low-grade plywood before you commit to a permanent installation, especially in a high-humidity environment like a laundry closet.
Build Custom Niches for the Items You Use Daily
In a small room, every centimeter counts. Look at the gaps. If there is a five-inch space between the washer and the dryer or the wall, you have enough room for a pull-out ‘spice rack’ for your cleaning supplies. This is where innovative storage solutions really shine. Instead of leaving bleach and dryer sheets on the floor where they collect lint and dust, build a slim vertical drawer on heavy-duty slides. When I did this in my 5×5 space, it felt like I’d suddenly expanded the room by two feet. But be careful with the hardware: I’ve seen many DIY projects fail because people ignore the cabinet screw mistake that causes heavy drawers to collapse under their own weight. Use screws rated for the load and ensure they are biting into solid wood or studs.
Stop Fighting the Drying Rack
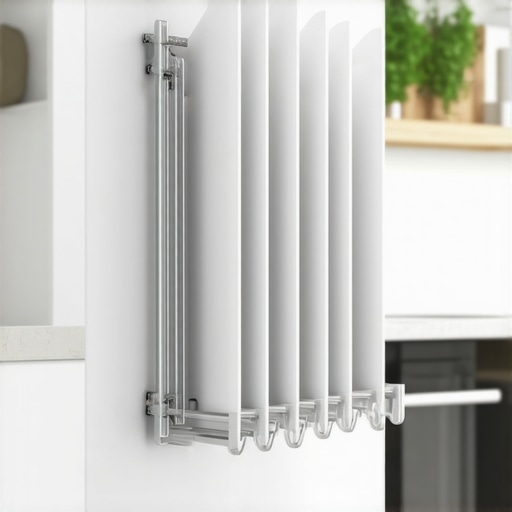
Floor-standing drying racks are the mortal enemies of small laundry rooms. They are like uninvited guests that take up the whole hallway and then won’t leave. The solution is to move the rack to the wall or the ceiling. A wall-mounted accordion rack is the perfect wingman for a small space. It stays flush against the wall until you need to hang a few sweaters, then disappears when the work is done. If you are feeling more ambitious, look into built-ins and storage hacks that incorporate a drying rod inside an upper cabinet. This hides the damp clothes from view while allowing them to air dry. I recently helped a friend install a custom cabinet above her washer that featured a mesh-bottom shelf specifically for drying delicate knits flat. It was a game-changer because it eliminated the ‘wet clothes draped over chairs’ look that usually plagues the rest of the house. For these wet areas, I always recommend plywood box construction over particle board because it handles the occasional steam and moisture much better, ensuring your hard work doesn’t swell and peel in two years.Many people believe custom cabinetry is reserved for show-stopping kitchens, but in my years of renovating tight spaces, I’ve found that custom work is actually a mathematical necessity for a utility room. If you buy a stock cabinet, you’re often left with filler strips—those thin pieces of wood that exist just to hide gaps. In a small laundry room, filler strips are the enemy of efficiency. When we talk about transforming your space with custom cabinets, we’re talking about capturing every single millimeter. According to the National Kitchen & Bath Association (NKBA), proper work triangle clearances and storage accessibility are the top factors in user satisfaction. If you settle for ‘close enough’ dimensions, you’re essentially paying for dead space. 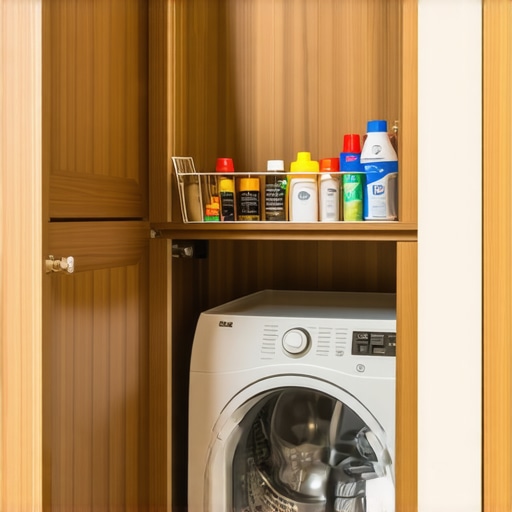 Let’s talk about a mistake that even seasoned DIYers make: the finish. A laundry room is basically a sauna that does chores. If you use a basic paint or a low-grade sealer, the moisture from your dryer will eventually find its way into the wood fibers. I’ve seen beautiful built-ins ruined in eighteen months because the homeowner didn’t know the difference between pre-catalyzed and post-catalyzed cabinet lacquer. Post-catalyzed lacquer creates a much more durable chemical bond that resists the heat and humidity of a utility zone. Have you ever noticed your cabinet doors sticking or warping after a heavy laundry day? That’s usually the wood breathing—and not in a good way.
Why do my high-end hinges suddenly start acting up in the laundry room?
It’s a common frustration. You invest in soft-close hardware, and six months later, it feels sluggish or crunchy. This is often because the high-lint environment of a laundry room acts like a magnet for the grease inside the slide mechanisms. Before you replace them, look into why your soft-close slides are failing—it’s usually just a matter of cleaning and re-lubricating rather than a mechanical failure. Also, always check that you aren’t overloading drawers with heavy detergent jugs without a center support. I always tell my clients that plywood box construction still wins in these wet areas because it maintains its structural integrity when things get heavy and damp. Have you ever fallen into the ‘cheaper materials’ trap for a utility space? Let me know in the comments.One thing I’ve learned from years of tinkering with small spaces is that the job isn’t done once the last screw is driven. Maintenance in a high-humidity zone like a laundry room is its own beast. If you want those drawers to keep gliding, you have to treat the hardware with respect. I personally use a dry PTFE spray on my drawer slides every six months. Unlike traditional oils, it doesn’t attract the lint that inevitably floats around your dryer. If you’ve noticed your drawers getting stiff, it’s worth investigating why your slow-close hinges are suddenly sluggish and how to clean them before you assume the hardware is broken. Usually, it’s just a buildup of fibers and heat-affected grease that needs a quick purge.
How do I maintain my laundry room cabinets over time?
The biggest threat to your investment is actually the air. According to the Architectural Woodwork Institute (AWI), maintaining a relative humidity between 25% and 55% is critical for permanent interior woodwork. In a laundry room, you can hit 80% humidity in twenty minutes. I always recommend a high-quality exhaust fan or a small dehumidifier to prevent the wood from expanding and contracting too aggressively. If you start seeing gaps, you might need to learn how to re-align doors after seasonal humidity changes to keep everything looking sharp. 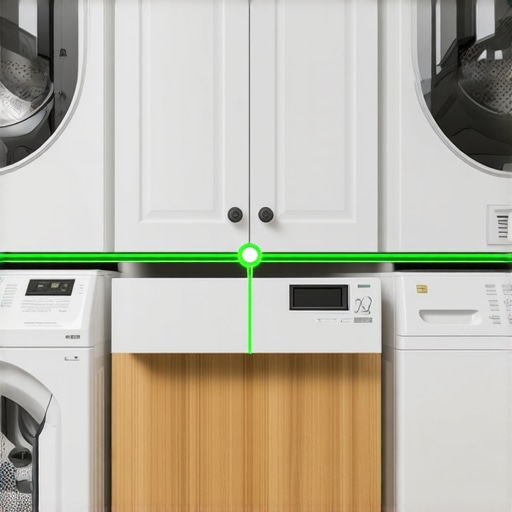 For the actual installation, I cannot stress this enough: stop relying on a bubble level and your eyes. Buy a self-leveling cross-line laser. It’s the only way to ensure your hanging drying racks and upper cabinets are perfectly horizontal across a 5-foot span. When you are working with plywood box construction, precision is everything because there is very little ‘give’ in the material. If your floor is wonky—which it probably is if it’s concrete—you’ll need to know the proper way to shim a cabinet on a slanted slab floor so your countertop doesn’t end up with a permanent tilt. Looking ahead, I see the laundry room becoming even more integrated into the home’s smart ecosystem. We’re already seeing built-ins designed with integrated moisture sensors that trigger ventilation fans automatically. If you’re planning a larger project, like a custom cabinets kitchen overhaul, think about how those same high-end finishes and moisture-resistant technologies can be scaled down for your utility closet. Don’t let a small footprint limit your ambition. Go grab a moisture meter today and check the humidity levels near your dryer—it’s the first step in ensuring your custom storage lasts for the next twenty years. If you’re feeling overwhelmed by the technical side of the layout, you can always contact us for a professional perspective on your specific space.
Hard Truths from the Humid Trenches
After years of redesigning these tight quarters, I’ve realized that the most expensive mistake isn’t the material choice—it’s ignoring the natural workflow. In a space this small, if you have to move a basket twice to get to the detergent, the layout has failed. One lightbulb moment for me was realizing that the standard 36-inch counter height isn’t a law. If you are shorter or taller, your custom folding station should reflect that to prevent back strain. Also, never underestimate the power of a dedicated ‘stray sock’ bin integrated into your built-ins and storage hacks; it keeps the small chaos from migrating to the floor. Most importantly, I’ve learned that accessibility trumps aesthetics every time. A beautiful cabinet you can’t fully open because it hits the dryer door is just a very expensive wall decoration.
The Gear That Survives the Spin Cycle
When you are ready to move from planning to execution, there are a few specific things I swear by. First, a high-quality moisture meter is non-negotiable for checking the studs before you seal the walls. For the installation itself, I always recommend using a self-leveling laser to ensure your innovative storage solutions aren’t fighting gravity from day one. I also rely heavily on the AWI Quality Standards for wood moisture content to ensure any wood I bring into the laundry room won’t warp immediately. If you’re dealing with older floors, knowing the proper way to shim a cabinet on a slanted slab floor is the difference between a sliding detergent bottle and a stable workspace. Lastly, keep a can of dry PTFE spray nearby; it’s the only lubricant that won’t turn laundry lint into a sticky gunk inside your hardware.
Design for the 300 Loads Ahead
The average person spends a massive chunk of their life managing textiles. You deserve a space that doesn’t feel like a punishment. Whether you are doing a full custom cabinets kitchen overhaul and extending that logic to the laundry, or just adding a single wall-mounted rack, the goal is the same: peace of mind. By focusing on verticality, choosing moisture-resistant materials like plywood box construction, and maintaining your hardware to prevent sluggish hinges, you transform a chore-closet into a high-efficiency engine. Don’t be afraid to start small—one shelf can change the entire energy of the room. #IMAGE_PLACE_HOLDER_E# Have you ever tried to install a folding station in a closet and run into a clearance issue with the doors? Let me know your biggest layout struggle below.