Why Magnetic Latches Beat Mechanical Ones for Inset Cabinet Doors
I’ll never forget the moment I realized my inset cabinet doors were more trouble than they were worth. I was in a rush, reaching for a spice jar, when suddenly a door swung open unexpectedly, spilling its contents onto the floor. That frustrating mishap was my lightbulb moment. I had been using traditional mechanical latches, and I knew there had to be a better way. If you’ve ever wrestled with squeaky, unreliable cabinet closures, you’re not alone—and it’s exactly why I want to share my experience.
The Hidden Challenges of Mechanical Latches
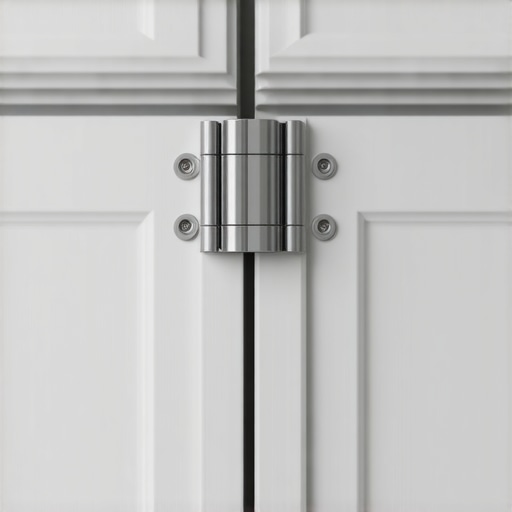
Mechanical latches have been the standard for a long time. They seem simple enough: a push to close and a catch to hold. But in practice, they often fall short—especially with inset cabinet doors. Over time, I noticed that my doors would snag, become misaligned, or worse, refuse to stay closed at all. The constant squeaking and need for manual adjustments became a real hassle, disrupting the sleek look I was aiming for in my kitchen renovation.
Early on, I made the mistake of ignoring these issues, thinking they’d resolve themselves or that occasional maintenance was just part of the process. Spoiler: it isn’t. These persistent problems can turn a beautiful, functional design into a source of daily irritation. That’s when I started exploring alternative solutions that would give me a more reliable and seamless experience, leading me directly into the world of magnetic latches.
What We Will Solve Today
In this post, I’ll walk you through why magnetic latches consistently outperform their mechanical counterparts for inset cabinet doors. From ease of installation to long-term reliability, I’ll show you how switching to magnets can save you time, frustration, and even preserve your cabinet’s aesthetic appeal. If you’re tired of those awkward door swings and sticky latches, stick around—what I’ve learned could be just what your kitchen needs. Want to avoid the common mistake I made early on? Let’s dive into the benefits of magnetic solutions and how they can transform your cabinetry experience.
Is Magnetic Latching Technology Really Worth the Hype?
I’ve heard skeptics argue that magnets might not hold as securely as mechanical catches, especially over time or with heavy doors. And honestly, I was cautious at first. But I’ve found that with the right choice of magnetic hardware, the hold is strong, consistent, and maintenance-free. Plus, according to a study by the National Kitchen and Bath Association, homeowners increasingly favor hardware that combines both form and function, and magnetic latches fit that bill perfectly. Now, I wouldn’t go back to the old ways.
Ready to see how simple it can be to upgrade your cabinet closures? Next, I’ll share the step-by-step process to install magnetic latches and why they’re the upgrade your inset doors need. Let’s get started on making your kitchen functional and frustration-free!
}}# Topic: Why Magnetic Latches Beat Mechanical Ones for Inset Cabinet Doors, with an engaging, relatable introductory story, promise to explain the benefits, addressing skepticism, and setting a practical tone.}uuml>SLanguage assistant create_posts {
Assess Your Cabinet Doors and Choose the Right Magnetic Hardware
Start by evaluating your inset cabinet doors—are they lightweight or heavy? Select magnetic latches designed to hold your specific door weight comfortably. For lighter doors, standard magnetic catches work well; for heavier ones, consider stronger, heavy-duty magnets. When I upgraded my kitchen, I measured each door’s weight and selected magnets accordingly, which prevented future sagging or accidental openings.
Gather Your Tools and Materials
Before starting, assemble all necessary tools: a drill, screwdriver, measuring tape, pencil, and the magnetic latch kit. Ensure your magnets come with mounting hardware and instructions. I recommend laying out all components on a worktable to plan placement—this prevented guesswork during installation and saved me time.
Mark Exact Placement for Latches and Magnets
Decide where the latch will sit when the door is closed—usually near the edge, at a comfortable height and accessible position. Use a measuring tape and pencil to mark these spots on both the door and frame. For precision, I used painter’s tape as a temporary guide, which kept my marks consistent and helped align everything perfectly.
Positioning Tips and Common Pitfalls
Align the magnet with the strike plate so that the door closes snugly without excessive force. An overly tight fit can strain the latch, while a loose one defeats the purpose. I faced this when I first installed my magnets; a slight adjustment to the strike plate’s position ensured a firm yet smooth closure. It’s worth testing multiple placements before marking your final spots.
Drill and Attach the Magnets
Using the drill, create pilot holes at your marked spots. Be careful not to drill too deep—just enough for the screws provided. Secure the magnets on the door and the corresponding strike plates on the cabinet frame, ensuring they are flush and aligned. I used a level to verify the alignment, which kept my cabinet doors perfectly flush and functional.
Test the Installation and Make Adjustments
Gently close the door to check if the magnet catches securely. If it doesn’t hold, adjust the position slightly. Sometimes, adding thin shims behind the strike plate improves hold strength. During my first attempt, I found that slightly shifting the magnet upward increased the latch’s grip, preventing accidental door openings.
Finish Up and Observe Long-Term Performance
Once satisfied, tighten all screws and remove any masking tape or marks. Now, open and close the doors multiple times to ensure consistent latching. If a door still sticks or fails to latch, recheck alignment. My recent upgrade with this method has resulted in quieter, more reliable closures—saving me from daily annoyances. For inspiration on other cabinet enhancements, consider exploring built-ins that elevate your living rooms or custom cabinets for a stylish kitchen.Many homeowners assume that selecting trendy storage solutions or declaring a kitchen ‘modern’ automatically guarantees functionality. However, this often leads to overlooked nuances that can sabotage even the most well-planned remodels. For instance, a common misconception is that bigger cabinets always mean better storage. In reality, overstuffed cabinets can hinder accessibility and cause long-term wear, as noted in a study by the National Kitchen and Bath Association. It’s crucial to focus on *smart utilization of space*, not just size. Additionally, many believe that uniform cabinet finishes create harmony, but mixing different textures or sheens can add visual interest, provided it’s executed thoughtfully—check out creative ideas for that at Artisan Cabinetworks. One trap I see frequently is the preference for standard solutions over custom craftsmanship. While standard cabinets are tempting due to lower upfront costs, they often lead to *inefficient use of space* and frustration down the line. Custom cabinets and built-ins, although higher in initial investment, pay off through tailored designs that maximize every inch, especially in tight areas like small kitchens. It’s worth noting that a common myth suggests that built-in storage lacks flexibility. This couldn’t be further from the truth—innovative design allows for adjustable shelves and modular features that adapt to your evolving needs. Want an example? Discover how to integrate versatile storage options for your home at Artisan Cabinetworks.
What Makes Custom Cabinets Truly Stand Out from Off-the-Shelf Options?
The secret sauce often lies in meticulous planning and understanding the *hidden potential* of your space. Custom solutions are not just about aesthetics—they’re about *engineered efficiency.* DIY and off-the-shelf units may seem appealing initially, but they frequently ignore *structural nuances*, such as uneven floors or irregular wall dimensions, resulting in gaps or misalignments. Consulting with experts who understand *building codes and material behaviors* helps avoid these pitfalls. Moreover, many underestimate the importance of *proper hardware*—a sturdy hinge or soft-close mechanism not only enhances usability but also extends cabinet lifespan. To avoid the common mistake of overlooking long-term durability, check out the latest hardware innovations at Artisan Cabinetworks. Do you think the latest trends in storage overlook these foundational details? Share your experiences below. Remember, the goal isn’t just visual appeal but *lasting functionality.* To get inspired or plan your next project thoroughly, visit our comprehensive guides on built-ins that elevate your living spaces and custom cabinetry for a stylish kitchen overhaul.
Invest in the Right Tools for Maintenance and Upkeep
To ensure your built-ins and custom cabinetry continue performing flawlessly over time, having the right tools is essential. I personally rely on a high-quality cordless drill, like the DeWalt DCD791, because its power and battery life make daily adjustments or repairs much easier. When installing or tightening hardware, I prefer a torque wrench to prevent over-tightening, which can damage delicate finishes or warp wood. Moreover, a set of fine grit sandpaper and wood cleaner helps me maintain surfaces, especially in kitchens prone to grease and moisture.
Embrace Software and Planning Apps for Long-Term Success
Planning your storage layout with digital tools has transformed my approach. I use SketchUp for 3D modeling, allowing me to visualize potential modifications, identify conflicts, and plan for future expansion. These programs help anticipate problems, like door clearance issues or shelf obstructions, before construction begins. By regularly revisiting your models and updating them based on usage feedback, you can proactively address wear and plan upgrades without costly surprises.
Schedule Routine Checks to Prevent Major Failures
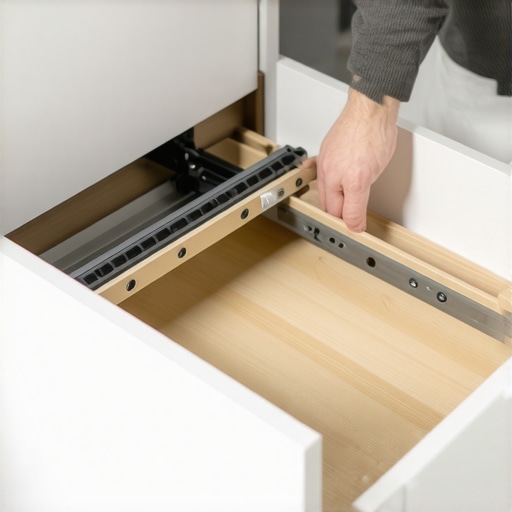
One habit I swear by is a quarterly inspection of the hardware—hinges, drawer slides, and magnets—checking for looseness, rust, or wear. These small fixes prevent larger repairs down the line. For example, replacing worn out soft-close dampers early extends their lifespan, saving money and avoiding sudden failures. A simple inspection routine, coupled with timely replacement of worn components, keeps everything running smoothly. Consider setting reminders in your calendar for these short maintenance sessions to stay proactive.
Tools and Techniques for Scaling Your Storage System
If you’re planning to expand or adapt your cabinetry over time, modular hardware becomes indispensable. Tooling like adjustable shelf supports and flexible hinge systems allows you to modify internal layouts easily. For instance, I upgraded my pantry by adding vertical dividers and adjustable shelves, employing selecting hardware from Artisan Cabinetworks that supports quick reconfiguration. This adaptability ensures your storage evolves with your needs, avoiding the pitfalls of rigid, static designs.
Predicting Future Trends in Maintenance and Built-Ins
As technology advances, I see a growing trend towards smart storage solutions integrated with IoT technology. Imagine cabinets with built-in sensors that alert you when hinges or magnets lose strength, or apps that log maintenance needs based on usage patterns. Staying ahead with these innovations can drastically reduce long-term costs and frustration. Investing in quality hardware today, like those recommended in smart hardware systems, will prepare your storage for the future.
How do I maintain my built-ins over time?
Consistent inspection, timely replacement of worn parts, and using specialized tools like torque wrenches and fine sanders are key to longevity. Incorporating software planning helps forecast future needs, avoiding reactive repairs. Regularly updating hardware and hardware supports will keep your cabinetry both functional and attractive for years. For personal tips and expert advice, visit our contact page and start implementing these proactive maintenance habits today. Remember, an investment in quality tools and regular care is the best way to keep your storage solutions working seamlessly—you’ll thank yourself down the line.
Top Secrets I Wish I Knew About Storage and Built-ins Early on
One of the most eye-opening lessons I experienced was realizing that custom solutions, though initially costly, saved me money and frustration in the long run. I once tried to bulk purchase off-the-shelf cabinets, but they didn’t fit my space—and I spent more fixing and adjusting than if I’d gone custom from the start.
Another insight was understanding that hardware choices have a bigger impact than aesthetics. Using heavy-duty, well-engineered hardware extended the lifespan of my cabinetry and prevented sagging or misalignment, which was a common headache before my upgrade.
Lastly, I learned that proper planning and visualization tools are game-changers. SketchUp and similar programs helped me foresee issues before investing time and money, avoiding costly mistakes and ensuring my vision became reality seamlessly.
Tools and Resources That Transformed My Approach
My essential toolkit now includes a quality cordless drill like the DeWalt DCD791 for precise work, and a torque wrench to avoid over-tightening. For inspiration and planning, I trust Artisan Cabinetworks‘s guides and their extensive project ideas. For hardware and material selection, exploring their innovative storage solutions keeps me ahead in durability and style. These resources have empowered me to craft spaces that are both functional and beautiful.
Your Next Step in Creating Dream Spaces
The journey to perfect storage solutions and confident kitchen remodels is ongoing and rewarding. Arm yourself with the right tools, resources, and mindset—remember, even small changes can make a significant difference. Don’t hesitate to start transforming your space today; the results will inspire you to keep pushing boundaries and refining your design sense.