Why Your Trash Pull-Out Needs a Bottom-Mount Slide for Better Weight Handling
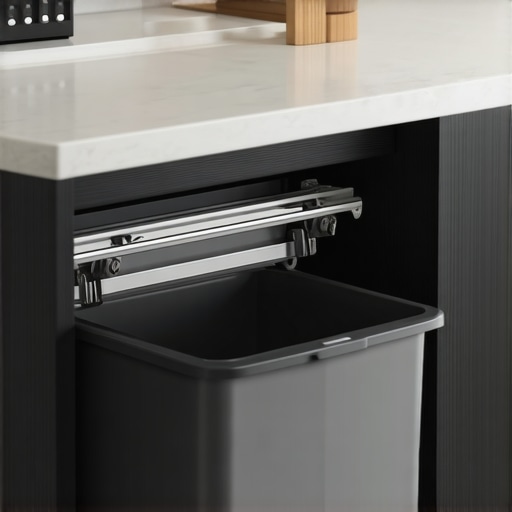
I still remember the ‘Great Lasagna Collapse’ of 2019. I had just finished a big family dinner, and the trash bin was nearing its limit—heavy, sodden with leftovers, and definitely over its weight class. I reached for the handle of my beautiful custom pull-out, gave it a standard tug, and… CRUNCH. One side of the drawer track gave up the ghost, the door twisted sideways, and I was left staring at a pile of coffee grounds and pasta sauce on my hardwood floor. It was the classic cabinet screw mistake that I see way too often in DIY setups. I had used side-mount slides for a heavy-duty job they were never meant to handle. Today, we are going to fix that once and for all by looking at why your kitchen needs a bottom-mount foundation. [image placeholder]
Side-Mount Slides Just Werent Built for This Stress
Most people assume that if a slide is rated for 100 pounds, it can handle 100 pounds. But here is the kicker: physics does not play fair. When you have a deep trash bin, the weight sits low and pulls outward. On a side-mount slide, all that torque is concentrated on a few tiny screws driven into the thin side-walls of your cabinet. It is a recipe for disaster. During my first kitchen remodel journey, I thought I was being smart by using what I had on hand. I was wrong. In my experience, side-mounts are great for socks or silverware. But for a bin full of wet kitchen waste? You need a foundation, not a suspension bridge. That is where the bottom-mount slide comes in. By placing the support directly under the load, you are using the cabinet floor to carry the weight rather than just the screws. According to the Business and Institutional Furniture Manufacturers Association (BIFMA), proper weight distribution is the single most important factor in the longevity of moving furniture components. If you are looking for expert tips on selecting storage solutions, start with the hardware that actually touches the floor.
Is a bottom-mount system actually worth the extra effort?
I get this question all the time. Neighbors see the price tag or the slightly more complex installation and wonder if they can just get away with the cheap stuff. My answer is always the same: do you want to fix it once, or do you want to mop up trash juice every six months? It is about peace of mind. When you hide your trash can, you want it to stay hidden and functional, not become a sagging eyesore that scrapes your face frame every time you open it.
The Hidden Advantage of Floor-Based Support
When I shifted my focus to smart storage ideas that actually last, the bottom-mount slide was a revelation. It is not just about weight; it is about stability. Have you ever noticed your trash pull-out wobbling from side to side? That is called racking, and it is the primary reason those expensive soft-close mechanisms eventually fail. A bottom-mount system creates a rigid, square base that resists that twisting motion. I have made the mistake of thinking heavy duty only meant the thickness of the metal. It does not. It is about the geometry of the installation. If you have ever had to re-drill holes because your trash drawer started dragging on the floor, you know exactly what I am talking about. Have you ever felt that annoying catch when trying to open your trash bin, only to realize the whole unit has shifted out of alignment?
Start with a Rock-Solid Cabinet Floor
Before you even touch a drill, you have to look at what is under your feet—or rather, under your trash bin. If your cabinet is made of thin particle board, no amount of expensive hardware will save you. When I am designing built-in storage solutions, I insist on 3/4-inch plywood. Particle board is basically just compressed sawdust and glue; once it gets wet from a leaking trash bag, those screws will pull right out like a loose tooth. This is exactly why plywood box construction still beats particle board in every high-moisture area of the home. Think of the cabinet floor as the foundation of a house. If the foundation is soft, the walls will eventually crack, no matter how pretty the siding looks.
Mount Your Tracks Directly to the Floor
The magic of a bottom-mount system is that the weight of a full bin is transferred directly to the cabinet floor, which in turn sits on your subfloor. When you install these, you want to use the widest possible footprint. I once saw a DIYer try to save time by using 1/2-inch screws on a heavy-duty slide. Two weeks later, the whole unit ripped out because there was not enough ‘bite’ in the wood. It is a classic cabinet screw mistake that leads to catastrophic failure. Use 3/4-inch pan-head screws that offer a wide surface area to grip the hardware frame tightly against the wood. 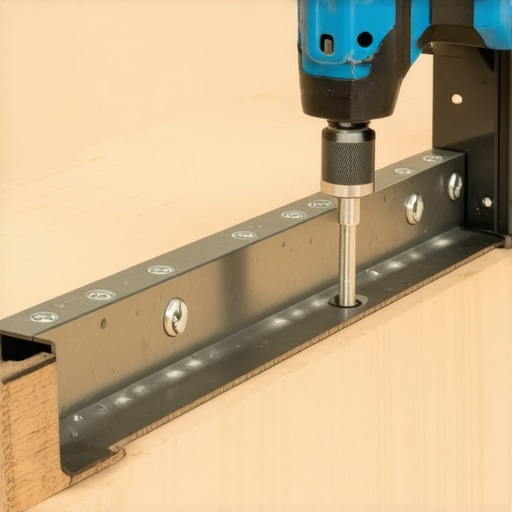
Stop the Sag with Proper Face Frame Alignment
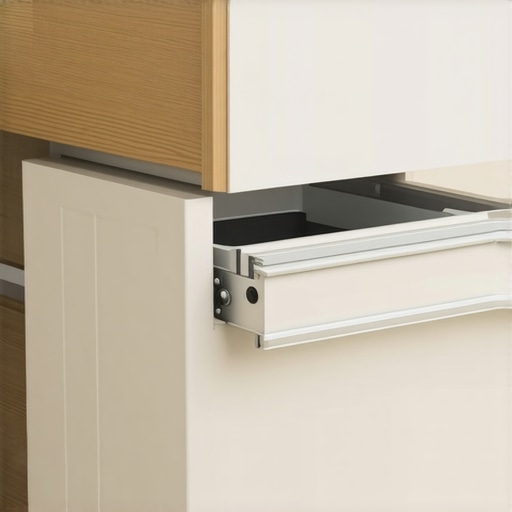
Once the floor tracks are secure, the next hurdle is the door. This is where most people lose their minds. If your door is even an eighth of an inch off, it will catch on the face frame every single time you pull it open. I remember working on a project in Novi where the homeowner had spent thousands on custom cabinets, but the trash pull-out felt like it was dragging through sand. The issue? The installer had not accounted for the weight of the actual door panel pulling the front of the slide down. To fix this, you need to shim the back of the slide slightly higher than the front. This ‘pre-loads’ the hardware so that when the heavy door is attached, it levels out perfectly flush. Learning how to align inset cabinet doors that do not close flush is a skill that separates a weekend warrior from a pro.
Keep the Tracks Clean to Prevent Grinding
Even the best hardware will fail if you let gunk build up in the ball bearings. In a kitchen, flour, sugar, and bits of trash find their way into the slides. I have been called to ‘repair’ broken drawers that actually just needed a good cleaning. If you notice your soft-close feature has become sluggish or makes a crunching sound, do not reach for the WD-40—that just attracts more dust. Instead, use a vacuum with a brush attachment and a damp microfiber cloth. Often, why your soft-close slides are failing is simply a matter of debris blocking the piston. By maintaining a clean environment inside the cabinet, you ensure that your modern kitchen remodel stays functional for decades, not just months.
Why Weight Ratings Alone Are Usually Lying to You
Most people think that ‘heavy duty’ is just a label on a box. In my years of building custom cabinets, I have learned that weight ratings are mostly marketing fluff if you do not understand the difference between static and dynamic loads. A slide rated for 100 lbs might hold a stack of plates perfectly still (static), but the second you pull that drawer out with speed (dynamic), the force increases exponentially. According to the National Kitchen & Bath Association (NKBA), a standard kitchen drawer should be engineered to withstand twice its expected load to account for this ‘jerk factor’ of daily use. If you are looking for innovative storage solutions, you have to look past the sticker and look at the mounting geometry. I have seen high-rated slides fail because they were mounted to a 1/2-inch side panel with zero floor support, causing the screws to rip out sideways under tension. 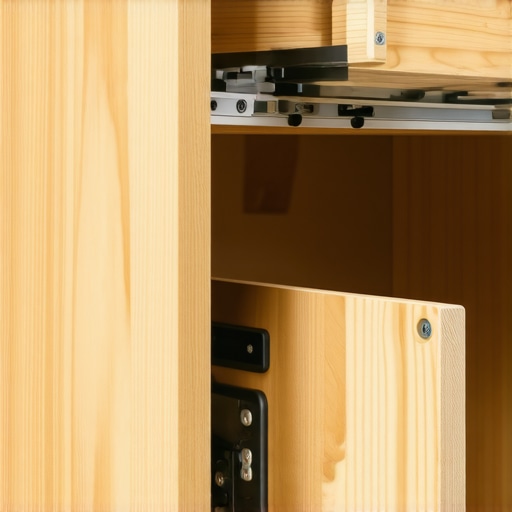
Can your custom cabinet handle the ‘Thanksgiving’ test?
This is the advanced question I ask every client before we finalize a design. It is easy to design for a Tuesday night dinner, but what happens when the bin is full of heavy leftovers and sodden trash? If your drawer face is wider than 18 inches, you are likely dealing with ‘racking,’ where one side of the slide moves slightly faster than the other, causing a twist. To stop this, I suggest moving beyond basic hardware and looking at why solid oak drawers are worth the extra cost; the density of the wood itself helps keep the hardware square and resists the bowing that leads to mechanical failure.
Avoid the Deadly Moisture Trap Under Your Sink
The biggest mistake I see from DIYers and even some pros is ignoring the micro-climate under the sink. People spend thousands on modern kitchen remodels, only to use standard fasteners that rust out in two years because of leaky trash bags or plumbing condensation. In a high-humidity zone, even if your trash pull-out is mechanically sound, the wood around the screws can soften. This is precisely why plywood box construction still wins over furniture board in these areas. Plywood fibers ‘grab’ the screw threads in a way that particle board simply can’t once moisture is introduced. If you have ever felt your trash pull-out getting ‘crunchy’ or sticking halfway, it might not be the slide—it might be the cabinet wall failing from the inside out due to poor material choice. Have you ever fallen into this trap? Let me know in the comments.
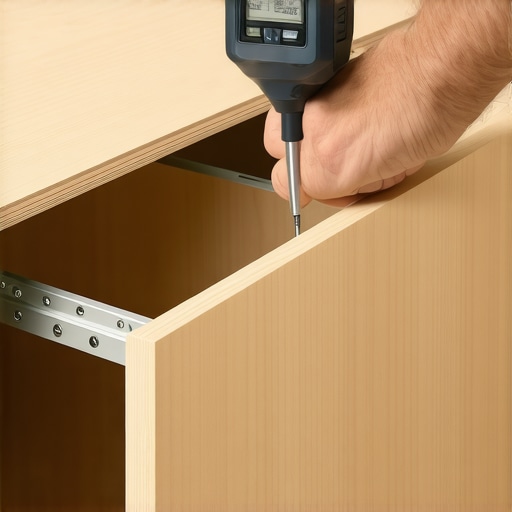
Hardware is not a ‘set it and forget it’ situation. If you want those heavy-duty bottom-mount slides to glide smoothly for the next twenty years, you have to treat them like the precision machinery they are. I have seen homeowners spend $50,000 on a stylish kitchen overhaul only to let the tracks fill with grit and the screws vibrate loose. My absolute favorite tool for keeping everything in check is a digital angle finder. It sounds overkill, but when you are dealing with built-in storage solutions, being off by even half a degree means your soft-close mechanism has to work twice as hard. I use it to verify that my cabinet floors haven’t settled or bowed over time. If they have, a quick adjustment to the leveling feet can save your hardware from a premature death.
Stop the Grinding Before It Destroys Your Slides
People often ask me what ‘maintenance’ actually looks like for a drawer. Every six months, I do a ‘quarterly cabinet crawl.’ I pull the drawers out entirely and inspect the tracks. If you see silver metal shavings, your alignment is off and the components are grinding. To fix this, I never reach for standard grease. Instead, I use a dry PTFE (Teflon) spray. It provides lubrication without becoming a magnet for dust and dog hair. According to the technical specifications from Blum, their high-end runners are tested for 100,000 open-and-close cycles, but those ratings assume a clean environment. If you want to avoid grinding drawer slides, cleanliness is more important than the brand of the hardware. For those of you with complex setups, using the one tool you need for perfectly aligned cabinet knobs can also help ensure you aren’t pulling on the drawer at an awkward angle, which causes uneven wear on the tracks.
How do I maintain my custom storage over time?
The secret is in the fasteners. Wood is a living material; it expands and contracts with the seasons. This movement can actually ‘back out’ screws over several years. I recommend a yearly check-up where you slightly tighten the mounting screws on your innovative storage solutions. If you find a screw that keeps spinning, don’t just ignore it. That is a sign the wood fibers have stripped. You can often fix this by removing the screw, inserting a small sliver of wood with some glue, and re-seating the screw once it is dry. This prevents the dreaded sagging pot and pan drawer that eventually ruins the cabinet face. If you are dealing with moisture, keep an eye out for rotting under the sink, as this will compromise your hardware’s foundation faster than anything else.
Prepare for the Future of Smart Storage
As we look toward 2025 and beyond, I predict we are going to see a massive shift toward fully integrated servo-drive systems. We are already seeing this in modern kitchen remodels where a simple tap of the knee opens the trash bin. This isn’t just a ‘cool’ feature; it actually reduces the physical torque on the cabinet box because the motor applies even pressure from the center rather than a human tugging from one side. If you are planning a custom cabinet upgrade for 2025, consider pre-wiring your base cabinets for power. Even if you don’t install motorized slides today, having the outlets ready will save you thousands in future labor. For now, go into your kitchen and give your most-used drawer a firm pull. If it wobbles or feels ‘crunchy,’ take ten minutes to clean the tracks and tighten the floor screws—it’s the easiest way to protect your investment.
The Hardest Lessons From a Decade of Cabinet Failure
After years of installing custom cabinets, I have realized that the ‘Great Lasagna Collapse’ was not just bad luck—it was a design flaw. My first lightbulb moment was realizing that side-walls are for show, but floors are for strength. If you are not anchoring your heavy-duty slides into a 3/4-inch base, you are essentially building on sand. I also learned that the ‘over-tightening’ trap is real; if you strip the wood fibers, that screw will never hold again. This is exactly why I recommend checking if plywood box construction still beats particle board for your specific project before you buy hardware. Finally, never trust your eyes alone. A door that looks level while empty will sag the moment you add a full trash bin, so always pre-load your hardware with a slight upward tilt.
#IMAGE_PLACEHOLDER_E#
My Field-Tested Toolkit for Cabinet Hardware
I do not just use whatever is on the shelf at the big-box store. For modern kitchen remodels, I rely on three specific assets. First, I always keep a digital angle finder in my pocket; it is the only way to ensure your built-in storage solutions are perfectly squared. Second, I only use PTFE-based dry sprays for lubrication to avoid attracting the dust that leads to grinding drawer slides. Lastly, I always refer back to the expert tips on selecting storage solutions when a client has a unique weight requirement, as hardware geometry changes based on the depth of the cabinet.
Build Your Dream Kitchen One Slide at a Time
Investing in high-quality hardware is the most underrated part of a successful stylish kitchen overhaul. It is not just about the wood or the paint; it is about how the room feels when you use it every single day. When your trash pull-out glides with a whisper instead of a groan, you know you have done it right. Do not be afraid to take the extra hour to shim those tracks or swap out those screws. Your future self—the one not cleaning up coffee grounds from the floor—will thank you. Have you ever had a drawer collapse at the worst possible moment? Let me know your stories in the comments below!