The Best Layout for a Secondary Butler’s Pantry
I remember the Saturday I finally snapped. My sister-in-law was trying to help me dry dishes after a huge family dinner, but there was nowhere to put the giant roasting pan. It ended up precariously balanced on top of the trash can because my countertops were a sea of half-empty platters and dirty glassware. That’s when it hit me: my “extra” space—the small room I called my butler’s pantry—was just a glorified closet for things I never used. I had spent thousands on a kitchen remodel only to realize my overflow zone was a cluttered mess that didn’t actually help me host.
The Real Reason Your Extra Kitchen Space Feels Like a Mess
I’ll be honest with you; I made a huge mistake early on. I thought that simply adding more shelves was the answer to all my problems. I filled that narrow room with deep, dark shelves that eventually became a graveyard for expired crackers and three different bottles of balsamic vinegar I forgot I owned. It was a classic case of quantity over quality. We often treat these secondary spaces as an afterthought, but without a strategic plan, they just become a secondary place to lose your mind. Today, I’m going to show you how to turn that awkward nook into a high-functioning station that actually takes the pressure off your main kitchen. We are going to look at the smart storage ideas that actually work, focusing on flow, accessibility, and specifically why a pull-out pantry often beats deep shelves when it comes to seeing what you actually have.
Is a Secondary Pantry Actually Worth the Extra Square Footage?
You might be wondering if it’s even worth the effort or if it’s just another room to clean. I get it. But consider this: according to a recent survey by the National Association of Home Builders (NAHB), nearly 85% of modern homebuyers rank a walk-in pantry as a top-tier necessity. The problem isn’t the space itself; it’s how we layout the cabinets. If you’ve ever felt like you’re playing a game of Tetris just to find the toaster, you know the struggle. Have you ever felt like your pantry was working against you instead of for you? Reach out and let me know—I’ve been there. We are going to move past the “junk drawer” phase and into a layout that makes sense for your daily coffee routine and your holiday hosting alike, starting with the zone method and the hidden toaster dock trick that changed my life. Let’s get into the nitty-gritty of the dimensions and the vertical storage hacks that make even a 4-foot wide space feel like a commercial kitchen wing.
Stop Sorting by Size and Start Grouping by Meals
The biggest mistake most people make during a kitchen remodel is organizing their pantry like a grocery store aisle—tall things in back, short things in front. That is a recipe for chaos. Instead, I recommend the pantry zone method. You need to group items by how you actually use them. I remember building out a client’s reach-in pantry where we designated a “Taco Tuesday” bin and a “Baking Sunday” shelf. Before this, she spent twenty minutes hunting for the cumin and the baking powder in separate corners. By grouping by activity, you eliminate the mental fatigue of hunting for ingredients. This approach works best when you use custom cabinets tailored to these specific bins, ensuring every inch of your storage solutions serves a purpose.
Why Seeing Everything Matters More Than Having Deep Shelves
We often think deeper is better, but deep shelves are where crackers go to die. If you can’t see it, you won’t eat it. This is exactly why a pull-out pantry beats deep shelves every single time. A pull-out brings the contents to you, exposing the items hiding in the dark corners. I once installed standard 24-inch deep shelves for a friend, and six months later, she found four unopened jars of peanut butter at the very back. We eventually swapped them for full-extension pull-outs, and she hasn’t overbought a single staple since. Think of your pantry like a filing cabinet; you want to look down at your options, not dig through them like a treasure chest.
Kill the Countertop Clutter with a Dedicated Appliance Dock
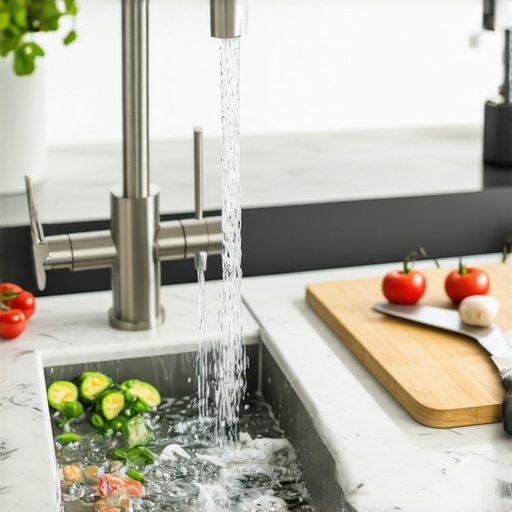
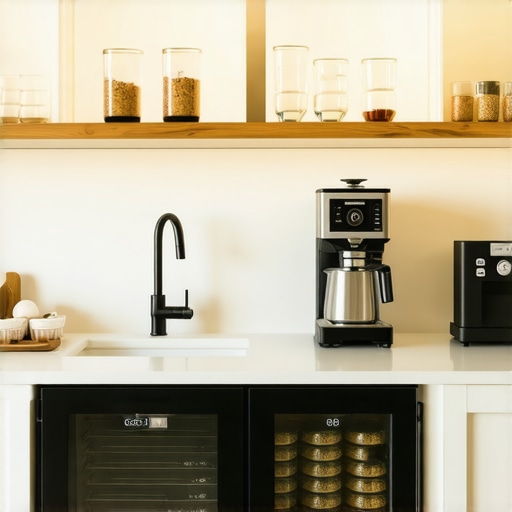
If your butler’s pantry feels like a staging ground for a small appliance graveyard, it’s time to get aggressive. The hidden toaster dock is a total game-changer. By installing outlets inside the cabinetry, you keep the toaster, blender, and espresso machine plugged in but out of sight. To take it a step further, consider that every high-end kitchen needs a dedicated coffee water line. Having a small sink or a direct plumbed line in your secondary pantry means you aren’t carrying heavy water reservoirs back and forth to the main sink. It turns a storage room into a functional beverage station.
Nail the Structural Details Before the Paint Dries
Don’t let the aesthetics distract you from the physics of weight. When you are planning your built-ins, remember that canned goods are incredibly heavy. I always tell my clients to design your pantry with adjustable shelf tracks. Life changes—one year you might need space for bulk paper towels, and the next, you’re obsessed with tall artisanal oil bottles. Fixed shelves are a trap. Furthermore, to prevent bowing, every tall pantry needs a fixed middle support shelf to anchor the unit. For the remaining shelves, a vertical cookie sheet divider is the best way to handle flat, awkward items like cooling racks or pizza stones. Finally, always insist on quality materials; Plywood box construction is the only way to ensure your cabinets don’t sag under the weight of fifty cans of soup over the next decade.
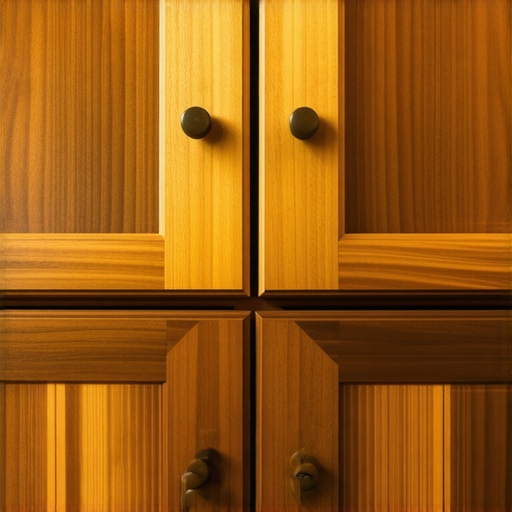
Everyone assumes that ‘solid wood’ is the gold standard for every part of a kitchen remodel, but here is the contrarian truth: using solid wood for your cabinet boxes is often a recipe for structural failure. While solid wood is beautiful for decorative elements, it is prone to warping and cracking when used for the large, flat surfaces of a cabinet carcass. This is exactly why plywood box construction still wins over furniture board in wet areas and even outperforms solid wood in terms of dimensional stability. According to the Kitchen Cabinet Manufacturers Association (KCMA), the structural integrity of high-end cabinetry relies on engineered plywood cores that resist the constant moisture and temperature fluctuations found in a working kitchen.
#IMAGE_PLACE_HOLDER_C#
The ‘Oops’ factor usually hits during the first major change of seasons. I have seen homeowners insist on gluing their panels tight into frames to achieve a seamless look, only to have the wood split wide open when the humidity drops in the winter. It is vital to understand why solid wood door panels still need room to breathe in summer. If your custom cabinets are built without accounting for this natural expansion and contraction, your investment will literally pull itself apart. These technical nuances are what differentiate a professional installation from an amateur ‘storage solution’ that fails within the first year.
Are you making the 29-inch desk height mistake?
When planning built-ins that integrate into the kitchen, such as a command center or home office nook, ergonomics are frequently neglected. I often see desks built at the standard kitchen counter height of 36 inches, which is a disaster for your posture. Understanding the built-in desk error why 29 inches is the only correct height is a non-negotiable rule for comfort. Anything higher leads to significant neck and shoulder strain. This level of precision is the hallmark of a truly custom kitchen remodel that considers the human body as much as the storage capacity.
Finally, do not let the aesthetics of the doors blind you to the mechanics of the hardware. You can spend a fortune on a remodel, but the hardware mistake that makes expensive cabinets look cheap is choosing beauty over weight-rating. If your drawers are already struggling, it is likely the real reason your cabinet drawer slides are grinding—they simply were not designed to handle the load of heavy cookware. For more ways to elevate your space, explore these custom cabinets ideas that transform your homes style. Have you ever fallen into the ‘solid wood’ trap or realized your workspace was just the wrong height? Let me know in the comments below!
After the dust settles from a major kitchen remodel, the honeymoon phase usually lasts until the first spill or the first time a drawer starts to drag. I have learned that the longevity of your custom cabinets depends less on the initial price tag and more on the precision of the installation and the consistency of the upkeep. If you want that showroom look to last, you have to treat your cabinetry like a fine piece of furniture rather than just a box that holds plates. Let’s talk about the specific ways to protect your investment and the gear that makes it possible.
Stop the visual chaos with a professional hardware jig
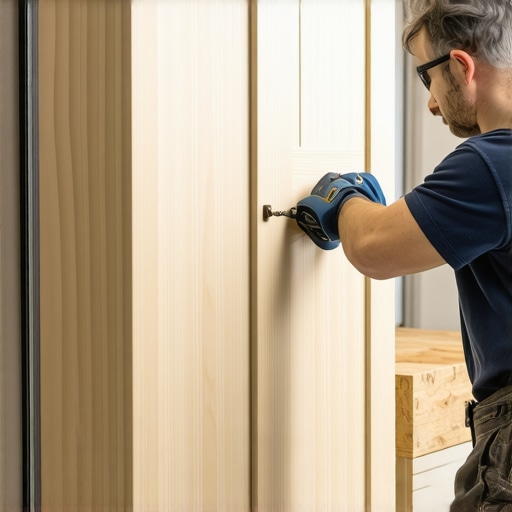
I cannot stress this enough: do not let anyone—not even your most trusted contractor—eyeball the placement of your handles and pulls. You can have the most expensive built-ins imaginable, but if the knobs are even a hair out of alignment, the whole project looks amateur. I always insist on using a dedicated metal drilling template; it is the one tool you need for perfectly aligned cabinet knobs every time. It locks onto the door corner and guarantees that every single hole is identical. This level of precision is what separates a high-end kitchen remodel from a weekend DIY attempt.
How do I keep my custom cabinets looking new for years?
Maintenance is where most homeowners drop the ball. It starts with knowing your finishes. If you have natural wood, you must learn how to remove stubborn water rings from natural wood cabinet surfaces before they set permanently. Moisture is the enemy of all storage solutions. I have seen beautiful islands ruined because a wet dish towel was left hanging over a drawer front. Furthermore, heat is a silent killer; you need to understand why your cabinet paint bubbles near the stove and how to prevent it by using proper heat shields or simply ensuring your range hood is drawing correctly. According to the Architectural Woodwork Institute (AWI) Quality Standards, a professional-grade finish must withstand specific chemical resistance tests, but even the best lacquer will fail if it is constantly subjected to steam and grease.
The mechanical side of cabinet longevity
We often focus on the doors, but the moving parts are what actually fail first. If your drawers start to feel gritty, it is usually because dust has mixed with the factory lubricant. I recommend a quick annual check of your hardware; learning why your slow close hinges are suddenly sluggish and how to clean them can save you from having to replace expensive soft-close mechanisms later. This proactive approach ensures your built-ins function as smoothly in ten years as they do on day one. Looking ahead, I predict we will see more ‘smart’ cabinetry that includes built-in moisture sensors under sinks and integrated LED diagnostics for hardware wear. For now, staying manual and observant is your best bet. If you want to dive deeper into the future of these spaces, check out this transform your kitchen with custom cabinets expert guide for 2025. I highly recommend you try one advanced tip this weekend: install a removable cabinet panel hack under your sink so you can access your plumbing without tearing out your beautiful woodwork during the next emergency.
Looking back at that roasting pan balanced on my trash can, I realize how much I didn’t know about the flow of a truly functional home. It is easy to get caught up in the color of the paint or the style of the handles, but the soul of a successful kitchen remodel lives in the details you cannot see from across the room. It lives in the weight rating of a drawer slide and the precision of an adjustable shelf. As you move forward with your own project, keep these hard-earned lessons in mind to ensure your storage solutions work as hard as you do.
Hard-Earned Truths from My Years of Sawdust and Sketches
If I could go back and talk to my younger self before my first major project, I would share these three lightbulb moments that changed everything for me. First, don’t skimp on the hardware; if you do, you will eventually find the real reason your cabinet drawer slides are grinding is simply that they weren’t built for the load. Second, ergonomics are non-negotiable. I have seen so many people regret high desks, which is why I always preach that the built-in desk error why 29 inches is the only correct height is a rule written in stone for comfort. Finally, remember that your needs will change. Designing with flexibility in mind—like using adjustable tracks—means your built-ins will grow with your family rather than becoming obsolete.
#IMAGE_PLACEHOLDER_E#
Resources That Will Save You Time and Stress
You do not have to reinvent the wheel when it comes to organizing or installing custom cabinets. There are specific tools and guides I trust implicitly because they have saved my skin on more than one occasion. For installation, the one tool you need for perfectly aligned cabinet knobs every time is a high-quality metal jig; it removes the guesswork and the fear of ruining a brand-new door. For planning, I always keep a list of smart storage ideas to maximize your kitchen space this year nearby to spark inspiration when a layout feels stagnant. And for the long-term vision, I highly recommend checking out this transform your kitchen with custom cabinets expert guide for 2025 to see where design trends are heading.
Take the First Step Toward Your Perfect Home
Starting a kitchen remodel can feel overwhelming, but every beautiful, functional space starts with a single decision to prioritize quality and intentionality. You deserve a home that supports your daily rhythm rather than adding to the chaos. Whether you are ready to tear out the old or just want to refine what you have, don’t be afraid to reach out and contact us for a professional perspective on your next set of built-ins. Your dream kitchen is not just about the square footage; it is about making every inch count. What is the one storage ‘pain point’ in your current kitchen that you are most excited to fix? Let me know in the comments below!