Why Your Cabinet Boxes Should Be Stapled, Glued, and Screwed
I still remember the sound—a low, ominous creak followed by a sickening thud at two in the morning. I ran into the kitchen to find my heavy cast-iron Dutch oven sitting in a pile of splintered wood and broken spices. The bottom of the cabinet didn’t just sag; it completely surrendered. Looking at that wreckage, I realized I’d fallen for the oldest trick in the budget-cabinet book: boxes held together by little more than hope and a few flimsy finishing nails. It was a mess. I spent the rest of the night questioning every ‘affordable’ choice I’d ever made while realizing that why plywood box construction still beats particle board for kitchens isn’t just a sales pitch—it’s about survival.
Build a Kitchen That Won’t Fall Apart Under Pressure
When you are planning a modern kitchen remodel, it is easy to get distracted by the pretty door styles and the fancy quartz countertops. But I’m telling you, as your neighbor who has seen the inside of too many failing cabinets, the real magic happens in the joinery. If your boxes aren’t stapled, glued, and screwed, you are essentially building a house of cards. I made this mistake early in my career when I built a laundry room cabinet and thought a few extra nails would do the trick. Three months later, the weight of the detergent bottles had literally pulled the back panel off. It was embarrassing, and it was avoidable. Have you ever opened a drawer only to have the front panel wiggle in your hand? That is the sound of a cabinet crying for help.
Is This Triple-Threat Method Actually Worth the Extra Work?
You might be wondering if doing all three is just overkill. It isn’t. According to the Architectural Woodwork Institute (AWI), the combination of mechanical fasteners (like staples and screws) used alongside structural adhesives creates a bond that is often stronger than the wood fibers themselves. The glue provides the long-term surface-to-surface bond, the staples act as a permanent clamp while that glue sets, and the screws provide the sheer strength to resist the weight of your heavy plates and appliances. This is why I always tell people that you should avoid glue-only joinery for any high-moisture or high-use area. Without screws, the humidity in your home can eventually cause that glue to fail, leading to the exact 2 AM disaster I faced. By integrating these three steps, we ensure that your custom cabinets stay square, level, and rock-solid for decades. We are going to dive into the specific tools you need to do this right, so you never have to sweep up a collapsed pantry again.
Make the Wood Glue Work for You
The first step in a rock-solid build is the adhesive. Think of wood glue as the DNA of your cabinet; it creates a chemical bond that fuses two pieces of wood into one. I always use a high-quality PVA glue, but the secret isn’t just the brand—it’s the coverage. You want a thin, even bead along the entire length of the dado or rabbet. I learned this the hard way while helping a friend with a modern kitchen remodel where we were moving too fast. We ‘dotted’ the glue instead of spreading it. Two years later, the steam from his dishwasher caused those joints to swell and pop because there wasn’t a continuous seal. In any custom cabinets as a game-changer in your kitchen remodel journey, the glue is your first line of defense against humidity and weight.
Staples Are Your Permanent Clamps
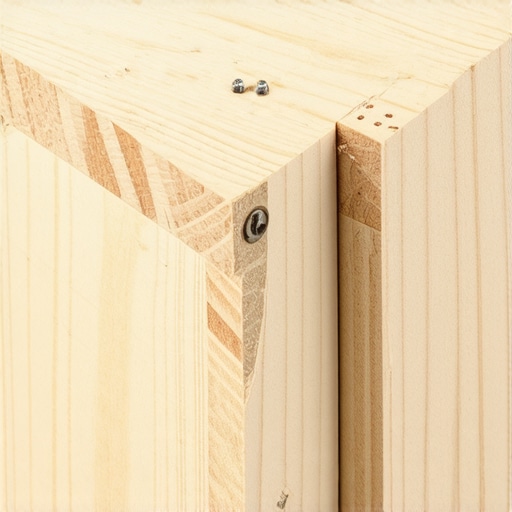
Once the glue is down, you need to hold everything perfectly square. This is where a pneumatic stapler becomes your best friend. Staples provide immediate holding power, acting as a ‘permanent clamp’ that keeps the box aligned while the glue cures. Unlike a single nail that can allow the wood to pivot, a crown staple has two legs that bite into the grain, preventing the cabinet from racking. When I’m building built-ins and storage hacks for a sleek functional kitchen, I space my staples every four to six inches. This ensures that the back panel and the sides are locked in tight, creating a rigid structure that won’t twist when you’re trying to level it on a wonky floor.
Finish the Job with Rugged Screws
If glue is the DNA and staples are the muscles, then screws are the skeleton. You cannot rely on staples alone to hold up a 100-pound stack of plates. This is exactly why your base cabinets should be secured with 3-inch rugged screws when they go into the wall studs, but even the box assembly needs them. I always pre-drill and countersink my screws into the structural cleats of the cabinet. I remember a project in a high-end pantry where the homeowner wanted the best way to organize heavy dutch ovens in a deep drawer. Because we used 1.5-inch screws to reinforce the drawer glides and the cabinet gables, that drawer still slides like butter five years later, despite holding nearly 80 pounds of cast iron. Without those screws, the constant pulling and pushing would have eventually vibrated the staples loose.
Avoid the Gravity Trap in Heavy Built-Ins
The biggest mistake I see in DIY or ‘budget’ installs is assuming gravity will do the work. It won’t. Gravity is actually your enemy. When you are installing built-ins that elevate your living room’s functionality, you are often dealing with tall spans that want to bow. By using the triple-threat method, you create a box that is a ‘torsion box’—it resists bending in every direction. I once saw a beautiful floor-to-ceiling library unit that started to ‘smile’ (the shelves sagged and the sides pulled inward) because the builder only used finish nails and a prayer. If he had just taken twenty minutes to add glue and structural screws to those fixed middle shelves, that unit would still be straight as an arrow today. It’s the difference between a piece of furniture that lasts through a single move and one that stays with the house for a generation.
Let’s dig deeper into the stuff most ‘design’ blogs won’t tell you. Everyone thinks solid oak or maple is the gold standard for every part of a cabinet, but that is a rookie mistake that can lead to warped shelves and sticking doors. In reality, why we recommend plywood shelves over solid wood for long spans comes down to simple physics. Solid wood moves with the seasons; it expands and contracts, which can cause long pantry shelves to cup or bow. High-grade plywood, with its cross-grain layers, stays flat no matter how much humidity hits it. If you are aiming for modern kitchen remodels featuring custom cabinets and built-ins, you need to prioritize dimensional stability over the ‘solid wood’ label.
Why Your “Solid Wood” Obsession Might Be Backfiring
The National Kitchen & Bath Association (NKBA) points out that structural integrity in a kitchen isn’t just about the material species—it is about the cabinet’s ability to remain perfectly square under static loads of over 200 pounds. I’ve seen homeowners insist on solid wood boxes only to have them crack at the seams because the wood couldn’t handle the dry air of a Midwest winter. When you are looking for expert tips on selecting storage solutions for a perfect kitchen upgrade, look for builders who understand how to balance materials. Combining a solid wood face frame with a plywood box isn’t ‘cheating’; it is engineering for longevity.
Is Your Base Cabinet Strong Enough for a 100-Pound Sink?
One of the most common ‘oops’ factors I encounter is a failure to plan for the weight of modern appliances and fixtures. People buy these gorgeous, heavy apron-front sinks but forget that a standard sink base isn’t built to hold that much weight plus 30 gallons of water. If you don’t know how to reinforce a sink base cabinet for a 100-pound cast-iron sink, you are basically inviting a structural failure. I always add internal 2×4 bracing or custom-built plywood cradles to the cabinet interior. Without this, the ‘triple-threat’ joinery we discussed earlier will eventually pull apart under the sheer downward force.
Don’t Let Your Deep Drawers Become a Junk Graveyard
Another myth I love to bust is that ‘more depth is always better.’ I’ve walked into kitchens where people have 24-inch deep lower cabinets with no pull-outs. That isn’t storage; that is a graveyard for Tupperware lids. This is exactly why a pull-out pantry beats deep walk-in shelves for visibility every single time. If you can’t see the item, you won’t use it. Furthermore, if those deep drawers aren’t built with the right hardware, they’ll fail. If you notice the real reason your cabinet drawer slides are grinding, it is often because the drawer box has racked (twisted) because it was built too deep without enough structural glue and screws to keep it square. Have you ever fallen into this trap? Let me know in the comments. We are here to make sure your next project doesn’t just look like a magazine cover but performs like a professional workstation.
Stop Guessing with Your Hardware Placement
I’ve seen more $50,000 kitchens ruined by a single misplaced drill bit than I care to count. When you’ve spent weeks planning your revolutionize your kitchen remodel using built-ins and creative storage, the last thing you want is a crooked handle that catches your eye every time you walk into the room. This is why the one tool you need for perfectly aligned cabinet knobs every time is a professional-grade aluminum drilling jig. I personally use the True Position Drill Guide because it eliminates human error. It’s not just about speed; it’s about the fact that once you drill through a finished maple door, there is no ‘undo’ button. If you are doing this yourself, invest in the jig before you buy the first screw. It’s the difference between a high-end custom look and a weekend DIY project gone wrong.
How can I keep these surfaces looking brand new?
Maintenance isn’t just about wiping down the counters; it’s about mechanical health. According to the Kitchen Cabinet Manufacturers Association (KCMA) in their ANSI/KCMA A161.1 performance specifications, cabinets undergo rigorous testing for shelf load, drawer cycles, and finish resistance to common household chemicals. To meet these standards in your own home, you need to be proactive. If you notice why your slow close hinges are suddenly sluggish and how to clean them, don’t wait for the door to stop closing. A quick blast of compressed air and a tiny drop of dry lubricant can save a $20 hinge from grinding itself to death. Similarly, knowing how to remove stubborn water rings from natural wood cabinet surfaces without stripping the lacquer is essential for any high-traffic kitchen. Usually, a mild mix of vinegar and olive oil does the trick for light rings, but prevention is always better—keep those steam-producing coffee makers out from under your upper cabinets.
The Future of Kitchen Modularity
I predict that the next five years will see a massive shift toward ‘modular custom’ builds. We are moving away from fixed shelves and toward interior systems that can evolve. I am already seeing clients ask for built-ins that elevate your living rooms functionality by doubling as tech hubs with integrated wireless charging hidden inside the wood. The goal is to create a shell that lasts fifty years with an interior that can be reconfigured in five. This is why I always insist that every base cabinet needs adjustable feet on uneven concrete. It allows the entire system to be leveled perfectly, ensuring that as the house settles, your drawers don’t start to stick. If your floor isn’t level, your cabinets will never be square, and a cabinet that isn’t square will eventually tear its own joinery apart.
Perfect Your Reveal in Under Ten Minutes
If your doors look slightly askew, don’t panic and start redrilling holes. Most modern European hinges have three-way adjustment screws built right in. Mastering the 5-minute hinge adjustment for fixing wonky cabinet reveals is the single best skill you can learn to keep your kitchen looking professional. I challenge you to go into your kitchen right now, find that one door that’s always been a quarter-inch low, and turn the vertical adjustment screw. It’s incredibly satisfying and costs absolutely nothing. For your next step, make sure you check out our deep dive into hardware selection—because the wrong pull can make even the most expensive cabinet feel like a budget buy.
Lessons from the Bench That You Won’t Find in a Manual
Over the years, I’ve realized that the small details make the biggest difference in long-term durability. For instance, grain direction isn’t just for looks; it is about physics. If you don’t understand why solid wood door panels still need room to breathe in summer, those beautiful shaker doors will eventually warp or crack. I also learned that the best storage isn’t about more space; it’s about smarter space—like knowing how to use t-bar pulls without them catching your pockets when you’re rushing through a Tuesday night dinner. These are the hard-won insights that separate a generic build from a masterpiece.
My Personal Toolkit for a Flawless Result
To get a truly custom look, you need more than just a hammer. I always recommend the True Position Drill Guide for hardware and Titebond II for a waterproof seal. These are the small investments that make custom cabinets ideas that transform your homes style actually come to life without the DIY headaches. Don’t skimp on the screws either; use structural fasteners for anything carrying a load. If you are aiming for high-end results, consulting innovative storage solutions for modern kitchen remodels can help you map out the technical requirements before you cut your first piece of plywood.
#IMAGE_PLACEHOLDER_E#
Step into a Kitchen That Actually Works
Your home is a major investment, and the way you approach a remodel sets the tone for your daily comfort. By choosing high-quality materials and the ‘triple-threat’ assembly method of glue, staples, and screws, you are building more than just boxes—you are building reliability. Your custom cabinets should be the last thing you worry about when the house gets busy. Embrace the process, trust the engineering, and enjoy the lasting beauty of a project done right. Have you ever had a cabinet shelf fail or a drawer front fall off at the worst possible moment? Tell me about your biggest kitchen ‘oops’ in the comments below!