The Secret to Making Plywood Edges Look Like Solid Wood
I still remember the first time I tried to build a set of custom cabinets for my own mudroom. I was so proud of the joinery until I stepped back and realized the raw edges of the plywood were staring back at me like a neon sign. It looked unfinished, cheap, and honestly, a bit embarrassing. I’d spent good money on high-quality sheets, yet it looked like I’d just slapped some shipping crates together. That’s the struggle with plywood; it’s incredibly strong and stable, but those layers are an aesthetic nightmare if you don’t know the tricks. Today, I’m going to show you how to bridge that gap between a ‘plywood project’ and ‘fine furniture’ so you never have to hide your work when guests come over.
The Day My Custom Cabinets Looked Like a Plywood Nightmare
Early in my woodworking journey, I made the classic mistake of thinking a bit of wood filler and extra sanding would magically make plywood edges vanish under paint. It didn’t. In fact, it just made the layers stand out even more. Plywood is a fantastic material—even the pre-finished maple interior options are a dream to work with—but the raw edges are its Achilles’ heel. If you’re planning a big project, you need a plan for those edges before you even make your first cut. According to the USDA Forest Products Laboratory, the cross-laminated structure of plywood makes it significantly more dimensionally stable than solid wood, resisting the warping that often plagues natural lumber, but that stability comes with those ugly visible plys.
Is Edge Banding Just a Ticking Time Bomb for Your Kitchen?
I know what you’re thinking: ‘Won’t that iron-on stuff just peel off in two years?’ It’s a valid fear. I’ve seen plenty of cheap vanities where the edge banding is curling away like a dried-up leaf. However, when done correctly with the right prep and a few pro secrets, edge banding—or better yet, solid wood nosing—can last a lifetime. Have you ever had a project ruined by edge banding that just wouldn’t stay put? Tell me about your most frustrating ‘pancake edge’ moment in the comments!
Why Pro-Level Edging Makes or Breaks Your Kitchen Remodel
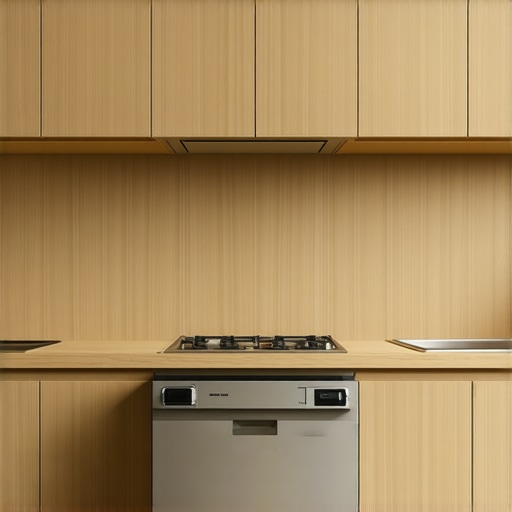
If you’re tackling a modern kitchen remodel, the difference between a DIY look and a professional finish lives entirely in the details. You can have the best layout in the world, but if your built-ins show raw plys, the perceived value of your home isn’t going to budge. Learning to mask these edges isn’t just about vanity; it’s about creating a durable, clean surface that resists moisture and wear. It turns a utility-grade material into something truly elegant that mimics the look of solid oak or maple perfectly.
Stop Letting Raw Plywood Kill Your Design
To get that high-end look for your custom cabinets ideas that transform your homes style, you have to treat the edges as the most important part of the build. Think of plywood edges like the seams of a tailored suit; if they are fraying or visible, the whole outfit looks like a mess. The first step is always meticulous preparation. You cannot just iron banding onto a dusty, jagged edge and expect it to hold for a decade. I once rushed a set of laundry room shelves, skipping the 120-grit sanding pass on the raw edges because I thought the hot-melt glue would just fill the gaps. Two weeks later, the banding started lifting in the humid environment, and I had to strip the whole thing. It was a total nightmare that cost me a full day of rework. Lesson learned: sand those edges perfectly flat and clean them with a tack cloth or denatured alcohol before the heat ever touches the wood.
The Proper Way to Apply Iron-On Edge Banding
The most common mistake DIYers and even some pros make is using an iron that is too cold or moving it too fast across the surface. You want the adhesive to fully liquefy and soak deep into the wood fibers of the plywood. I use an old household iron set to the ‘cotton’ setting—just make sure you have emptied the water out because steam is the enemy here. Run the iron slowly—about two inches per second—and follow immediately with a wooden pressure roller or a scrap block of wood. Pressing down firmly while the glue is still in its liquid state is what ensures the bond survives the test of time, especially in innovative storage solutions for modern kitchen remodels where heat and steam are constant threats.
Why Solid Wood Nosing Beats Every Other Method
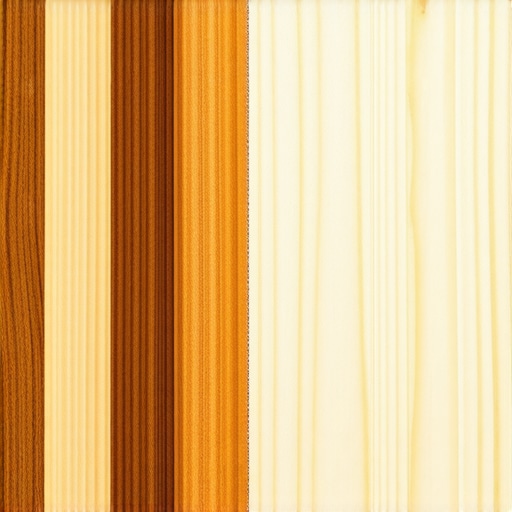
If you really want your built-ins and storage hacks for a sleek functional kitchen to look like heirloom furniture, stop using tape and start using solid wood nosing. Nosing involves gluing a 1/8-inch or 1/4-inch thick strip of matching hardwood directly to the plywood edge using clamps and wood glue. It is like putting a literal shield on your cabinets. This is particularly vital because why plywood box construction still wins over furniture board in wet areas often comes down to how well you seal those vulnerable edges against moisture. Solid wood nosing can be rounded over with a router bit, giving you a soft, organic edge that thin veneer banding simply cannot achieve.
Mastering the Flush Trim Without Ruining the Surface
Once your edging is on, you have to trim it perfectly flush. This is the most delicate ‘make or break’ moment of the process. I remember a specific project where I was using a flush-trim router bit on a beautiful set of built-ins that elevate your living rooms functionality. I moved against the grain by mistake, and the bit caught a fiber, tearing a huge chunk out of the finished plywood face. It was a heart-sinking moment. Now, I always trim the ‘tail’ ends with a sharp chisel first, then use a dedicated edge banding trimmer or a very fine-cut file held at a slight 5-degree angle. By filing toward the plywood rather than away from it, you prevent the banding from pulling away and create a micro-bevel that feels smooth to the touch. This technique is what separates the weekend warriors from the master cabinet makers. Even if you have already had to learn how to fix a cabinet door that wont stay closed without replacing hinges, mastering the edge will save you more frustration in the long run than any other skill in the shop.
Stop Chasing Maximum Volume in Your Kitchen
Most designers will try to sell you on the ‘more is more’ philosophy when it comes to selecting storage solutions for a perfect kitchen upgrade. In my experience, this is a recipe for a cluttered, frustrating workspace. The hidden nuance that most people miss is that deep, dark cabinets are essentially ‘item graveyards.’ This is precisely why a pull out pantry beats deep walk in shelves for visibility every single time. By bringing the back of the cabinet to your fingertips, you eliminate the need to dig through layers of canned goods. According to research by the National Kitchen & Bath Association (NKBA), the transition from traditional ‘storage zones’ to ‘functional workstations’ is the most significant factor in long-term homeowner satisfaction, yet many still prioritize raw square footage over accessibility. Have you ever lost a jar of honey for three years in the back of a deep corner cabinet? Let me know in the comments!
Why Every High-End Design Fails Without This 29-Inch Rule
If you are planning a revolutionize your kitchen remodel using built-ins and creative storage, you might be tempted to make every counter a standard 36-inch height. This is a massive ‘oops’ factor, especially if you’re integrating workspace. I once built a stunning home office wing for a client, only to realize I’d made the desk surface 30 inches high—a standard table height—but for her specific ergonomic chair, it was a disaster. I learned the hard way about the built in desk error why 29 inches is the only correct height for long-term comfort. That one-inch difference is the gap between a productive day and a trip to the chiropractor.
Can Seasonal Humidity Actually Destroy Your Custom Inset Look?
This is a question I get from advanced woodworkers constantly: ‘Why did my perfectly gapped doors suddenly bind?’ If you’ve invested in custom cabinets as a game changer in your kitchen remodel journey, you need to account for wood movement. Inset doors are the gold standard of high-end cabinetry, but they are incredibly unforgiving. Understanding the inset cabinet gap re-aligning doors after seasonal humidity changes is vital. If you don’t leave a ‘nickel’s width’ gap during the humid summer, those doors will swell and stick by winter, potentially damaging the face frames.
Avoid the Heavy Drawer Disaster Before It Happens
Finally, let’s talk about the hardware ‘trap.’ Most people think all drawer slides are created equal, but if you’re building built-ins and storage hacks for a sleek functional kitchen designed for heavy cast-iron pans, standard screws won’t cut it. I’ve seen beautiful drawers literally rip out of their carcasses because the installer used 1/2-inch screws instead of deep-thread cabinet screws. This is the cabinet screw mistake that causes heavy drawers to fail, and it’s an expensive fix once the wood fibers are stripped. Always over-engineer your supports; your future self will thank you when those drawers still glide smoothly ten years from now. Have you ever fallen into this trap? Let me know in the comments.
The Pro Gear That Finally Saved My Sanity
You do not need a warehouse full of heavy machinery to get a factory-level finish, but there are a few ‘non-negotiables’ in my kit that I wish I’d bought on day one. For years, I tried to eyeball hardware placement or use those flimsy plastic templates from the big-box stores. It was a recipe for disaster. Now, I never start a project without a professional-grade aluminum drilling guide. It is truly the one tool you need for perfectly aligned cabinet knobs every time. When you are dealing with a transform your kitchen with custom cabinets expert guide for 2025, a single hole drilled 1/16th of an inch off is all it takes to make the whole room look amateur. Beyond jigs, I swear by a random orbital sander with a vacuum attachment. Dust is the enemy of a durable finish, and keeping your workspace clean is just as important as the technique itself.
How do I maintain my custom cabinets over time?
Even the best-built built-ins and storage hacks for a sleek functional kitchen require a little love once the seasons change. The biggest mistake I see homeowners make is ignoring the hardware. Over time, those soft-close mechanisms can collect grease and dust. If you notice your doors aren’t closing smoothly, don’t buy new ones; instead, learn why your slow close hinges are suddenly sluggish and how to clean them to restore that satisfying silence. Additionally, doors will inevitably shift due to the weight of the wood and house settling. Knowing how to adjust european hinges for a perfectly level door reveal is a five-minute skill that keeps your kitchen looking brand new. According to technical documentation from Blum, their high-end hinges are tested for up to 200,000 opening and closing cycles, but that lifespan is only achievable if they are kept aligned and free of debris.
The Future of Integrated Storage Tech
Looking ahead, I see a massive shift toward ‘invisible’ functionality. We are moving away from bulky, protruding handles and toward a more streamlined aesthetic. This is why why finger pull channels are replacing traditional handles in modern kitchens is becoming the standard for high-end builds. People want their smart storage solutions for small kitchens in 2025 to feel like a natural extension of the architecture, not just a box bolted to the wall. We are also seeing the rise of sensor-driven lighting and motorized lift systems that hide heavy appliances when not in use. My advice? Take one of your current ‘trouble’ cabinets this weekend and try to deep-clean and re-align the hinges. You will be shocked at how much a perfectly level door changes the feel of the whole room.
Hard-Won Lessons from the Shop Floor
One thing I realized after years of builds is that the best custom cabinets aren’t perfect; they are simply the result of knowing how to fix small mistakes. Here are a few lightbulb moments that changed my approach: First, grain direction isn’t just for the face. When applying edge banding, matching the grain direction of the veneer to the plywood face makes the seam disappear under a finish. Second, never trust a factory edge. Even high-quality plywood can have minor dings from the warehouse, so I always rip 1/4 inch off every edge to ensure a perfectly clean surface for gluing. Finally, remember that humidity is a silent thief. Always let your wood acclimate to the room for at least 48 hours before you start your selecting storage solutions for a perfect kitchen upgrade process to prevent nasty gaps from forming later.
The Tools That Keep My Sanity Intact
You don’t need a million dollars in machinery, but these three items changed my life. First, a professional-grade aluminum jig is non-negotiable. It is the one tool you need for perfectly aligned cabinet knobs every time, preventing those heart-breaking mistakes. Second, I highly recommend a dedicated veneer edge trimmer; using a utility knife is a recipe for jagged edges. Finally, check out the technical guides from professional hardware manufacturers. They offer deep dives into how to maximize space with innovative storage solutions for every room that go far beyond basic tutorials. #IMAGE_PLACE_FINAL#
Start Building Your Legacy Today
Woodworking is a journey of patience, but the rewards are tangible. When you stand in your kitchen and see those perfectly flush edges and smooth-gliding drawers, you’ll know the effort was worth it. Investing in your own custom cabinets is more than just a home improvement; it is a custom cabinets as a game changer in your kitchen remodel journey, turning a utility space into an heirloom. Don’t be afraid to make mistakes—they are just markers on the road to mastery. Have you ever struggled with a project where the raw plywood edges just wouldn’t cooperate? Let me know your biggest shop frustration in the comments below!