Why Your Cabinet Handles Should Be Installed Horizontally
I remember standing in my sister’s brand-new kitchen, the kind where the paint still smells fresh and the stone counters feel like silk. She’d spent a small fortune on beautiful custom cabinets, but every time I looked at the island, something felt… itchy. All the handles were installed vertically, even on the wide drawers. It looked like a forest of metal sticks fighting for attention. Then, the kicker: I walked past a base cabinet and snap—my favorite pair of jeans became a casualty of a protruding vertical pull. It was a visceral reminder that kitchen design isn’t just about the finish; it’s about the flow.
The Day I Realized My Kitchen Looked Like a Pincushion
Early in my journey as a kitchen enthusiast, I made the classic mistake of thinking hardware was an afterthought. I figured as long as the modern kitchen remodel looked good in photos, the orientation of a five-inch piece of brass didn’t matter. I was wrong. I once spent an entire weekend drilling vertical holes into forty different doors, only to realize I’d created a visual nightmare of vertical lines that made the ceiling feel lower and the room feel cluttered. Today, I want to help you avoid that “pincushion” effect and show you why a simple 90-degree pivot can transform your space from basic to high-end.
Does Shifting Your Hardware Actually Change the Vibe?
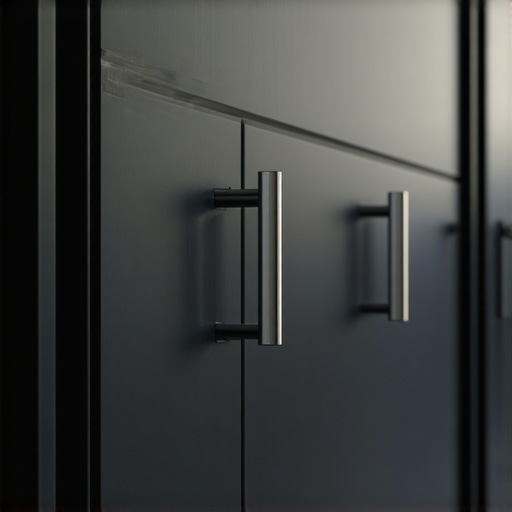
You might be skeptical. You might think a handle is just a handle. But think about the horizon. Horizontal lines are naturally calming to the human eye. When you install your pulls horizontally, you are reinforcing the architectural lines of your built-ins and creative storage. It creates a seamless, streamlined look that guides the eye around the room rather than stopping it at every single door. Have you ever felt like your kitchen was just too “busy” even when the counters were clean? Tell me, have you ever caught your sleeve on a vertical handle while rushing to grab a boiling pot?
Horizontal Handles are the Secret to Ergonomic Flow
Beyond the aesthetics, there is a massive practical argument for this setup. When handles are horizontal, they are significantly more ergonomic for the way our hands naturally move. According to the National Kitchen & Bath Association (NKBA), kitchen design should prioritize “human-centric” movement to reduce physical strain. A horizontal pull allows for a more natural grip, especially on heavy drawers filled with cast iron. Plus, it is the secret to choosing hardware that does not snag your pockets. By keeping the ends of the pulls tucked away or aligned with the cabinet edges, you eliminate those annoying “hook” points that catch on clothing. We are going to dive into exactly how to measure for this transition without ruining your doors.
Stop Guessing and Start Centering
To achieve the sleek aesthetic found in a stylish kitchen overhaul, you need to treat your hardware like a continuous architectural element. The most common mistake is placing horizontal pulls too high or too low on a door. For standard base cabinets, you want the pull centered on the top rail. If you’re working with flat-panel custom cabinets, aim for two to three inches from the top corner. This creates a “weighted” look that feels intentional rather than floating in space. When the eye travels across the kitchen, it should see a clean horizon line of metal, not a scattered constellation of vertical dots.
Why a Jig is Better Than Your Eyeballs
I learned this the hard way during a project in a cramped apartment where every mistake was magnified by the morning sun hitting the high-gloss finish. I thought I could eyeball the horizontal levelness of forty different pulls using just a tape measure and a pencil. By noon, I had a “staircase” effect that made the whole wall look crooked. Now, I never touch a drill without a professional cabinet hardware jig. It locks onto the edge of the door and ensures every hole is identical down to the millimeter. If you’ve already messed up and noticed your handles aren’t lining up with the doors next to them, check out the 5-minute hinge adjustment for fixing wonky cabinet reveals before you start redrilling. Often, the door is just sagging on its hinges, not the handle being crooked. Using a jig also prevents the dreaded “drill bit walk” where the bit slips on a slick finish and ruins your expensive door.
The 33 Percent Rule for Large Drawer Fronts
When you are dealing with those massive 36-inch wide drawers designed for innovative storage solutions, a single small handle looks like a postage stamp on a billboard. You have two options: use one extra-long pull that spans about one-third of the drawer’s total width, or use two smaller pulls placed at the one-third and two-third marks. My personal preference is the single long horizontal pull. It reinforces the width of the room, making a small kitchen feel significantly broader and more custom. If you go the two-handle route, be warned: humans are naturally lazy. We usually pull from one side with one hand, which puts uneven torque on the drawer slides. Over time, this is why your drawer fronts are crooked and why the soft-close mechanism might start to fail. A single horizontal pull centered on the drawer prevents this mechanical fatigue entirely.
Center Your Grip for Heavy Lift Storage
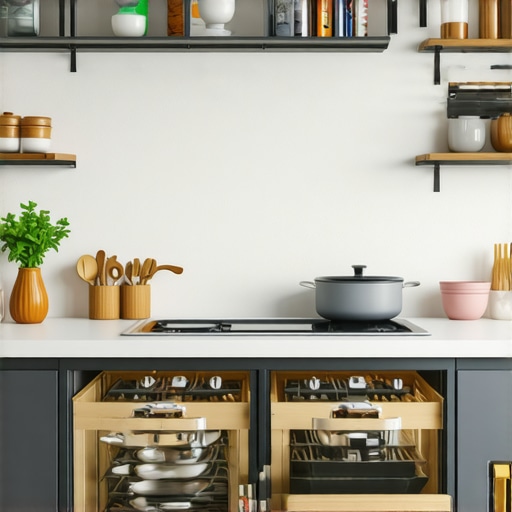
In modern kitchen remodels featuring custom cabinets and built-ins, we often install deep drawers for heavy appliances like mixers, blenders, or Dutch ovens. For these, the horizontal handle shouldn’t just be at the top; it needs to be centered vertically on the drawer front. This “dead-center” placement ensures that when you pull, the force is distributed evenly across the drawer box. I once installed a handle at the very top edge of a 15-inch deep drawer filled with cast iron skillet sets. Within a month, the faceplate began to pull away from the box because of the extreme leverage. By moving the handle to the center of the drawer face, you align the hardware with the center of gravity. It makes a 40-pound drawer feel like it weighs ten pounds, and it protects the integrity of your joinery for years to come.
However, even with the sturdiest joinery, I see one ‘pro’ mistake repeated in almost every high-end modern kitchen remodel: the obsession with filling every square inch of wall space. Most people believe that more cabinets automatically equate to a better kitchen. In reality, over-crowding your walls with uppers often creates a dark, boxed-in feeling that kills the room’s energy. I’ve started advocating for ‘negative space’—leaving sections of the wall open or using floating shelves to let the backsplash breathe. It sounds counterintuitive, but smart storage solutions for small kitchens in 2025 are shifting toward quality of access over quantity of volume. If you pack a room with boxes, you aren’t just storing dishes; you’re shrinking your living space.
The Odor Trap Most Designers Overlook
One ‘trap’ that even seasoned renovators fall into is the logic of appliance proximity. You’d think putting the waste bin right next to the heat source is efficient for prep, but why your garbage pull-out should never be next to the oven comes down to simple thermodynamics. Heat accelerates the decomposition of organic waste, leading to odors that can permeate your expensive custom cabinets. It’s a subtle nuance, but failing to account for ‘micro-climates’ in your kitchen layout is a hallmark of a beginner’s floor plan. I always tell my clients: design for the nose as much as the eyes. According to a study by the Research Institute for Cooking & Kitchen Intelligence (RICKI), nearly 40% of homeowners regret not spending more time on the functional layout before selecting their cabinet finishes. This lack of foresight often leads to ‘collision zones’ where the dishwasher door blocks the trash or the fridge hits the island.
Can Your Cabinet Depth Actually Sabotage Your Workflow?
Most builders stick to the standard 24-inch depth for base cabinets because it’s easy. But for serious cooks, that depth can become a ‘black hole’ where small appliances go to die. This is where the deep drawer move for storing blenders and food processors becomes essential. Instead of deep, dark shelves, go for full-extension drawers. If you’re building built-ins and creative storage, consider varying your depths. A 15-inch deep pantry often outperforms a 24-inch one because nothing can hide in the back. I once saw a client lose an entire stand mixer for two years simply because it was buried behind a stack of crockpots in a standard-depth base cabinet. Have you ever fallen into this trap? Have you ever reached for a spice only to find a jar of honey from three years ago buried in a corner? Let me know in the comments if you’ve ever had to excavate your own cabinets!
Maintaining the visual perfection of your custom cabinets isn’t a ‘one and done’ task. Even the most stunning modern kitchen remodels featuring custom cabinets and built-ins require a bit of mechanical TLC every few years to stay in peak condition. One tool I absolutely refuse to work without is a professional-grade adjustable hardware jig. I personally use the Kreg version because it features hardened steel drill guides that prevent the bit from wandering. When you are drilling into expensive maple or oak, a half-millimeter mistake can make your handles look like a crooked smile. If you’re currently planning a stylish kitchen overhaul, don’t trust your investment to a cheap plastic template that wears down after the fifth hole.
How do I maintain my cabinet alignment over time?
Most homeowners ignore their hinges until a door literally stops closing or starts scraping the frame. I recommend a ‘hinge audit’ every six months. If you notice a gap widening between your doors, it’s time to learn how to adjust European hinges for a perfectly level door reveal. A simple quarter-turn of the adjustment screw can prevent the wood from rubbing, which is the primary cause of paint chipping on the edges. According to the Architectural Woodwork Institute (AWI), maintaining a consistent indoor relative humidity between 25% and 55% is the single most important factor for wood cabinetry longevity. If your home swings outside these ranges during the seasons, you’ll see joints opening or doors warping, regardless of how well they were built. I always keep a small digital hygrometer inside my pantry to monitor this.
Looking ahead, the next decade of kitchen design is moving toward a ‘zero-hardware’ aesthetic. While I love the tactile feel of a solid brass pull, integrated finger channels and high-tension touch-to-open latches are becoming the gold standard for smart storage solutions for small kitchens in 2025. We are seeing a massive shift where built-ins and storage hacks for a sleek functional kitchen are designed to disappear into the architecture entirely. If your current drawers are starting to feel heavy or ‘crunchy,’ don’t wait for the hardware to seize up entirely. It is vital to understand why your soft-close slides grind and the quick lubrication fix before the ball bearings fail and score the metal tracks.
To truly scale your storage capacity, look for expert tips on selecting storage solutions for a perfect kitchen upgrade that focus on maximizing the ‘dead space’ above your uppers. Most people waste the top 12 inches of their room, but by extending custom cabinets to the ceiling, you gain a massive amount of real estate for those once-a-year items like holiday platters or oversized stock pots. My challenge for you this week: take five minutes to grab a screwdriver and tighten the mounting screws on your most-used drawer pulls. A loose handle creates tiny vibrations every time it’s pulled, which acts like sandpaper on your cabinet’s finish over time. Tightening them now is a free fix that adds years to your kitchen’s lifespan.
The Hardest Lesson I Learned About Hardware Fatigue
After years of installing custom cabinets, I’ve realized that the smallest details cause the most long-term grief. Here are a few lightbulb moments that changed how I approach every kitchen remodel:
- The Shadow Test: Before I drill a single hole, I use blue painter’s tape to mock up every handle. I leave it for 24 hours to see how the natural light hits the hardware throughout the day. It has saved me from awkward glares and shadow-heavy placements more times than I can count.
- Never Trust the Factory Screws: Most hardware comes with cheap, breakable screws. I always swap them for high-quality fasteners. Knowing why your base cabinets should be secured with 3-inch rugged screws applies to the hardware too—structural integrity starts with the metal you cannot see.
- The Psychology of Silence: A high-end kitchen doesn’t just look good; it sounds good. Beyond the handle placement, I always invest in the secret to a quiet kitchen: dampening your cabinet doors with high-quality felt or silicone bumpers to match the premium feel of the hardware.
The Essential Toolkit for Professional Hardware Installation
#IMAGE_PLACEHOLDER_E#
If you are serious about taking your storage solutions to the next level, you need more than just a standard screwdriver. These are the items I trust to get the job done right every time:
- The Kreg Cabinet Hardware Jig: This tool eliminates the guesswork and ensures that every horizontal pull is perfectly parallel to the floor, avoiding the dreaded slanted look.
- Self-Centering Vix Bits: These ensure your pilot hole is dead-center. Without it, your screw will pull the handle slightly to one side as you tighten it, ruining your alignment.
- Digital Hygrometer: To protect your built-ins and creative storage, you need to monitor the environment. Wood is a living material, and keeping track of humidity prevents the warping that ruins hardware spacing.
Create a Space That Actually Works With You
Your kitchen should be a sanctuary, not a source of frustration or snagged pockets. Whether you are following an expert guide to custom cabinets for 2025 or just refreshing your current hardware, remember that design should serve your lifestyle. Do not be afraid to break standard rules if a horizontal orientation makes your movement more fluid and your workspace more ergonomic. If you ever feel overwhelmed by these technical decisions, feel free to reach out to us; we love helping homeowners navigate the tiny details that make a massive difference in home value. Have you ever had a specific piece of hardware that drove you crazy every single day because of how it was installed? Let me know in the comments below!