How to Choose the Right Finish for Your Kitchen Hardware
I spent three months obsessing over wood grains and paint swatches for my custom cabinets, feeling like a total pro. Then, the installer asked, “Where are the pulls?” My heart sank. I’d treated hardware as an afterthought, a last-minute dash to the hardware store that resulted in a mismatched mess of finishes that didn’t just look off—they felt cheap against my beautiful stylish kitchen overhaul. It’s the “jewelry” of the room, yet so many of us treat it like a generic grocery list item. Today, I’m going to help you avoid my early blunders and show you how to pick a finish that actually complements your home’s soul. [image_placeholder]
Pick a finish that survives your real life
Choosing a finish isn’t just about looking at a pretty Pinterest board; it’s about knowing how much you actually clean. My biggest mistake early on was falling in love with a delicate, unlacquered brass. It looked stunning for a week, then developed a “patina” that just looked like dirty fingerprints because I have three kids and a dog. If you’re going through a modern kitchen remodel, you need to be honest: are you a “wipe-down every night” person or a “let it ride” person?
Does the finish really matter if the cabinets are top-tier?
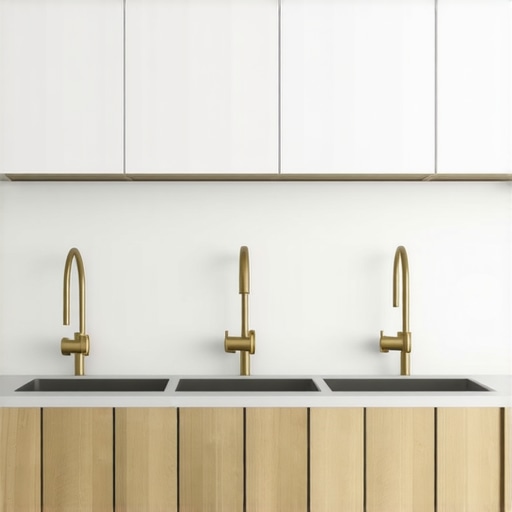
You might think that if you’ve invested in high-end dovetail drawers and premium wood, the handles are secondary. But the wrong finish can actually make expensive cabinetry look dated or, worse, DIY-gone-wrong. Interestingly, the National Kitchen & Bath Association (NKBA) notes that while matte black is a top trend, it requires significantly more maintenance than brushed tones to keep it from looking chalky or water-stained. I learned the hard way that cleaning matte black hardware requires a specific touch that I just didn’t have time for. Have you ever installed a set of “matching” handles only to find out they were three different shades of gold once you got them under your LEDs? Tell me I’m not the only one who has suffered through that frustration! We want to make sure your hardware survives the daily grind while keeping that “just finished” glow. Let’s break down how to actually choose the right metal for your specific space.I once ordered ‘satin brass’ handles from three different online vendors, thinking they’d all be close enough. When the boxes arrived, I had one that looked like a neon yellow highlighter, one that was practically chocolate brown, and one that actually looked like brass. If I had just screwed them onto my custom cabinets as a game-changer in your kitchen remodel journey without checking, the whole kitchen would have felt disjointed. That’s why your first step is to never trust the stock photo on your screen.
Order a sample of every finish you are considering
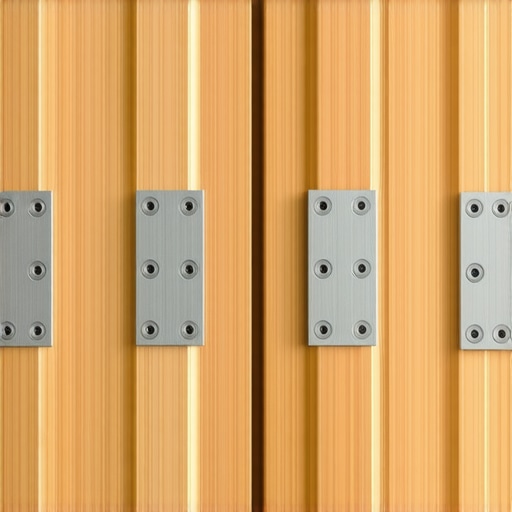
Buying a single knob or pull might feel like a waste of shipping money, but it is the cheapest insurance policy you will ever buy. Metal finishes react wildly to the specific light in your home. A champagne bronze that looks sophisticated in a bright showroom might look like muddy plastic in a kitchen with limited natural light. While you are at it, check how to pick the right hinge overlay for frameless cabinets to ensure your visible hardware matches your interior mechanicals.
Test the metal against your kitchen LEDs
Most modern kitchens use LED bulbs that range from warm yellow to clinical blue. A cool-toned chrome will look crisp under blue-tinted lights but can look cheap and sterile under warm lighting. Conversely, warm copper or gold finishes can look ‘dirty’ if your lighting is too cool. Hold your sample against your cabinet doors at 8:00 AM, noon, and 6:00 PM. This is especially vital if you are integrating innovative storage solutions for modern kitchen remodels where hardware is frequently touched and viewed from multiple angles. 
Choose the right shape to prevent pocket snags
Execution isn’t just about color; it’s about physics. I can’t tell you how many times I’ve seen homeowners choose beautiful ‘T-bar’ pulls only to realize they constantly hook onto the pockets of their jeans or the loops of their aprons. It sounds like a minor annoyance until it rips your favorite pants or causes a spill. Learning how to choose cabinet pulls that wont catch on your pockets is a practical necessity that many designers overlook in favor of aesthetics. If you have a high-traffic area, stick to ‘D’ shaped pulls or knobs with rounded edges.
Drill with a template for precision
Once you have the perfect finish, do not ‘eyeball’ the installation. Even a sixteenth of an inch of variance will be glaringly obvious when the light hits the metal. Use a dedicated hardware jig or template to ensure every hole is identical across every door. Knowing the best way to drill holes for new cabinet hardware involves clamping the guide to the door so it cannot shift mid-drill. I remember rushing a bathroom vanity and ending up with a ‘smiling’ handle that sat at a slight angle—it drove me so crazy I had to replace the entire drawer front. Take the extra five minutes to measure twice, clamp the jig, and drill once.While hardware is the jewelry of the room, the foundation is where the most expensive ‘oops’ moments occur. A common belief in many DIY circles is that you should run your flooring wall-to-wall before the cabinets arrive to ensure a ‘cleaner’ look. In my experience, this is the quickest way to ruin a high-end modern kitchen remodel. If you are using floating materials like LVP, you are essentially pinning the floor down with thousands of pounds of cabinetry, preventing the natural expansion and contraction required for the material to survive seasonal shifts. This is exactly why luxury vinyl plank should not be trapped under your base cabinets. To avoid buckling or unsightly gaps, you should always install your base cabinets before your flooring and use the toe kick to hide the necessary expansion gap. 
Stop treating your pantry like a static bookshelf
Another hill I will die on is the ‘fixed shelf’ trend. Some designers prefer the look of fixed shelves because they appear more like high-end furniture, but unless you plan on buying the exact same size of cereal boxes and flour canisters for the next twenty years, you are creating a functional nightmare. Real life is messy and your storage needs will fluctuate. This is why your pantry shelves should be adjustable, not fixed. According to research by the National Kitchen & Bath Association (NKBA), flexibility in cabinetry is a primary driver of long-term homeowner satisfaction in built-ins and storage hacks for a sleek, functional kitchen. Don’t let a quest for ‘symmetry’ rob you of the ability to fit a tall stand mixer later.
Will a standard 36-inch counter height actually save your back?
Most builders default to a 36-inch finished height because it’s the industry standard, but for the advanced home chef, this is often an ergonomic compromise. If you are significantly taller or shorter than the ‘average’ person, that standard height can cause chronic shoulder or lower back strain. For clients who do a lot of heavy kneading or prep work, we often discuss why your kitchen island should be two inches taller than your perimeter counters. It’s these tiny, one-percent adjustments—not just the paint color—that separate a basic update from a custom cabinets as a game-changer in your kitchen remodel journey. Have you ever fallen into the ‘floor first’ trap or regretted a fixed-shelf design? Let me know in the comments.Keeping the momentum of a remodel alive requires moving past the ‘pretty’ phase and into the ‘performance’ phase. If you want your transform your kitchen with custom cabinets expert guide for 2025 to actually hold its value, you need to think like a builder, not just a decorator. I’ve seen stunning kitchens fall apart within three years because the homeowner didn’t understand the physics of wood or the chemistry of a finish.
The one tool that keeps my installs perfectly level
I don’t care how expensive your level is; if it’s a bubble level, you’re playing a guessing game. When I’m working on built-ins that elevate your living rooms functionality, I exclusively use a self-leveling cross-line laser. Why? Because houses are living things—they breathe, they settle, and they are rarely ever truly ‘square.’ A laser gives you a continuous ‘line of truth’ across the entire room. If you are trying the secret to installing heavy pantry pull outs solo, that laser line ensures your tracks are perfectly parallel even if your floor has a subtle dip. Without it, you’ll be fighting why your drawer fronts are crooked and the adjuster screw fix for the rest of your life.
How do I keep my custom cabinets looking new for a decade?
Maintenance isn’t just about a weekly wipe-down. It’s about understanding what actually kills a finish. According to the Kitchen Cabinet Manufacturers Association (KCMA) ANSI/KCMA A161.1 standard, cabinet finishes are tested against everything from vinegar to boiling water. However, these tests don’t always account for the ‘slow burn’ of cooking grease. If you don’t perform a deep de-grease every six months, that film becomes a magnet for dust, which eventually acts like sandpaper on your lacquer. I always tell my clients that why your indianapolis kitchen cabinet paint quote includes a mandatory de-greasing step isn’t just for the painters—it’s for you too. Use a non-alkaline, mild soap; avoid anything with ammonia, which can cloud the topcoat of a stylish kitchen overhaul. 
Smart cabinets are the next frontier
Looking ahead, I predict we will see a massive shift toward ‘active’ cabinetry. We are already seeing innovative storage solutions for modern kitchen remodels that include integrated sensors for leak detection. Imagine your sink base sending a notification to your phone the second a pipe drips, rather than discovering a warped cabinet floor six months later. This is why I always insist that why your sink cabinet needs a drip tray right now is the single most important ‘insurance’ item in your kitchen. If you’re ready to take the next step, I challenge you to go out and buy a single hardware template jig before you drill your next hole—it is the one small purchase that will save you hours of frustration and potentially thousands in ruined door fronts.
Finishing a kitchen project is often more mentally taxing than starting one. After weeks of decisions, it’s easy to let your guard down right when the most visible details are being installed. I’ve learned that the difference between a kitchen that looks ‘done’ and one that looks ‘designed’ lives in the final 5% of the work. Let’s look at the hard-won wisdom that only comes from years of trial, error, and a few stripped screws.
Hard Truths from the Back of My Toolbelt
Over the years, I’ve realized that the industry ‘standard’ is often just a baseline for mediocrity. For instance, many people forget that why your pantry shelves should be adjustable, not fixed is about more than just convenience—it is about future-proofing your home against changing lifestyle needs. I’ve seen beautiful, fixed-shelf pantries become obsolete the moment a homeowner buys a bulk-sized air fryer that won’t fit the gaps.
Another lesson that cost me a lot of pride: never trust a wall to be straight. If you are trying to figure out how to align cabinet doors when your walls are out of plumb, you’ll quickly learn that shims and patience are your best friends. Don’t force a cabinet into a corner that isn’t square; scribe it to fit the wall instead. This is especially true when you are working on built-ins that elevate your living rooms functionality, where gaps against the drywall can ruin the custom look instantly.
Lastly, don’t overlook the ‘invisible’ comfort. We often talk about why we recommend 36-inch base cabinets for every modern remodel, but if you are an avid baker, you might actually need a lower section for kneading dough. Design for your body, not for the next person who might buy your house ten years from now.
[image_placeholder]
The Gear That Separates Pros from Amateurs
If you want your kitchen to survive the ‘real life’ test, you need to invest in the right protective and precision tools. I never start a sink installation without explaining why your sink cabinet needs a drip tray right now; it is the cheapest way to prevent a slow leak from rotting your expensive woodwork. For the installation phase, I swear by a dedicated hardware jig. Learning the best way to drill holes for new cabinet hardware with a physical guide ensures that your handles aren’t ‘stepping’ up or down across a row of drawers. I also highly recommend the NKBA (National Kitchen & Bath Association) planning guidelines for anyone attempting to DIY their layout—it’s the bible of ergonomic kitchen design that helps you avoid ‘clash points’ where doors hit appliances.
Build a Space That Feeds Your Soul
A successful renovation isn’t just about the resale value; it’s about creating a sanctuary where you actually want to spend your Tuesday nights. When you choose to use custom cabinets as a game-changer in your kitchen remodel journey, you aren’t just buying boxes; you are buying a workflow that matches your specific rhythm. Don’t be afraid to break the rules or choose a bold finish if it makes you happy every time you walk into the room. Your home should be a reflection of your life, not a carbon copy of a showroom floor. Have you ever had to redo a ‘finished’ part of your kitchen because a small detail like the hardware height drove you crazy? Let me know in the comments below!