The Mudroom Bench Trick for Storing Tall Winter Boots
I will never forget the morning I tripped over my own dignity—and a pair of soggy, size-10 winter boots—right in my own entryway. It was mid-February, the floor was a slushy mess of salt and melted snow, and my expensive tall boots were slumped over like tired toddlers, completely blocking the path to the door. I had spent a fortune on those boots, only to watch them develop permanent, ugly creases because they simply did not fit in my standard mudroom cubbies. That was my lightbulb moment: standard furniture is almost always the enemy of a functional home. Today, I am sharing the exact mudroom bench trick that saved my sanity and my footwear. We are not just talking about buying a bigger box; we are talking about a specific design tweak that handles those tall UGGs and Sorel rain boots without them flopping over or eating up all your precious floor space.
Stop Tripping Over the Boot Pile
Living in a place where winter lasts five months means you cannot just ignore the entryway chaos. I made the massive mistake early on of thinking built-ins and storage hacks were strictly for the kitchen. I was wrong. My first attempt at a mudroom solution was a weekend DIY project where I built simple, uniform square cubbies. Within a week, the knee-high boots were shoved in sideways, leaking salty water onto the finish and ruining the look. The secret isn’t just more space—it is specialized verticality. By integrating a boot notch into built-ins that elevate your living rooms functionality, you create a dedicated home for those 15-inch shafts. According to research from the National Association of Home Builders, a well-organized entryway can reduce household stress levels by significantly cutting down on morning departure times. Have you ever lost a battle with a pair of floppy rain boots while trying to get out the door?
Is a custom bench actually worth the hype?
You might be asking yourself if you can just buy a plastic tray from a big-box store and call it a day. Sure, you can, if you enjoy looking at a cluttered mess every single time you walk through your front door. A plastic tray is a temporary band-aid, but a custom-designed bench is a permanent cure. When you look at maximizing space with innovative storage solutions for every room, the mudroom is where you get the most bang for your buck in terms of daily lifestyle improvement.
The Secret of the Tall-Boy Notch
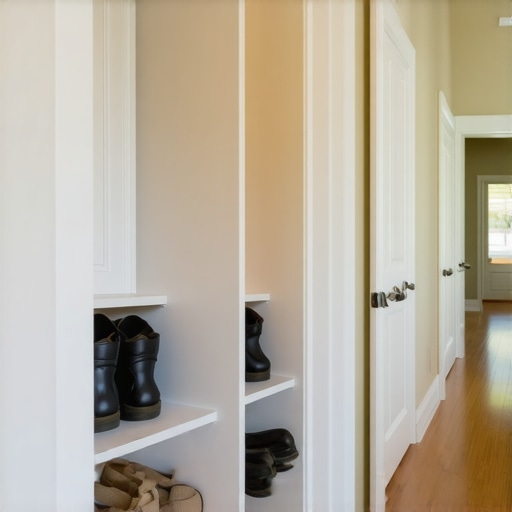
I have seen too many homeowners fall into the mudroom bench trap where they prioritize a symmetrical look over the actual height of their winter gear. My realization happened when I visited a client who had used a piano hinge on only half of their bench seat. One side stayed fixed for sitting, while the other side lifted to reveal a deep, narrow well specifically for tall winter gear. It is a total game-changer. Instead of forcing a 16-inch boot into a 12-inch cubby, you let the boot stand tall. This prevents that annoying floppy boot look and keeps the leather from cracking. If you are currently planning modern kitchen remodels featuring custom cabinets and built-ins, you should apply that same logic to your mudroom. Don’t let a builder give you the standard layout; demand the specialized boot notch.I will never forget a project in Novi where I built a beautiful, symmetrical mudroom set for a family of five. Three weeks later, I got a sheepish call. The wife’s expensive leather riding boots were being crushed under the weight of the bench lid because the cubbies were exactly two inches too short. I had to go back and retro-fit the entire base. It was a messy, expensive lesson in why you must measure the boot, not the furniture. When you transition from general concepts to actual construction, the first rule is to stop guessing. Take your tallest pair of Sorels or Uggs, measure from the heel to the top of the shaft, and add two inches for ‘grab room.’
Map Out Your Boot Well Depth
Most people think a bench should be a solid box, but the secret to handling tall footwear is the split-level floor. You want a standard seating height of 18 inches—anything higher and your feet dangle like a kid in a high chair—but you need the internal storage to drop lower. By designing a ‘sunken’ floor within the bench, you can accommodate a 22-inch boot while keeping the exterior looking sleek and proportional. If you are currently browsing modern kitchen remodels featuring custom cabinets and built-ins, you can apply this same ‘hidden depth’ logic to your entryway.
Stop Choosing Materials That Rot in Three Years
Entryways are wet zones. Period. If you use cheap materials, you are basically building a ticking time bomb for mold. I always tell my clients that why plywood box construction still beats particle board for kitchens is the exact same reason it is mandatory for mudrooms. Particle board acts like a sponge; one season of melting snow and your bench will swell and crumble. To go a step further, I often use the Vancouver plumber trick why waterproof liners are mandatory for custom sink bases inside the boot well. It sounds like overkill until you realize you can just wipe out the salt and slush without ever touching the wood.
The Hinge Choice That Prevents Slammed Fingers
A heavy oak or maple bench top is a guillotine for little fingers if you don’t use the right hardware. I learned this the hard way when a heavy lid almost took out my own thumb during a test fit. You need to leverage the bench seat secret using piano hinges for no-slam toy boxes. A piano hinge distributes the weight across the entire length of the bench, preventing the wood from warping over time and allowing for a much smoother opening. This is especially critical if you have opted for a ‘Tall-Boy Notch’ where only half the bench lifts up.
Build for the Slant in Your Floor
Entryway floors are rarely level. Whether it is an old farmhouse or a new build, there is usually a slight pitch toward the door for drainage. If you bolt a custom bench directly to a slanted floor, the lid will never sit flush and the doors will eventually rub. This is why why every base cabinet needs adjustable feet on uneven concrete is a non-negotiable step in my process. You level the cabinet first, then use a toe-kick or a scribe mold to hide the gap. This ensures that the mudroom shoe pile fix vertical cubbies with mesh backs look intentional and high-end rather than a DIY project gone wrong. Keep in mind that a well-built bench must also breathe; trap a damp boot in a sealed box and you will have a mildew problem by April. Integrating small, subtle vents or mesh panels in the rear allows for the necessary airflow to dry out your gear overnight.Building a mudroom bench isn’t just about the wood; it is about the physics of daily life. Most designers will tell you that symmetry is the holy grail of a high-end look, but I am here to tell you that symmetry is often the death of a truly functional home. When you obsess over making the left side of your mudroom match the right perfectly, you end up with ‘filler’ space that does nothing but collect dust. Real luxury isn’t about two identical wardrobes; it is about custom cabinets ideas that transform your homes style by adapting to how you actually live. Have you ever fallen into this trap? Let me know in the comments.
Ditch the Symmetry Trap for Real Function
I have noticed a common mistake in innovative storage solutions for modern kitchen remodels: people sacrifice vertical clearance for visual balance. If you have one tall cabinet for brooms and another that ‘looks’ the same but only houses small shelves, you are wasting the chance for the hidden pantry secret turning a 4-inch gap into a spice wall. Research from the National Kitchen & Bath Association (NKBA) emphasizes that ergonomic zoning—placing items exactly where they are used—is far more critical for long-term satisfaction than a mirrored layout.
The Load-Bearing Secret Your Contractor Might Miss
One of the biggest ‘oops’ factors I see is homeowners choosing heavy quartz or quartzite countertops without checking their cabinet’s skeletal system. It is a terrifying sight to see a $5,000 stone slab start to bow the center of a base cabinet because there was no mid-span support. This is exactly why plywood box construction still wins over furniture board in wet areas and high-stress zones. Particle board simply does not have the shear strength to hold that weight over a ten-year span without sagging. 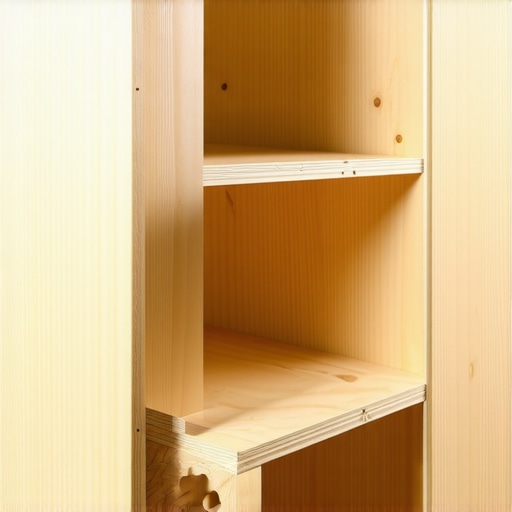
Can your cabinet boxes actually survive a 3cm stone slab?
It isn’t just about the box material, though. If you don’t use the hardware mistake that makes expensive cabinets look cheap as a cautionary tale, you might forget that the screws holding those boxes together are the real unsung heroes. I always insist on using 2.5-inch screws directly into the studs, especially for upper units. Also, do not forget the finish! I have seen gorgeous installs ruined because homeowners did not realize why your cabinet paint bubbles near the stove and how to prevent it. Without proper heat shields near the oven, even the most expensive custom paint will eventually fail. When you are planning custom cabinets as a game changer in your kitchen remodel journey, you must focus on the ‘guts’ of the cabinet as much as the doors.Even the most expensive cabinetry will fail if you treat it like a ‘set it and forget it’ appliance. I have seen stunning installations in high-end homes go to seed in less than five years because the homeowners didn’t understand the physical reality of wood in a living environment. Wood is a breathing, moving organism, even after it is chopped, dried, and painted. If you want your investment to last a lifetime, you need to transition from the ‘builder mindset’ to a ‘caretaker mindset.’
Keep Your Investment from Falling Apart
The single biggest threat to your custom work isn’t wear and tear—it is humidity. I always tell my clients that why solid wood door panels still need room to breathe in summer is the most important lesson in wood science. When the air gets thick in July, your doors will swell; when the furnace kicks on in December, they will shrink. If you have inset cabinetry, you will likely notice the inset cabinet gap re-aligning doors after seasonal humidity changes is a necessary ritual. Don’t panic when a door rubs slightly in August; it is simply the house doing what nature intended. According to the Architectural Woodwork Institute (AWI), maintaining a consistent interior relative humidity between 25% and 55% is critical to prevent permanent structural damage to high-end joinery.
The One Tool I Refuse to Work Without
People often ask what fancy laser or computerized saw I use most, but the truth is much simpler. My secret weapon for a flawless finish is a high-precision hardware jig. I personally use the True Position Drill Guide because it eliminates the ‘human error’ of a wandering drill bit. Using the one tool you need for perfectly aligned cabinet knobs every time ensures that your handles aren’t just ‘close enough,’ but mathematically perfect. If your knobs are off by even a sixteenth of an inch, your eye will catch it every time you walk into the room, making even modern kitchen remodels featuring custom cabinets and built-ins look like a rush job.
How do I maintain these high-end finishes over time?
Maintenance isn’t just about cleaning; it is about mechanical upkeep. Every six months, you should go through your kitchen and check your moving parts. If you hear a squeak or feel resistance, investigate it immediately. Often, the real reason your cabinet drawer slides are grinding is just a bit of grit or a loose screw that takes thirty seconds to fix. I also recommend knowing why your soft close slides grind and the quick lubrication fix to keep that ‘luxury feel’ when you close a drawer. For the doors themselves, learn how to adjust european hinges for a perfectly level door reveal. A simple turn of a screwdriver can take a sagging door and make it look brand new again.
Expect More from Your Walls in 2026
Looking ahead, the trend for custom storage is moving toward ‘invisible integration.’ We are seeing a massive shift away from bulky, stand-alone pieces toward built-ins that elevate your living rooms functionality by hiding tech behind specialized panels. Think motorized spice racks and hidden charging stations tucked into toe-kicks. The future is about making the home work for you, not you working around the home’s limitations. If you are starting a project now, I challenge you to look at your most annoying daily task—whether it’s digging for a lid or tripping over a boot—and design a custom solution specifically for that one pain point. Go ahead, grab a screwdriver this weekend and check the tension on your most-used cabinet door; you will be amazed at how a tiny adjustment changes the whole feel of your kitchen.
The Hardest Lessons My Toolbelt Taught Me
Reflecting on years of sawdust and satisfied clients, I’ve realized that the most beautiful custom cabinets are useless if they don’t respect the laws of physics. Here are the lightbulb moments that changed how I approach every storage project. First, never build a cubby that fits a boot perfectly; if it fits like a glove, you can’t get your hand in to pull it out. Always add at least two inches of ‘grab room’ at the top of your tall-boy notch. Second, understand that why you should never glue cabinet doors into the frames is a rule that applies just as much to mudrooms as it does to kitchens. Wood needs to move, and fighting that movement only leads to cracked joints. Finally, remember that a cheap hinge is a liability. I’ve seen high-end projects ruined by bargain-bin hardware that sags within a year. You can easily avoid the hardware mistake that makes expensive cabinets look cheap by choosing high-cycle rated European hardware from the start.
A Few Tools and Resources to Get You Started
If you are ready to move beyond the big-box store mindset, you need the right reference points. I personally rely on the Architectural Woodwork Institute (AWI) for their humidity standards—it is the gold standard for anyone serious about professional woodworking. For the actual installation phase, I never leave my shop without a high-precision hardware jig; it is the only way to ensure your handles are mathematically perfect. If you are currently designing for tight quarters, I highly recommend browsing smart storage solutions for small kitchens in 2025 to see how the industry is maximizing every square inch of the modern home. For those looking for professional guidance, you can always contact us to discuss how specialized storage solutions can fix your specific home layout issues.
Stop Planning and Start Building Your Dream Space
The journey to a truly functional home doesn’t happen overnight, but it does start with a single decision to prioritize quality and ergonomics over cheap convenience. Whether you are tackling a full kitchen remodel or just trying to fix the mountain of boots in your entryway, remember that your home should adapt to your lifestyle, not the other way around. Don’t be afraid to demand the ‘Tall-Boy Notch’ or the hidden depths that make a house feel custom. You deserve a space that handles the chaos of daily life with ease and style. Have you ever struggled with a storage layout that looked great on paper but failed in real life? Let me know in the comments below!