The Toekick Vacuum: Why We Add Suction Points to Every Base Cabinet
It was late one Saturday afternoon when I finally opened my kitchen cabinet under the sink and promptly cursed the mountain of dust, crumbs, and pet hair that had accumulated there—despite my best cleaning efforts. That moment of frustration was my lightbulb moment. I realized traditional gaps at the base of cabinets weren’t just an eyesore—they were a magnet for dirt and chaos. Since then, I’ve been on a mission to understand how to keep these hidden spaces cleaner and more functional.
Transforming the Hidden Space Beneath Your Cabinets
In my quest, I stumbled upon a game-changing idea: adding suction points to every base cabinet with a cleverly designed Toekick Vacuum system. This isn’t just about convenience; it’s about rethinking storage and cleanliness altogether. By integrating suction points, we can effortlessly sweep away debris every time we walk through the kitchen, keeping our spaces pristine without extra effort. Today, I’ll walk you through how this simple addition can make your kitchen smarter and more inviting.
Is the Hype About Toekick Vacuums Just Overblown?
Honestly, I was skeptical at first. I’d seen various vacuum attachments and storage hacks before, but nothing seemed to stick or deliver consistent results. Early on, I made the mistake of thinking that regular sweeping was enough, only to realize how much dust and crumbs lurked in the corners, waiting for the next big mess. Once I installed suction points and paired them with a portable vacuum, I saw an immediate difference: my kitchen stayed cleaner with almost no extra effort. If you’re like me and dread the never-ending struggle with baseboard clutter, then this might just be the upgrade you didn’t know you needed.
Curious to see how it works? Let’s dive into the ins and outs of making your cabinets smarter and why the little details matter in your remodel. Whether you’re considering a full renovation or just a quick upgrade, I’ll share tips on how to maximize space and keep your kitchen looking its best. For broader ideas, don’t miss the recent insights on [smart storage solutions for small kitchens](https://artisancabinetworkz.com/smart-storage-solutions-for-small-kitchens-in-2025) that can revolutionize your entire home. Ready to transform those hidden gaps into powered cleaning stations? Let’s get started.
Design Your Suction Points for Efficiency
Start by measuring each base cabinet’s width and identifying optimal locations for the suction ports—preferably where debris tends to accumulate most, like near high-traffic areas or food prep zones. Use masking tape to outline the desired placement, ensuring alignment and accessibility. This approach allows you to visualize the layout and make adjustments before drilling.
Marking Precise Locations
Use a ruler and level to draw straight lines for the suction port centers. For example, in my recent remodel, I marked the ports about 4 inches from the cabinet edges, which kept the hoses manageable and unobtrusive. Precise marking prevents misalignment and makes the installation smoother, especially on uneven cabinet bases.
Cutting and Preparing the Cabinet
Next, drill small pilot holes through the marked spots using a drill bit slightly smaller than your chosen hole saw or hole cutter. For example, I used a 1.5-inch hole saw to ensure a snug fit for the suction ports. Be cautious of underlying wiring or plumbing—use a stud finder or probe if necessary. Wear safety goggles to protect from sawdust and debris during cutting.
Installing the Ports and Connecting the Hose
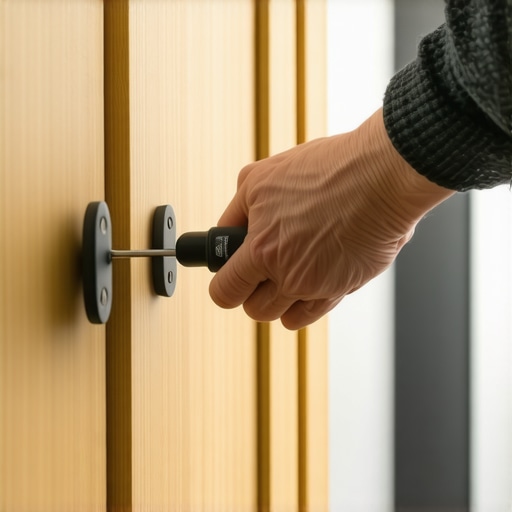
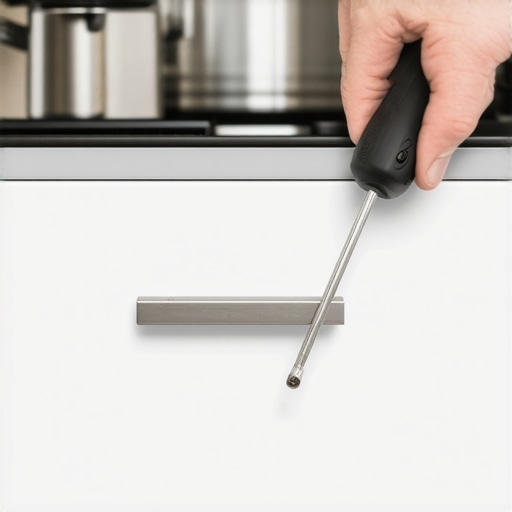
Insert the suction ports into the cut holes, securing them with the provided screws or fittings—tighten evenly to avoid gaps. Connect flexible hoses to each port, routing them neatly along the cabinet’s interior. Use cable clips or adhesive mounts to keep hoses in place, preventing sagging or pinching when opening drawers or doors.
Integrate the System with Your Vacuum
Link all hoses to a central vacuum unit using a manifold or splitter, ideally installed in an accessible spot such as the garage or utility room. When I installed mine, I renamed the system to ‘kitchen cleanup’ for quick activation. Ensure all connections are airtight to maintain strong suction; test each port for airflow before finishing the setup.
Testing and Fine-Tuning
Power on your vacuum and check each port for debris suction. Adjust hose positions or tighten fittings if necessary. In my case, I found that a few ports needed slight realignment to optimize airflow—small adjustments can significantly improve performance. Regularly inspect the ports and hoses for wear or obstructions, replacing parts as needed to keep the system efficient.
Maximize Space with Built-In Solutions
Installing a Toekick Vacuum isn’t just about cleaning; it transforms your cabinet base into a smart storage hub. Consider integrating outlets or organizing accessories nearby to enhance functionality. For example, adding a power strip in the cabinet space, as shown in this article, can streamline your kitchen workflow and storage.
When embarking on a kitchen renovation, many homeowners fall prey to misconceptions that can hinder the process and lead to less-than-ideal results. One widespread myth is that custom cabinets are always prohibitively expensive and only suitable for high-end projects. While it’s true that bespoke cabinetry often costs more upfront, their tailored fit and superior quality can save money over time by reducing the need for replacements or extensive modifications. Additionally, many believe that standard cabinets with minor modifications can substitute for custom solutions, but this overlooks the significance of precise measurements and optimally designed storage, especially in smaller or uniquely shaped kitchens. For example, if you want to maximize space and accessibility, investing in custom-built units can make a tangible difference. Learn more about innovative storage techniques that can revolutionize your small kitchen by visiting this guide.
Many assume that all built-ins are merely aesthetic add-ons, but the reality is that they can be strategically designed to enhance functionality. Integrated features like hidden charging stations or pull-out spice racks often get overlooked, yet they can significantly improve workflow efficiency. Moreover, there’s a common misconception that quality craftsmanship is incompatible with modern minimalism, which isn’t true at all. Skilled artisans can create sleek, minimalist designs that blend form and function seamlessly. For instance, a well-executed inset door adds a clean look without sacrificing durability, a choice recommended by experts in this article.
Now, let’s tackle an advanced question: How does the selection of woodworking materials influence the longevity of custom cabinets in humid environments? Many think that any solid wood will perform equally, but the reality is different. Woods with low moisture absorption, like cedar or certain treated hardwoods, resist warping and cracking better in high-humidity settings. Conversely, softer woods or those with high porosity tend to swell or degrade over time, especially if not properly sealed. According to a recent study by the Wood Science Association, choosing the right wood species can extend the lifespan of cabinetry by up to 30%. Therefore, partnering with experienced craftsmen who understand these technical nuances ensures your investment lasts and maintains its aesthetic appeal for years to come.
Avoid falling into the trap of oversimplified solutions that overlook these critical details. Want to get the most out of your remodel? Reach out through our contact page for expert advice tailored to your specific needs. Remember, informed decisions make all the difference in creating a space that’s both beautiful and practical. Have you ever fallen into this trap? Let me know in the comments.Maintaining your custom cabinetry and kitchen upgrades requires more than just the initial investment; it’s about using the right tools and methods to ensure longevity and consistent performance. I rely on a few key equipment and software solutions that have proven their worth over countless remodeling projects. First, a high-quality orbital sander, like the Festool RTS series, is essential for finishing touches and periodic touch-ups to keep surfaces smooth and free of blemishes. Its variable speed control allows precise sanding without damaging delicate finishes, which is vital for maintaining the upscale look of custom cabinets.
How do I maintain my cabinetry and storage solutions over time
Regular cleaning with non-abrasive, pH-neutral cleaners, combined with periodic sealing of exposed wood surfaces, helps prevent moisture damage and staining. I also swear by a digital project management software such as Houzz Pro, which simplifies task tracking and collaboration with clients and suppliers—keeping the project on schedule and budget, reducing long-term issues caused by miscommunication. When it comes to long-term results, paying attention to hardware quality pays dividends; I always opt for soft-close hinges and full-extension slides from reputable brands like Blum. These components not only enhance usability but also extend the lifespan of cabinetry. Prediction-wise, I see the future trending toward smarter storage solutions integrated with IoT devices, which will enable homeowners to monitor and manage their storage spaces remotely. Staying ahead involves adopting these innovations early, ensuring your projects remain cutting-edge.
Implement smart storage tools to boost your kitchen’s function and durability
For example, installing a moisture meter like the Protimeter Surveymaster during the initial build helps identify potential humidity issues before they become costly problems. Regularly using such tools ensures you catch and address issues early, prolonging the life of your cabinets and surfaces. Ultimately, the secret to lasting Kitchen remodels is not just in high-quality materials but in maintaining a routine of checks and proper care. Incorporate maintenance practices into your project plans—like sealing exposed wood every few years or updating hardware as needed—and use the right tools to facilitate these tasks.
For aspiring remodelers or homeowners committed to durability, I highly recommend trying techniques like sealing cabinet edges with moisture-resistant products or periodically inspecting hardware. A small investment in these routines today can save significant costs and frustration down the road. Want to take your maintenance game further? Reach out through our contact page for expert advice on customizing long-term care strategies tailored to your cabinetry and storage solutions. Remember, proactive upkeep is your best friend—keeping your cabinets working flawlessly for years to come.
The Unexpected Wisdom from My First Mistakes
One of the most valuable lessons I learned was that patience beats rushed decisions, especially when customizing cabinetry. Instead of rushing through measurements and cuts, taking the extra time to plan thoroughly saved me headaches and perfect fits later. I also realized that investing in quality tools, like a precise hole saw and a digital level, can make the difference between amateurish results and professional finishings. Lastly, I discovered that small tweaks, like adjusting hose lengths or sealing tiny gaps, can drastically improve performance and longevity of integrated systems like a Toekick Vacuum, turning a simple upgrade into a game-changer for everyday cleanliness.