The Mudroom Locker Secret: Why Ventilation Is Non-Negotiable
I remember the day I finally finished our mudroom remodel. It looked like something straight off a Pinterest board—crisp white paint, custom hardware, and heavy, solid doors that hid every bit of family chaos. Then, a rainy Monday happened. My kids shoved their damp soccer cleats and rain-soaked hoodies into those beautiful cubbies and clicked the doors shut. Three days later, I opened a locker and was hit by a scent so foul I thought a small animal had crawled inside and died. It wasn’t just “gym smell”; it was the smell of damp neglect. I had spent thousands of dollars to build a set of high-end petri dishes. [image_placeholder_1]
Airflow is the secret ingredient for a functional mudroom
In my early days of designing cabinetry, I focused entirely on the aesthetics. I thought that if the joinery was tight and the finish was smooth, the job was a success. But I learned the hard way that when it comes to mudrooms, airtight is actually your enemy. If you are looking at custom cabinets ideas that transform your homes style, you have to consider how those cabinets will breathe. Without proper ventilation, moisture gets trapped against the wood. This doesn’t just make your clothes smell; it actually breaks down the cabinet itself. I’ve seen drawers swell and finishes peel simply because wet boots were left in a sealed box. It’s a mistake I see homeowners make constantly when they maximize space with innovative storage solutions for every room without thinking about the physics of damp gear.
Is all this extra venting actually worth the effort?
You might be skeptical. After all, shouldn’t a well-built cabinet be able to handle a little humidity? The truth is that mold doesn’t care how much you paid for your built-ins. According to the Building Science Corporation, mold can begin to grow on organic surfaces in as little as 24 to 48 hours when moisture is present and airflow is restricted. By the time you notice that musty odor, the spores have already moved in. In my own home, I eventually had to retrofit our lockers with louvers and mesh panels just to save the wood. I’m telling you this because I want your mudroom to stay as fresh as the day it was installed. If you’re planning a project, you need to treat airflow with the same respect you’d give a modern kitchen remodel featuring custom cabinets where steam and heat are constant factors. Have you ever noticed a lingering funk in your entry closet that just won’t go away no matter how many air fresheners you use? That’s your house crying out for a breeze. We’re going to dive into exactly how to build that ventilation in without sacrificing the sleek look you’re after, including the mudroom bench trick for storing tall winter boots that keeps the air moving and the floors dry. Whether you’re working with a professional or DIYing your way to a cleaner home, let’s make sure your hard work doesn’t end up smelling like a locker room.
Give Your Doors Some Lungs with Integrated Vents
The biggest mistake you can make is thinking a mudroom door should close like a vault. To get air moving, you have to create a path for it. I recommend using decorative metal mesh or woven wire inserts instead of solid wood panels. If you love the look of wood, louvers are your best friend. Think of it like a radiator cover; the goal is to let the warm air from your house circulate through the damp clothes. I once built a gorgeous set of lockers for a family in a coastal town who insisted on solid oak panels with zero gaps—total privacy for their clutter. Six months later, I was back with a pry bar. The back of the cabinet, hidden behind the winter coats, was a forest of green mold. We had to rip out the backs and install decorative mesh. It was a mess, but it taught me that why solid wood door panels still need room to breathe in summer is a lesson best learned before the first coat of paint. 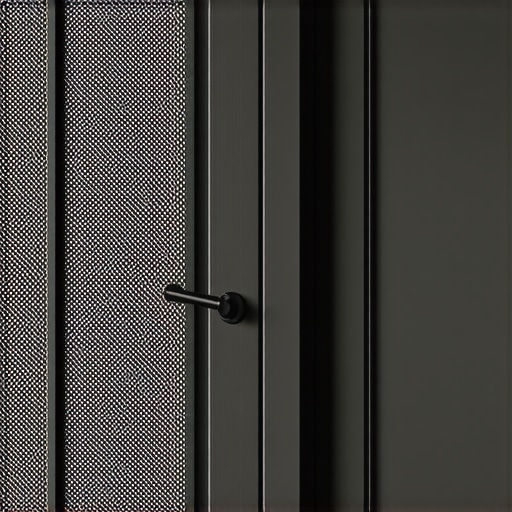
Choose Materials That Do Not Turn into Sponges
In a kitchen, you might get away with furniture board in some areas, but in a mudroom, moisture is a constant. When wet boots sit on a shelf, they leach water. If that shelf is made of particle board, it will swell and crumble within a year. This is why plywood box construction still wins over furniture board in wet areas every single time. Plywood has the structural integrity to handle the weight and the occasional puddle without delaminating. For the shelves themselves, I often suggest using slatted inserts. Instead of a solid flat surface, use three or four 1-inch strips of wood with half-inch gaps between them. This allows dirt and water to fall through to a removable tray below rather than soaking into the cabinet base. For long runs, remember that why we recommend plywood shelves over solid wood for long spans applies here too, as it prevents the sagging often caused by heavy damp coats.
The Toe Kick Trick for Stealthy Airflow
If you don’t want visible vents on the front of your beautiful cabinetry, you have to get creative with the ‘under-work.’ One of my favorite moves is to leave a half-inch gap at the top of the toe kick, hidden by the overhang of the cabinet base. This acts as an intake for air. When paired with the mudroom bench trick for storing tall winter boots, where you create a recessed area specifically for vertical airflow, you create a natural chimney effect. Warm air enters the bottom, rises through the damp gear, and exits through the top of the locker. It is invisible, effective, and keeps the ‘locker room funk’ from ever settling in.
Adjust Your Gaps to Prevent Wood Warping
Even the best-built cabinets will move as the seasons change. In a high-moisture environment like a mudroom, this movement is exaggerated. I always tell my clients to expect the inset cabinet gap re-aligning doors after seasonal humidity changes to be a part of their maintenance routine. If your doors start to rub, they aren’t just annoying; they are trapping air. You can often handle this yourself by learning how to fix a cabinet door that wont stay closed without replacing hinges, which usually involves a simple screwdriver and five minutes of your time. Keeping those gaps consistent ensures the air can move even when the doors are shut tight against a rainy Tuesday’s worth of gear.While airflow keeps things fresh, there is another layer of expertise that separates a showroom kitchen from a functional one. Everyone tells you to maximize every square inch, but in my experience, over-engineering your storage is the fastest way to ruin a workflow. We have all seen those ultra-skinny cabinets squeezed next to the stove, but the truth is, why narrow spice pull-outs are often harder to use than you think comes down to the simple fact that if you cannot see the label of the third jar back, you are not saving time. When you transform your kitchen with custom cabinets, the goal should be accessibility over pure volume. I once had a client who insisted on double-stacked pull-outs for every base cabinet. Within three months, they were leaving the doors open because the convenience was actually a multi-step process just to reach a cereal bowl. It is a classic example of how innovative storage solutions for modern kitchen remodels can backfire if they ignore how a human actually moves through a room.
The Structural Trap of Excessive Weight
Then there is the load-bearing trap. Most homeowners assume that because a cabinet is custom-made from solid wood, it is basically a safe. But physics does not take a day off. The cabinet screw mistake that causes heavy drawers to fail is a nightmare I see too often in high-end projects. People load up a 36-inch wide drawer with 80 pounds of cast iron, not realizing that the side-mount slides are only rated for 75 pounds including the weight of the drawer itself. According to the Kitchen Cabinet Manufacturers Association (KCMA), standard cabinet durability is predicated on specific weight distributions. If you do not account for this during the design phase, you will find that the real reason your cabinet drawer slides are grinding isn’t a lack of lubrication; it is that the metal is literally screaming under the weight. 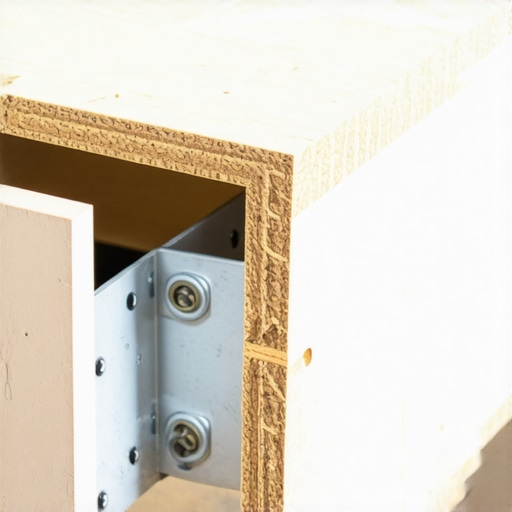
Can your cabinet drawers actually survive a heavy-duty lifestyle?
It is a question most do not ask until they see a drawer front start to sag or a slide pop out of its track. This is why learning how to fix a sagging pot and pan drawer with a center support is a skill every home chef should have, though it is better to build it right the first time. You should also consider why your trash pull-out needs a bottom-mount slide for better weight handling, as these specific units take the brunt of daily use and force. If you are in the middle of a custom cabinets as a game-changer in your kitchen remodel journey, do not let the more-is-more philosophy lead you into a structural trap. Have you ever fallen into this trap or noticed your high-end drawers starting to feel a bit clunky? Let me know in the comments.Once those drawers are installed and the hardware is set, the real work of homeownership begins. You have just invested in a ultimate guide to custom cabinets for a stylish kitchen overhaul, and the last thing you want is for a squeaky hinge or a warped door to ruin the experience. I have seen beautiful projects fall apart in three years because the owners did not realize that high-end cabinetry is a living, breathing part of the house.
Stop the slow decay of your high-end hardware
It starts with the slides. If you hear a gritty sound, do not ignore it. Dust and kitchen grease are the natural enemies of precision engineering. I always keep a pressurized air canister and a specific dry PTFE lubricant in my kit because why your soft close slides are failing and the quick cleaning fix is usually just a matter of removing debris rather than replacing parts. If you let it go, the friction will eventually strip the ball bearings, and you will be looking at a much more expensive repair. The same goes for your hinges. If they feel sluggish, why your soft close slides grind and the quick lubrication fix involves a light touch; never use heavy oils like WD-40, which actually attract more dust over time.
The one tool I trust for a flawless finish
When people ask how I get every handle to line up to the millimeter, they expect a complicated laser setup. The truth is much simpler: I use a stainless steel True Position Drill Guide. It is the only way to ensure that the one tool you need for perfectly aligned cabinet knobs every time delivers professional results. If you are scaling your project or adding more built-ins that elevate your living rooms functionality, buy a real jig. Plastic versions flex, and a 1/16th-inch error at the start of a cabinet run becomes a glaring eyesore by the end of it. 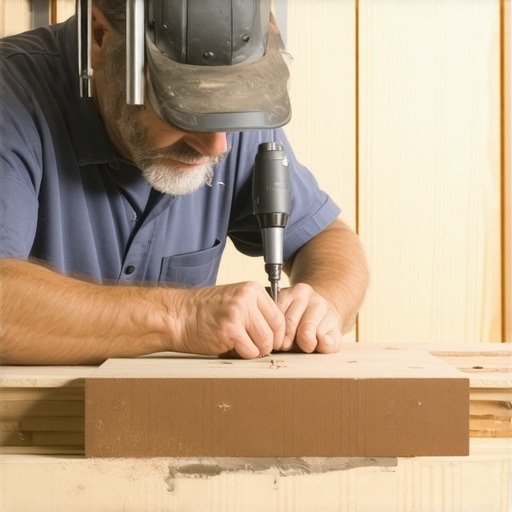
How do I keep my custom built-ins looking new for a decade?
Maintenance is not just about cleaning; it is about environment. The Architectural Woodwork Institute (AWI) specifies in their Quality Standards that interior woodwork should be maintained in a relative humidity range of 25% to 55%. If your house swings wildly between summer humidity and winter dryness, your wood will move. This is exactly why you need to master the inset cabinet gap re-aligning doors after seasonal humidity changes. I recommend checking your door reveals every six months. If you spot a spill, act fast. Knowing how to remove stubborn water rings from natural wood cabinet surfaces is vital, but prevention is better. In the future, I expect we will see more integrated sensors within smart storage solutions for small kitchens in 2025 that actually alert your phone if the humidity inside a cabinet rises too high. For now, your best bet is a simple hygrometer and a screwdriver. Try this tonight: take five minutes to check the tension on your most-used drawer and tighten any loose mounting screws with a hand tool—never a power drill—to prevent stripping the wood.
The Mudroom Mistakes I Stopped Making
After years of building these spaces, I have realized that the most expensive mistakes are usually invisible. Here is what I wish I had known when I first started: First, never underestimate the power of a ‘sniff test’—if a closed cabinet feels stuffy after five minutes, your gear will never dry. Second, when you are looking for expert tips on selecting storage solutions for a perfect kitchen upgrade, remember that those same principles of accessibility apply to your entryway; if a kid has to fight a heavy door to hang a coat, the coat ends up on the floor. Lastly, prioritize functionality over a ‘museum look.’ A mudroom is a transition zone, not a gallery. I have learned to embrace the visible vents because they are a sign of a house that works.
The Tools That Ensure a Professional Finish
I don’t recommend products unless they have survived a decade in my toolkit. For precision, I only use the True Position Drill Guide. It is the gold standard for avoiding crooked hardware that can ruin a custom build. [image_placeholder_final] I also swear by PTFE Dry Lubricant for any squeaky slides; unlike oils, it won’t attract the grit and grime that inevitably follows kids into a mudroom. For those who want to get serious about their layout, I often point people toward built-ins and storage hacks for a sleek functional kitchen because the organization logic is identical. Finally, keep a simple digital hygrometer in your mudroom. If it reads over 55%, open a window or turn on a fan.
Build a Home That Breathes with You
Your home should be a place that supports your daily rhythm, not a source of hidden mold or frustration. By focusing on airflow and material integrity, you are protecting your investment and your family’s health. Whether you are adding a few cubbies or doing a full transform your kitchen with custom cabinets project, always ask yourself: ‘How does the air get out?’ If you can answer that, you are already ahead of 90% of the DIY projects I see. If you ever feel stuck on a design choice, don’t hesitate to contact us for a professional perspective. Custom cabinets are more than just boxes; they are the lungs of a busy home. Have you ever opened a closet and been hit by that dreaded ‘damp dog’ smell? Let me know how you handled it in the comments below!