How to Clean Matte Black Cabinet Hardware Without Scratches
I’ll never forget the sinking feeling in my chest when I saw that first, permanent-looking swirl mark on my brand-new matte black drawer pulls. I had just spent a fortune on high-end handles to complement my modern kitchen remodel, and within a week, my toddler’s buttery fingers had left a map of the world on every single one of them. I reached for a standard “all-natural” vinegar spray, thinking I was being smart and eco-friendly. Big mistake. The acidity didn’t just clean the grease; it left a cloudy, etched ghost of a smudge that haunts me to this day. I learned the hard way that these sleek, velvety finishes require a gentle touch, not a chemistry experiment. Today, I am going to show you exactly how to maintain that factory-fresh look without turning your hardware into a scratched-up mess. [image-placeholder]
Stop Scrubbing Your Kitchen Hardware the Wrong Way
Living with matte black is a bit like owning a black car; it looks incredibly sharp for the first ten minutes, and then every speck of dust and oil becomes a personal affront. During my own kitchen remodel journey, I realized that the hardware is the jewelry of the room. You wouldn’t clean a diamond with a scouring pad, so why do it to your handles? Most people make the mistake of using abrasive sponges or harsh degreasers because they want that matte surface to stay perfectly flat and non-reflective. But here is the reality: the more you rub, the more you risk polishing the finish or, worse, scratching through the powder coating entirely.
Is matte black actually worth the extra effort?
I get asked this all the time by homeowners who are looking into built-ins and storage hacks for a sleek functional kitchen. My answer is always a resounding yes—if you know the secret to the “no-touch” clean. Early on, I thought I could use a Magic Eraser to get rid of stubborn oil spots. Do not do this. It is essentially ultra-fine sandpaper and it will leave a shiny bald spot on your matte finish faster than you can say “oops.” According to cleaning experts at Real Simple, the key to preserving these delicate surfaces is avoiding anything with a pH that is too high or too low. Have you ever accidentally ruined a finish by being a bit too enthusiastic with the cleaning supplies? I’d love to hear your experiences so we can all learn from those expensive little accidents. Now, let’s get into the step-by-step process that keeps your kitchen looking like a showroom without the stress.
Stop using harsh chemicals on your expensive hardware
Think of matte black powder coating like the delicate skin of a peach. If you use a high-acidity chemical or a coarse cleaner, you are essentially peeling that skin away, revealing a shiny or etched surface that can never be undone. I learned this when I was finalizing my transformative kitchen with custom cabinets; the beauty of the hardware is in its depth of color, and that color is surprisingly fragile. Your primary weapon should be a simple mixture of warm water and a single drop of pH-neutral dish soap. This mild surfactant breaks down the oils from your hands without reacting with the metallic finish. I once tried a ‘heavy duty’ degreaser on a single knob after a messy taco night, and the hardware turned a weird, cloudy gray. Since then, I have stuck to the ‘less is more’ philosophy.
Reach for the microfiber instead of the scrub brush
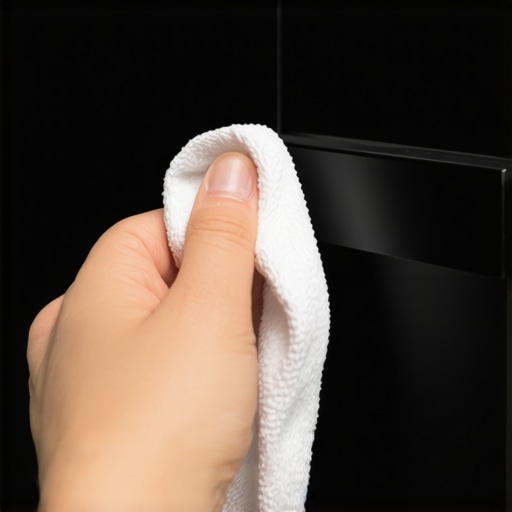
The texture of your cleaning cloth matters just as much as the liquid you use. A standard paper towel might feel soft, but it is actually quite abrasive and can leave micro-scratches that dull the matte effect over time. Instead, use a clean, high-quality microfiber cloth. These cloths act like tiny magnets for dust and grease, lifting the debris away from the surface rather than grinding it in. I suggest keeping a dedicated stash of these in your cleaning supplies under the sink so you aren’t tempted to grab a rough sponge in a hurry. [image-placeholder]
Dry every handle to prevent those annoying water spots
One of the biggest frustrations with matte finishes is the white, crusty buildup of hard water spots. If you let your hardware air-dry after a wipe-down, the minerals in the water will settle into the porous finish and create stubborn rings. The trick I use is a two-cloth system: one damp cloth for the actual cleaning and one bone-dry microfiber for an immediate follow-up. It is a bit like buffing a car; you want to remove all moisture before it has a chance to evaporate. When we were working on innovative storage solutions for modern kitchen remodels, I noticed that the clients who followed this dry-buffing rule had hardware that looked brand new even years later.
Dab away the grease instead of scrubbing
When you encounter a particularly stubborn fingerprint or a splash of pasta sauce, your instinct is to scrub. Resist that urge. Scrubbing creates heat and friction, which can actually ‘polish’ the matte finish into a permanent semi-gloss spot. Instead, apply your soapy water to the cloth and gently ‘dab’ the spot. Let the moisture sit for thirty seconds to loosen the debris, then lift it away. It’s a patient process, but it protects the integrity of the coating. If you have perfectly aligned cabinet knobs, you want them to stay uniform in their finish, not have one or two that shine brighter than the rest because of over-enthusiastic cleaning. This method ensures that the ‘jewelry’ of your kitchen remains subtle and sophisticated, just as it was designed to be.While we’re on the subject of keeping things pristine, let’s talk about the massive misconception I see during almost every modern kitchen remodel. Most people believe that ‘custom’ is a synonym for ‘indestructible,’ but that is a dangerous assumption. I’ve seen homeowners drop five figures on cabinets only to have the drawer bottoms sag within eighteen months because they were held together with nothing but hope and a few drops of wood glue. The real secret to a successful custom cabinets journey isn’t the finish you choose, but the joinery you can’t see. One common mistake is assuming that all shops use the same structural standards. I always tell my clients that if you aren’t asking how the boxes are assembled, you’re flying blind.
The trap of the premium label
Many ‘custom’ shops actually outsource their boxes and only build the doors. This is where the ‘oops’ factor usually happens. You think you’re getting a unified, handcrafted piece, but you might be getting a hybrid that won’t stand up to the weight of heavy stoneware. For instance, why your cabinet boxes should be stapled glued and screwed is a question of structural physics, not just a preference. Without all three, the box can rack or twist over time. I once saw a gorgeous set of custom cabinets literally pull away from the wall because the backs were only 1/4-inch thick and stapled poorly.
Why do some high-end drawers fail so quickly?
This is a sophisticated question that gets to the heart of material science. Most people think plywood is plywood, but the core matters. According to the Architectural Woodwork Institute (AWI), the grade of the core determines the screw-holding capacity of the cabinet. In my own projects, I’ve found that why we use solid maple for drawer boxes instead of poplar is the difference between a drawer that lasts fifty years and one that splinters in five. Poplar is softer and cheaper, making it a common ‘hidden’ cost-cutting measure in supposedly high-end kitchens. 
The foundation mistake that ruins a perfect installation
Even if your cabinets are built like a tank, a sloped floor can ruin the entire aesthetic. I’ve watched installers try to hide a two-inch floor drop with just a bit of caulk, and it looks terrible. If you are dealing with an old house, you must know how to level a kitchen island on a significantly sloped floor before the first box is set. If the base isn’t perfect, your mitered joints will eventually open up, and those matte black handles we talked about won’t look perfectly aligned anymore. Don’t let a contractor tell you they can ‘fix it in the trim.’ You also need to consider the best way to seal the gap between your cabinet and the floor to prevent moisture from seeping under and swelling the wood. Have you ever fallen into this trap of prioritizing the ‘look’ over the structural ‘bones’? Let me know in the comments. When you are planning for a transformative kitchen with custom cabinets, remember that the beauty is only as deep as the construction quality.I stopped relying on my old 4-foot bubble level years ago when I realized that even a 1/16th of an inch discrepancy at the start of a run can lead to a massive gap by the time you reach the refrigerator. Now, I never set a single box without a self-leveling 3-axis green beam laser. It is the only way to ensure your modern kitchen remodel stays visually perfect from floor to ceiling. If you are doing this yourself, remember that the one tool you need for perfectly aligned cabinet knobs every time is actually a high-quality drilling jig; don’t try to freehand it and hope for the best.
How do I maintain my custom storage solutions over time?
The longevity of your cabinetry depends on more than just a weekly wipe-down. Every six months, I perform a ‘hardware audit’ where I check for loose screws and alignment issues. Wood is a living material; it expands and contracts with the seasons, which can lead to doors that don’t close quite right. Learning the 5-minute hinge adjustment for fixing wonky cabinet reveals will save you from the frustration of seeing crooked lines every morning. According to the Kitchen Cabinet Manufacturers Association (KCMA), maintaining the finish also means avoiding the steam from countertop appliances like pressure cookers, which can delaminate the edge banding over time. If you notice your drawer slides are grinding, a quick blast of dry PTFE lubricant—not WD-40, which attracts dust—will keep them gliding like butter. 
Hidden smart storage is the next frontier of home design
As we look toward the next decade of design, I predict we will see a complete departure from the ‘clutter on the counter’ look. We are moving toward environments where everything—from the air fryer to the laptop—has a hidden home within the architecture of the room. This is why I always suggest smart storage ideas to maximize your kitchen space this year that include built-in power and data. For example, why every kitchen should have a dedicated charging station for laptops is becoming a top-tier request from my clients who need a seamless transition between life and work. Even small additions, like a vertical spice drawer next to your range, can fundamentally change your daily cooking workflow. My challenge to you today: go into your kitchen and find one door that is slightly out of alignment. Use a screwdriver to adjust the hinge right now rather than waiting for it to start rubbing against the frame. You will be surprised how much better the whole room feels when those lines are crisp again.
Hard Truths About Matte Black and Hidden Cabinet Costs
Over the years, I have realized that the most expensive mistakes aren’t the ones you make during the purchase, but the ones you make during the first month of ownership. Here are a few lightbulb moments I wish I had known sooner:
- Consistency is better than intensity: You don’t need an aggressive deep clean every week; you need a gentle wipe-down every few days. Letting grease bake into the finish is what leads to the scrubbing that ruins matte surfaces forever.
- Hardware reveals the soul of the shop: If the handles are misaligned, it is often a sign that the cabinet boxes were rushed. I always refer back to the ultimate guide to custom cabinets for a stylish kitchen overhaul to help homeowners spot these structural red flags before the warranty expires.
- Price does not always equal performance: Some mid-range handles with thick powder coating actually outperform luxury boutique brands that rely on thin, delicate electroplating.
My Go-To Kit for Kitchen Longevity
I have spent years testing cleaning products, and I always come back to a specific set of tools for long-term maintenance. First, a stack of high-GSM microfiber cloths—the density is crucial for lifting skin oils without creating friction. Second, I swear by a single drop of pH-neutral soap; it is the only surfactant that will not react with the metallic layers. Finally, for those attempting a DIY hardware upgrade, a professional drilling jig is non-negotiable. Even the most brilliant smart storage ideas to maximize your kitchen space this year will look cluttered if the hardware is not perfectly symmetrical. If you are ever in doubt about your specific cabinet finish, do not hesitate to contact us for a professional recommendation.
Designing a Space That Lives as Hard as You Do
A kitchen should not be a museum where you are afraid to touch the surfaces. By choosing superior joinery and mastering the gentle cleaning method, you can enjoy a magazine-worthy look without the constant anxiety. Whether you are deep in the middle of a modern kitchen remodel or just trying to protect a new investment, remember that the best results come from a blend of high-quality construction and patient care. Your kitchen is the heart of your home—treat its jewelry and its structural bones with equal respect. Have you ever struggled with persistent fingerprints on your matte hardware? Let me know your cleaning hacks in the comments below!