The Truth About Pre-Finished Plywood vs On-Site Staining
I’ll never forget the ‘Walnut Incident of 2012.’ I was tackling a massive set of built-ins for my living room, and I thought I was being a purist by staining every single sheet of maple plywood by hand. Two weeks later, I was lightheaded from the fumes, my garage floor was permanently walnut-colored, and the cabinet interiors looked like a kindergartener’s art project. Worse yet, every time we opened the doors, the smell of off-gassing stain hit us like a brick. That was my lightbulb moment: just because you can stain every square inch of your project doesn’t mean it’s the smart way to build. If you are planning modern kitchen remodels featuring custom cabinets and built-ins, you are likely standing at the same crossroads I was. Should you go for the ‘custom’ hand-stained look everywhere, or is there a better way? Today, I’m going to share why I swapped the staining rags for pre-finished maple and never looked back.
The Nightmare of the Sticky Cabinet Interior
When you start custom cabinets as a game-changer in your kitchen remodel journey, it’s easy to focus on the beautiful door colors and the fancy hardware. But you actually live with the inside of the boxes. Early in my career, I made the classic mistake of assembling my cabinet boxes first and trying to finish the interiors afterward. Brushing polyurethane into a dark, 24-inch deep corner is a recipe for drips, missed spots, and a finish that stays ‘tacky’ for years. Your plates will literally stick to the shelves. I learned the hard way that why pre-finished maple interior is better than melamine or raw wood is a lesson in both durability and sanity.
Is pre-finished plywood actually worth the extra cost?
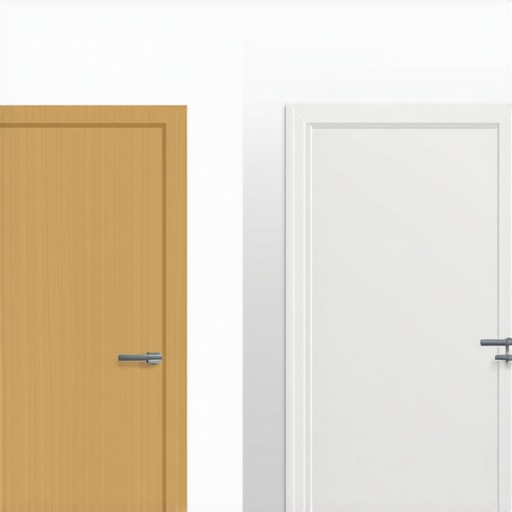
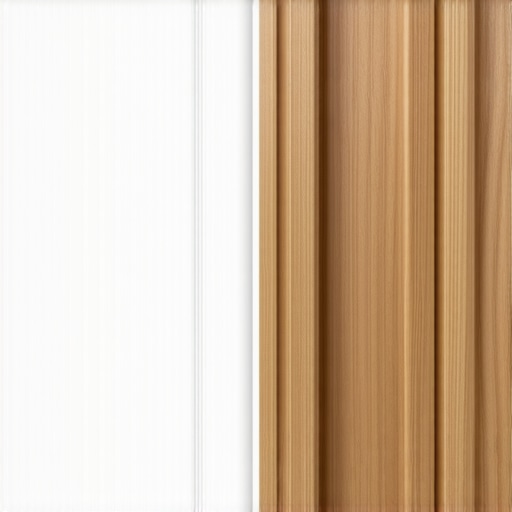
It’s the question I get from every skeptical homeowner. The short answer? Yes, and it’s not even close. Pre-finished plywood comes from the mill with a UV-cured topcoat already applied. It is smooth as glass and incredibly resilient. According to the Kitchen Cabinet Manufacturers Association (KCMA), factory-applied finishes are tested against everything from vinegar to citrus juices to ensure they meet high-performance standards that a brush-on finish in a dusty garage simply can’t match. When you’re trying to figure out why your Indianapolis kitchen cabinet paint quote varies by thousands of dollars, look at the guts of the cabinets. Professional shops use pre-finished goods because they don’t fail. Have you ever spent an entire weekend sanding between coats of finish only to have a single dust mote ruin the final look? Drop a comment or reach out if you’ve ever felt that specific brand of frustration! We’re going to break down the technical differences next so you can make the right call for your home.
The Pre-Finished Workflow That Saves Your Sanity
Building custom cabinetry isn’t just about the doors; it’s about the structural logic of the box. I stopped finishing my own interiors years ago because factory-applied UV finishes are simply untouchable in a home shop. Think of it like a smartphone screen versus a piece of glass you tried to polish yourself—one is flawlessly hard, and the other is a magnet for fingerprints. When we build, we use pre-finished maple for the carcass and only finish the ‘show’ parts (the face frames and doors) separately. This prevents that sticky, tacky feeling that occurs when finish off-gasses in an enclosed space. This approach is essential for modern kitchen remodels featuring custom cabinets and built-ins because it ensures the moment you move in, your cabinets are ready for heavy use without the chemical smell. 
Why Your Boxes Need More Than Just Wood Glue
If you’ve ever seen a cabinet back panel bowing away from the wall, you’ve seen the result of ‘nail-only’ construction. It’s a shortcut that leads to disaster. In my early days, I once built a 48-inch wide pantry for a client and, in a rush, used 18-gauge brad nails to secure the back. Six months later, the weight of their canned goods pushed the entire back panel out. It was a mess of spilled beans and broken wood. That’s why we stopped using nails for cabinet backing and switched to screws. Now, we follow a strict protocol where every box is stapled to hold it square, then generously glued, and finally reinforced with mechanical fasteners. You can read more on why your cabinet boxes should be stapled glued and screwed to understand the physics of a box that never sags.
The Zero-Gap Secret for Walls That Aren’t Straight
No house has perfectly square walls, and if you just shove a square cabinet into a crooked corner, you’ll have ugly gaps that no amount of caulk can hide. The pro move is ‘scribing.’ This involves leaving an extra fraction of an inch of wood on the cabinet edge and physically carving it to match the undulations of your drywall or masonry. I remember a project where I had to fit a library wall against an 1800s brick fireplace. By using a simple compass to trace the brick onto my cabinet side, I was able to cut a line that made the wood look like it grew out of the stone. You can apply this same level of detail when learning how to scribe a bookshelf to a brick fireplace for a zero-gap look. It turns a standard install into a true custom masterpiece.
Smart Storage Hacks for the Modern Kitchen
Once the box is rock-solid, the focus shifts to how you actually use the space. The biggest killer of kitchen organization is ‘The Avalanche’—that sound of twenty baking sheets falling over when you try to grab one. To solve this, we integrate innovative storage solutions for modern kitchen remodels right into the design phase. A simple addition like the vertical cookie sheet divider that ends the cabinet clatter turns a chaotic lower cabinet into an organized filing system for your pans. Furthermore, you must respect the safety clearances; for instance, understanding the 30 inch clearance rule for ovens and your upper cabinets is non-negotiable for fire safety and cabinet longevity. By focusing on these technical details—like using 3/4-inch plywood because why we recommend plywood shelves over solid wood for long spans is a matter of preventing mid-shelf bowing—you ensure your kitchen works as well as it looks.However, the most common myth I encounter is that ‘more is always better.’ Homeowners often think they need to maximize space with innovative storage solutions for every room by filling every available wall with cabinetry. In reality, a kitchen that is too ‘heavy’ with boxes feels smaller and less functional. I’ve seen people insist on floor-to-ceiling cabinets only to realize they can’t actually reach the top three shelves without a ladder they have no place to store. This is the ‘storage paradox’: more volume often leads to more clutter. In high-end design, we use ‘negative space’ to let the cabinetry breathe. It is often better to have fewer, more efficient cabinets than a wall of poorly planned boxes. This is where built-ins and storage hacks for a sleek functional kitchen come into play—focusing on quality of access over raw square footage.
The Heat Trap That Turns Your Trash into a Biohazard
Here is a nuance that even some ‘pro’ designers miss: why your garbage pull out should never be next to the oven. It seems convenient, right? You’re prepping, you’re cooking, and you want the bin nearby. But the heat transfer from a modern oven can accelerate the decomposition of organic waste in your bin. I once had a client who couldn’t figure out why their high-end kitchen smelled like a compost heap every time they baked a chicken. The heat was literally ‘cooking’ the trash. According to the National Kitchen & Bath Association (NKBA) planning guidelines, separating ‘hot’ zones from ‘waste’ zones is essential for maintaining air quality and cabinet hygiene. #IMAGE_PLACE_HOLDER_C#
Don’t Ignore the Floor Beneath Your Feet
Another ‘Oops’ factor involves the foundation. I’ve walked into multi-million dollar homes where the cabinet doors were crooked because the installer didn’t understand why every base cabinet needs adjustable feet on uneven concrete. If your house is settling, your cabinets will move with it unless they are properly isolated and leveled. It’s a technical detail that separates a ‘DIY’ look from a master-level installation and ensures your modern kitchen remodels featuring custom cabinets and built-ins stay square for decades.
Why does that expensive custom paint job start to yellow after three years?
This is the nuance that breaks my heart. Clients spend a fortune on a specific shade of ‘Alabaster,’ only to find the real reason your white painted cabinets are turning yellow is often the topcoat chemistry or UV exposure. Most people assume ‘all-wood’ is the premium choice, but if you’re doing a painted finish, solid wood can actually be your enemy. The natural expansion and contraction of wood species like oak or maple will eventually crack the paint at the joints—a phenomenon we call ‘witness lines.’ When you look at the hidden costs of choosing custom colors for your cabinetry, you’re not just paying for the pigment; you’re paying for the technical foresight to ensure it doesn’t fail. Have you ever fallen into this trap where a ‘premium’ choice ended up causing a headache? Let me know in the comments. We want to help you transform your kitchen with custom cabinets expert guide for 2025 by avoiding these invisible pitfalls before the first board is even cut.I’ve spent thousands of dollars on high-end machinery over the years, but the most important lesson I’ve learned is that the quality of your finish is only as good as the precision of your installation. People often ask me why their expensive drawers start to feel ‘crunchy’ after a year. Usually, it’s because of sawdust infiltration or poor alignment during the initial build. To prevent this, I never step onto a job site without a can of dry PTFE lubricant. Unlike WD-40, which attracts dust like a magnet, dry lube keeps things smooth without creating a gunk sandwich. If you notice your kitchen performance slipping, why your slow close hinges are suddenly sluggish and how to clean them is the first technical hurdle you should clear.
The Secret Weapons in My Tool Trailer
When I’m deep into modern kitchen remodels featuring custom cabinets and built-ins, I rely on a few specific pieces of kit that make the difference between a DIY look and a showroom finish. For example, I stopped eyeballing hardware years ago. Every pro I know uses a dedicated aluminum template because the one tool you need for perfectly aligned cabinet knobs every time isn’t a tape measure—it’s a repeatable jig. This ensures that even if you have sixty drawers, every pull sits at the exact same millimeter. For the installation itself, I always swap out the standard screws that come with the hardware. I’ve seen too many heavy pots rip a drawer face off because of a weak fastener. Instead, I use 1-inch truss-head screws with a wide bearing surface to ensure a mechanical bond that survives a lifetime of slamming. 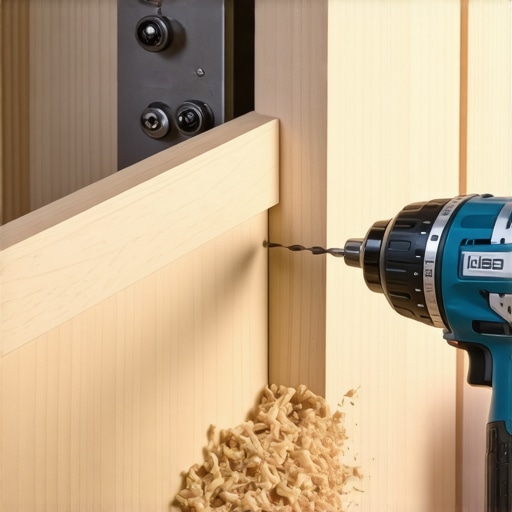
How do I keep my custom cabinetry looking new for a decade?
Maintenance is the part of custom cabinets as a game-changer in your kitchen remodel journey that most people ignore until something breaks. Wood is a living material; it breathes. According to the Architectural Woodwork Institute (AWI) standards for premium-grade cabinetry, maintaining a consistent relative humidity between 25% and 55% in your home is critical. If your house gets too bone-dry in the winter, those beautiful mitered joints will start to pull apart. You also need to keep an eye on the mechanics. If a door looks slightly askew, don’t ignore it. Learning the 5 minute hinge adjustment for fixing wonky cabinet reveals can save the wood from rubbing and chipping the finish. It’s also vital to check your slides; the real reason your cabinet drawer slides are grinding is often just a loose mounting screw that’s catching on the ball bearings.
The Future of Your Kitchen Storage
Looking ahead to 2025 and beyond, I see a massive shift toward ‘active’ cabinetry. We are moving away from simple boxes and toward integrated tech. I’m talking about internal LED lighting that triggers via proximity sensors and voice-activated waste pull-outs. But as we add more complexity, the fundamental build quality becomes even more important. You can’t put a $500 electronic servo on a flimsy box. That is why I always lean on the side of over-engineering, such as why your base cabinets should be secured with 3 inch rugged screws rather than standard construction screws. I predict we’ll see a return to more natural, textured wood grains as people tire of the ultra-flat, sterile look of the last decade. My advice? Try this today: Grab a screwdriver and check the tightness of your hinge plates. A simple quarter-turn today can prevent a stripped screw hole three years from now. If you’re ready to plan a space that lasts, transform your kitchen with custom cabinets expert guide for 2025 and get the foundation right.
Hard Lessons from My Woodworking Scars
Over the years, I’ve realized that the most expensive mistakes aren’t the ones you see on the surface; they are the ones hidden behind the face frames. For instance, I’ve seen beautiful cherry cabinets fall apart because the builder ignored the cabinet screw mistake that causes heavy drawers to fail. It is a heartbreaking sight to see a $2,000 drawer front hanging by a thread because of a five-cent fastener. My lightbulb moment was realizing that custom cabinets as a game-changer in your kitchen remodel journey only works if the engineering matches the aesthetics. You should also remember that while wood is beautiful, it is also alive; if you don’t account for expansion, your joints will eventually scream at you. I always tell my clients to look for custom cabinets ideas that transform your homes style while prioritizing the structural logic of the box first.
Tools I Use Every Single Day
If you want to move from ‘DIY’ to ‘Professional,’ you need to stop eyeballing your measurements and start trusting your templates. I never start a project without my aluminum hardware jig because I know that a single misaligned knob can ruin the visual flow of an entire wall. Beyond the tools, your mental resources matter just as much. I highly recommend checking out expert tips on selecting storage solutions for a perfect kitchen upgrade to help you visualize the flow before you ever touch a saw. Furthermore, the ultimate guide to custom cabinets for a stylish kitchen overhaul is an essential resource for anyone trying to balance high-end design with practical, everyday durability. I personally trust high-quality plywood over particle board every time, and I never skimp on the drawer slides—smooth motion is the true hallmark of luxury.
Build a Kitchen That Actually Loves You Back
At the end of the day, your home should serve you, not the other way around. Investing in modern kitchen remodels featuring custom cabinets and built-ins is an investment in your daily peace of mind. When your kitchen functions like a well-oiled machine, the stress of meal prep evaporates, and the room becomes a place of joy rather than a place of clutter. Don’t be afraid to dream big, but keep your feet on the ground regarding the technical details. If you ever feel overwhelmed by the choices, just reach out and contact us to talk through your vision. You deserve a space that is as resilient as it is beautiful. Have you ever had a ‘nightmare’ cabinet experience where a simple storage solution could have saved the day? Let me know your stories below!