The Simple Pivot That Reclaims Your Under-Sink Plumbing Space
I was on my hands and knees, squinting into the dark abyss under my kitchen sink, when it finally happened. I reached for a fresh sponge and instead knocked over an old bottle of concentrated floor cleaner that had been slowly oozing for months. My floor was a sticky, chemical-scented mess, my back was screaming at me, and I realized I was done playing ‘Cabinet Tetris.’ We have all been there. That deep, cavernous void under the sink is where cleaning supplies go to be forgotten for a decade. But what if I told you that a single, clever shift in how you view your pipes could give you back nearly 40% of that lost space? Today, we are going to fix that black hole once and for all by rethinking the ‘pivot’ from static shelves to custom, integrated solutions. [image_placeholder]
Stop Letting Your Plumbing Dictate Your Storage
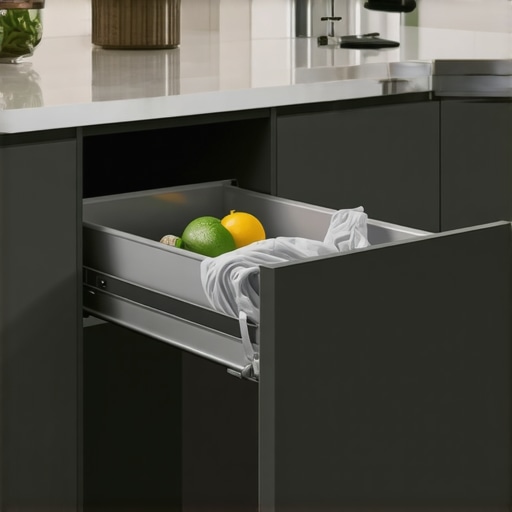
I will be the first to admit a mistake I made early in my DIY journey: I bought those generic, ‘one-size-fits-all’ expandable plastic racks. They were a total disaster. They wobbled every time I touched them, they didn’t clear the P-trap properly, and they actually wasted more space than they saved because of their clunky frames. This is exactly why maximizing space with innovative storage solutions requires a bit more strategy than just buying a plastic bin. You need to work around the hardware, not just shove things in front of it. Often, this means looking at the Vancouver plumbing secret—designing your cabinet with a removable center post or an offset drain—to allow for full-extension U-drawers that hug the pipes.
Is this really worth the effort of moving pipes?
You might be skeptical. After all, it is just one cabinet in a whole house. But consider the reality: the under-sink area is the primary storage for high-use items that you need every single day. When it is a chaotic mess, your entire kitchen workflow grinds to a halt. According to a report by the National Kitchen & Bath Association (NKBA), clutter in high-traffic work zones is the primary cause of ‘kitchen fatigue’ among homeowners. By reclaiming that space, you aren’t just finding a home for your dish tabs; you’re streamlining your daily life. Have you ever discovered a cleaning product you bought three years ago hiding behind a pipe only after you bought a replacement? I certainly have. Revolutionizing your kitchen remodel starts with these small, high-impact pivots that prioritize accessibility over deep, dark voids. Furthermore, when you can actually see the back of the cabinet, you can spot signs your cabinet bases are rotting from hidden leaks before they become a multi-thousand-dollar insurance claim. It is about time we stop treating this space like a junk drawer with plumbing in the middle and start treating it like the valuable real estate it is.
Turn Your Plumbing Into a Storage Map
To stop the ‘Cabinet Tetris’ cycle, you have to stop seeing your pipes as obstacles and start seeing them as the blueprint for your storage layout. The first step is to grab a tape measure and map out the exact dimensions of the ‘dead zone.’ This isn’t just height and width; you need to measure the distance from the cabinet floor to the lowest point of the P-trap and the depth from the back wall to the front of the shut-off valves. This spatial data allows you to utilize U-shaped drawer boxes. These are essentially standard drawer boxes with a notch cut out of the center to clear the plumbing. Think of it like a jigsaw puzzle piece that fits perfectly around the neck of your sink.
Build Drawers That Hug Your Pipes
When I first attempted this, I built a beautiful birch drawer only to realize that the garbage disposal motor sat two inches lower than the actual drain pipe. When I turned on the disposal, the vibration was so intense it rattled my mounting screws loose within a week. That mess taught me that reinforcing a sink base cabinet is as much about managing vibration as it is about weight. For a successful ‘pivot,’ you must ensure your slides are rated for at least 100 pounds. This is especially true if you are integrating a heavy trash system. In fact, why your trash pull-out needs a bottom-mount slide becomes clear once you realize the sheer leverage a full bin puts on side-mount hardware in a damp environment.
The Waterproof Barrier You Cannot Skip
Because this zone is inherently high-risk for moisture, the materials you choose are non-negotiable. Standard particle board will swell and disintegrate the moment a valve drips. This is exactly why plywood box construction still wins in wet areas like the kitchen and bathroom. Once your structure is solid, you need to apply what I call the Vancouver plumber trick: installing a medical-grade silicone waterproof liner before you put in a single bottle of soap. This liner acts as a secondary containment system, catching slow drips before they soak into the wood grain. If you are implementing smart storage ideas to maximize your kitchen space, these small protective layers are what keep your custom work from rotting from the inside out. Use full-extension slides so that you never have to reach into the dark again; by bringing the back of the cabinet to you, you eliminate the ‘black hole’ effect entirely and gain immediate access to everything from your dishwasher pods to those spare scrub brushes that used to vanish into the abyss.
While reclaiming that 40% of space under your sink is a massive win, it is only the first step in a much larger strategic shift. Most homeowners approach a remodel with the mindset of ‘filling the gaps,’ but that is exactly where the trouble starts. The common wisdom tells you to maximize every square inch, yet over-packing your layout is the fastest way to ruin a high-end design. In my experience, a kitchen that is too ‘efficient’ often becomes impossible to work in. For instance, those tiny, six-inch spice pull-outs look great in Pinterest photos, but in reality, why narrow spice pull-outs are often harder to use than you think becomes painfully obvious the moment you try to fit anything larger than a standard McCormick jar. Instead of just filling gaps, I recommend focusing on ‘usage clusters’ through the pantry zone method, which prioritizes how you actually move through the space during a Tuesday night dinner rush.
Can your cabinet hardware actually handle your daily habits?
This is the ‘Oops’ factor that catches even seasoned renovators off guard. You might spend a fortune on hand-painted doors, but if you skimp on the ‘skeleton’ of the cabinet, the system will fail within three to five years. According to a performance study by the Kitchen Cabinet Manufacturers Association (KCMA), drawer slides and hinges are the most frequent points of failure in ‘budget-custom’ kitchens. If you start to hear a gritty sound or feel resistance when pulling out your heavy pot drawers, you need to address the real reason your cabinet drawer slides are grinding before the internal ball bearings fail completely. We often think of custom cabinets as a game-changer for aesthetics, but the real luxury is in the weight rating of the hardware that you never see.
Another advanced nuance involves the hidden chemistry of your kitchen layout. It seems logical to place your waste management system as close to the cooking zone as possible, but why your garbage pull-out should never be next to the oven is a lesson in thermodynamics. The ambient heat from a 400-degree oven accelerates the decomposition of organic waste in your trash bin, creating a petri dish for odors that can eventually permeate the wood grain of the surrounding cabinetry.
True expertise in modern kitchen remodels featuring custom cabinets requires understanding material science. If your stove is flanked by cabinets, you must be wary of ‘skin’ materials. For example, why your canton kitchen remodeling project should skip cheap thermofoil near the oven is a non-negotiable rule; the heat will eventually cause the plastic membrane to delaminate and peel away from the MDF core. Have you ever fallen into this trap of choosing a finish that couldn’t handle the heat? Let me know in the comments.
Once you have conquered the under-sink abyss and successfully navigated the material science of your kitchen layout, the focus shifts to preservation. I have walked into many kitchens five years after a major remodel and found drawers that stick and doors that sag. It breaks my heart because 90% of those issues are preventable with ten minutes of maintenance a year. Maintenance isn’t just about wiping down the fronts; it is about the mechanics that live behind the wood. If you ignore the ‘bones’ of your cabinetry, even the most expensive custom cabinets will eventually feel like a budget installation.
How do I keep my custom hardware working like day one?
The most common complaint I hear is about ‘ghosting’ doors—doors that slowly creep open on their own—or uneven gaps between drawer fronts. This usually happens because the house has settled or the seasons have shifted. You don’t need a contractor to fix this; you just need to learn how to adjust European hinges for a perfectly level door reveal. A simple turn of a screwdriver can realign your entire kitchen. Similarly, if your motion-controlled drawers start to feel sluggish, it is often just a build-up of dust in the tracks. Knowing why your soft-close slides are failing and applying a quick cleaning fix can save you the hundreds of dollars it costs to replace high-end runners like the Blum Tandem series. According to Blum’s technical documentation, their hardware is rated for up to 200,000 opening and closing cycles, but that rating assumes the tracks remain clear of debris and excessive grit.
Precision Tools that Save Your Sanity
If you are planning to scale these storage solutions to other parts of your home, like built-ins that elevate your living room, you need the right kit. I never step onto a job site without a dedicated cabinet hardware jig. I spent the first two years of my career measuring every handle by hand with a ruler, and I still have nightmares about the one time I drilled a hole two millimeters off-center on a $400 walnut door. Now, I use the one tool you need for perfectly aligned cabinet knobs every single time to ensure total consistency. When you are looking at a wall of custom drawers, even a tiny deviation is visible to the naked eye.
Where Storage Tech is Heading in 2025 and Beyond
As we look toward the future of innovative storage solutions for modern kitchen remodels, I predict we are going to see a massive shift toward ‘active’ cabinetry. We are already seeing the integration of internal LED lighting that triggers via proximity sensors, but the next step is climate-controlled zones within standard cabinetry to extend the shelf life of produce. This level of complexity makes the initial ‘pivot’ we discussed—reclaiming that 40% of space—even more critical. You cannot install smart sensors in a cabinet that is overflowing with leaky cleaning bottles. If you are ready to stop fighting your kitchen and start optimizing it for the long haul, contact us today to discuss how a truly custom build can change your daily rhythm. My advice? Start today by pulling out your heaviest drawer and simply wiping the tracks with a dry microfiber cloth—it’s the smallest habit that yields the longest results.
Lessons Bought with Sweat and Sticky Floors
After years of crawling into dark corners and overhauling layouts, I have had a few ‘lightbulb moments’ that completely changed how I approach home organization. First, I realized that a kitchen should never be designed around its static footprint, but around its kinetic movement. I stopped focusing on how much I could shove into a box and started focusing on how easily I could get it back out. If you have to move more than two items to reach what you need, your system has failed. This is why I always emphasize expert tips on selecting storage solutions for a perfect kitchen upgrade that prioritize one-motion access.
Another hard lesson was the ‘over-engineering’ trap. In my early days, I tried to make every single drawer a complex masterpiece of dividers, only to find that my habits changed and the dividers became obstacles. Flexibility is the ultimate luxury. Using adjustable tracks and removable inserts ensures that your custom cabinets can grow with your cooking style rather than locking you into a rigid 2025 layout forever. Finally, never underestimate the power of lighting; an unlit deep drawer is just a high-tech black hole.
The Essential Gear for a Professional Finish
If you are ready to stop dreaming and start building, these are the tools and resources I personally rely on to ensure every project lasts a lifetime. #IMAGE_PLACEHOLDER_E# I never start a cabinet project without a high-quality Self-Centering Drill Bit. It sounds minor, but it is the only way to ensure your hinge screws sit perfectly flush, which prevents that annoying ‘clicking’ sound when you close a door. For inspiration and technical specs, I frequently return to Fine Woodworking’s Archive; their deep dives into joinery are the gold standard for anyone serious about built-ins and storage hacks for a sleek, functional kitchen.
I also highly recommend investing in Heavy-Duty Silicone Mats for every wet-zone cabinet. Unlike cheap adhesive liners, these can be pulled out and hosed off in the yard if a soap bottle leaks. They are a small investment that preserves the integrity of your plywood bases for decades. If you feel overwhelmed by the technical side of things, don’t hesitate to reach out for professional guidance to ensure your structural bones are as strong as your aesthetic vision.
Build a Kitchen That Actually Loves You Back
It is easy to get caught up in the stress of a renovation, but remember that the goal is to create a sanctuary. Your home should serve you, not demand your constant labor to keep it organized. By reclaiming that 40% of wasted space under your sink and prioritizing high-quality hardware, you are investing in your own daily peace of mind. Every time you pull out a smooth-gliding drawer instead of digging through a dark cabinet, you’ll feel the value of that effort. Don’t be afraid to take the ‘pivot’ and rethink your space—you have the tools and the strategy to turn any ‘black hole’ into a high-performance work zone. Have you ever discovered a leaking pipe too late because of under-sink clutter? Let me know in the comments below!