The Secret to Designing a Mudroom Bench That Does Not Trap Dust
I remember the night I finally hit my breaking point. I was on my hands and knees with a flashlight and a bent wire hanger, trying to fish a petrified grape and a three-inch-thick mountain of grey lint out from the back corner of my ‘dream’ mudroom bench. It was a beautiful piece of custom cabinetry, but it was a total dust magnet. I spent more time cleaning it than actually using it to sit down and lace up my boots. My mistake was simple but devastating: I designed for Pinterest aesthetics without thinking about how a vacuum actually moves through space. If you are tired of your entryway looking like a collection bin for every bit of hair and outdoor grit, you are in the right place. Today, I’m going to show you how to pivot your design so you never have to scrub a dark corner with a toothbrush again. Have you ever found yourself apologizing to guests for the mysterious ‘fuzz’ living under your bench seating? Let’s fix that. [image placeholder]
Stop Building Dirt Traps in Your Hallway
For years, I thought the classic open cubby was the gold standard for innovative storage solutions. I was wrong. The biggest mistake I made early in my career was building benches that sat flush on the floor with open fronts. This creates a stagnant air pocket where dust settles and stays forever. Now, I always insist on either a fully recessed toe kick or a completely floating design. When you use a floating bench, you have to know how to scribe a bench to a stone wall without any gaps to ensure no debris falls behind the unit. A floating bench allows your robot vacuum or a simple swiffer to glide right under the unit without hitting a single obstacle. It’s a total game changer for the sanity of any homeowner.
Does a custom bench really make cleaning easier?
You might think that more furniture just means more to clean, but it’s actually the opposite when the geometry is right. According to the American College of Allergy, Asthma, and Immunology, indoor dust can contain everything from skin cells to heavy metals, making those hard-to-reach corners more than just an eyesore—they are a legitimate health hazard for your family. By using the mudroom bench trick for storing tall winter boots, you can keep items off the floor while maintaining a sealed base. When we talk about why plywood box construction still beats particle board, durability is a factor, but so is the ability to create tight, seamless joints that don’t let fine grit seep into the cabinet structure. We aren’t just building a place to sit; we are building a barrier against the inevitable mess of a busy life.
Get the Bench Off the Ground to Kill the Clutter
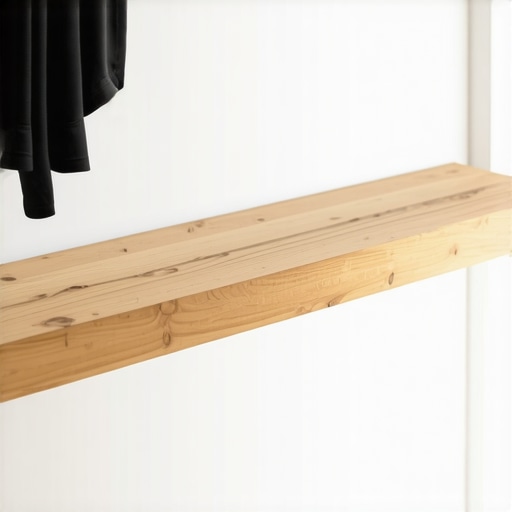
The biggest transformation happens when you stop thinking of a bench as a piece of furniture that sits on the floor and start thinking of it as a structural extension of your wall. I once spent an entire Saturday afternoon helping a neighbor dismantle a traditional mudroom unit because a set of car keys had slipped into a tiny gap between the baseboard and the cabinet. It was a nightmare of sawdust and spiders. Since then, I’ve been a firm believer in the floating approach. By mounting your bench to the wall studs using heavy-duty cleats, you eliminate the footprint entirely. This isn’t just about looks; it’s about the ‘Roomba test.’ If a robot vacuum can’t get under it, you shouldn’t build it. To make this work, you need to understand custom cabinets ideas that transform your homes style while serving a functional purpose. A floating bench should sit roughly 16 to 18 inches off the floor, leaving plenty of room for a row of shoes underneath without them getting lost in the shadows.
Lock It Down with the Right Hardware
You cannot just screw a bench into drywall and hope for the best. I use a ‘french cleat’ system or structural lags. When I’m working on built-ins that elevate your living rooms functionality, the same rules apply: you want the weight to be distributed across the studs. If you’re worried about a floating unit not holding the weight of three adults, don’t be. When properly braced, a plywood-constructed bench is incredibly rigid. Speaking of rigidity, why plywood box construction still beats particle board comes down to screw-holding power. Particle board will crumble under the shear force of a floating seat, but high-quality maple or birch plywood will hold for decades. 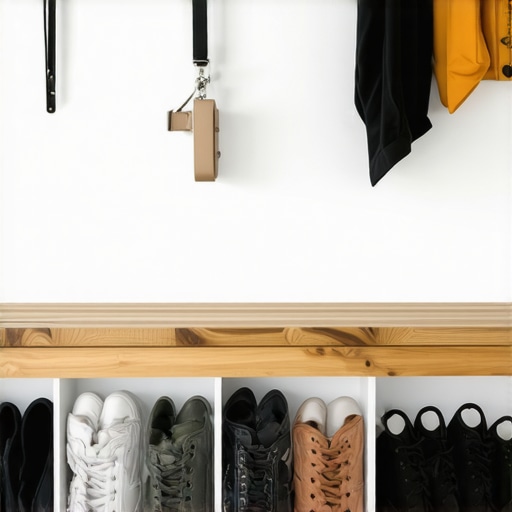
Kill the Gaps Before They Kill Your Sanity
Dust doesn’t just sit on top of things; it migrates into the smallest crevices. If your bench meets a wall that isn’t perfectly plumb—and let’s be honest, no wall is—you’ll end up with a ‘crumb canyon.’ This is where you have to master the scribe. I use a simple compass to trace the wall’s profile onto my end panels. It’s the same technique I use for creating seamless kitchen remasters with built-in storage solutions. If you can’t get a perfect scribe, a small, subtle piece of shoe molding can hide the sin, but a tight fit is always the goal. When you eliminate the gap, you eliminate the hiding spot for grit. This logic even extends to the floor. If you choose a solid base instead of a floating one, you should consider the hidden toe kick drawer move for storing step ladders or flat items. It turns a dead space into a sealed, functional zone that’s easy to wipe down.
Pick a Finish That Actually Repels Dirt
The texture of your wood matters as much as the shape. A rough, reclaimed wood bench looks great on Pinterest, but in a real-world mudroom, those grooves will hold onto salt and mud like a magnet. I always recommend a smooth, pre-finished plywood or a high-quality lacquer finish. Understanding the difference between pre-catalyzed and post-catalyzed cabinet lacquer is vital here. You want a surface that is slick enough for a damp microfiber cloth to glide over without snagging. In my own home, I used a post-cat lacquer on our entry bench, and five years later, the heavy winter boot mud still wipes off with zero scrubbing. It’s about building a surface that fights back against the mess.
People often assume that more specialized storage is always better, but I’m here to tell you that over-customization is the quickest way to ruin a layout. Take the classic narrow spice pull-out, for example. Everyone thinks they need one next to the stove, but why narrow spice pull-outs are often harder to use than you think becomes clear the first time a jar of cumin falls into the bottom mechanism. It’s a cleaning disaster waiting to happen. Instead of micro-compartments, I lean toward smart storage ideas to maximize your kitchen space this year that prioritize flexibility. A wide drawer with adjustable dividers will beat a tiny pull-out every single time. The real ‘oops’ factor comes down to the hardware that nobody ever looks at. I’ve seen homeowners drop a fortune on custom cabinets as a game-changer in your kitchen remodel journey only to have the drawer slides fail because they weren’t rated for the load. If you are planning deep drawers for cast iron, you need to understand the real reason your cabinet drawer slides are grinding: weight distribution. Most standard slides are designed for light cutlery, not thirty pounds of ceramic. 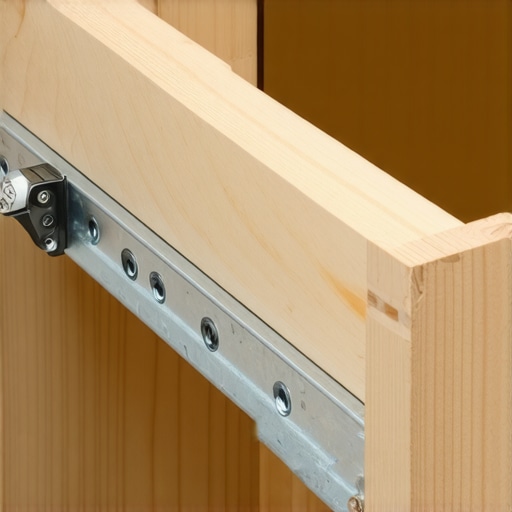
Will your heavy drawers actually survive the five-year mark?
According to the Architectural Woodwork Institute (AWI), the dynamic load rating of a drawer slide includes the weight of the drawer itself. When we discuss why we use solid maple for drawer boxes instead of poplar, we are adding significant ‘dead weight’ before you even put a single fork inside. If you aren’t upgrading to 150-lb rated under-mount slides for your heavy-duty zones, those slides will eventually sag and chew up your face frames. It’s also why why your trash pull-out needs a bottom-mount slide for better weight handling is non-negotiable in my builds. A side-mount slide on a heavy trash bin will rack and fail within three years of daily use. Have you ever fallen into this trap? Let me know in the comments.Even the most expensive hardware eventually needs a little love. I’ve noticed a trend where people spend fifty thousand dollars on a kitchen but then panic the moment a door sits a fraction of an inch low. It’s not a failure of the builder; it’s just physics. When you revolutionize your kitchen remodel using built-ins and creative storage, you are introducing a lot of moving parts into a shifting environment. To stay ahead of it, I never walk onto a job site without a high-precision cabinet hardware jig. It’s the one tool you need for perfectly aligned cabinet knobs every time because it removes human error from the equation. I don’t care how good your eye is; a jig doesn’t get tired or distracted by a podcast, and it ensures your handles are consistent to the millimeter across fifty different drawers.
Stop Eyeballing Your Hardware Placement
If you are still using a tape measure and a pencil for every single pull, you are asking for a headache. I personally use an adjustable aluminum jig that clamps directly to the door frame. This level of precision is what separates high-end custom cabinets ideas that transform your homes style from a DIY project that feels slightly ‘off.’ When you align your hardware perfectly, it draws the eye along clean, horizontal lines, making even smart storage solutions for small kitchens in 2025 look twice as expensive. Precision is the ultimate flex in the world of built-ins.
How do I keep my custom built-ins looking and performing like new?
Maintenance in the cabinet world is ninety percent about managing moisture and ten percent about hardware calibration. The Architectural Woodwork Institute (AWI) specifies that for premium-grade cabinetry, the relative humidity in a home should be maintained between twenty-five and fifty-five percent to prevent excessive wood movement. If you ignore this, you’ll find yourself needing to learn how to adjust European hinges for a perfectly level door reveal more often than you’d like. I always keep a small toolkit in my kitchen junk drawer specifically for the 5 minute hinge adjustment for fixing wonky cabinet reveals. A quick turn of a Phillips head screw every six months is the secret to a kitchen that never feels dated or broken down.
The Future of Storage is More Than Just Shelves
I predict we’re moving toward a world of ‘active’ cabinetry—think sensors that alert you to humidity spikes inside your pantry or integrated lighting that adjusts based on the time of day. While those high-tech bells and whistles are exciting, the foundation remains the same: solid construction and smart layout. If you want to maximize space with innovative storage solutions for every room, you have to be willing to look at the ‘unseen’ parts of your furniture. My advanced tip for you today: Grab a screwdriver this weekend and audit the gap between your two most-used cabinet doors. If they aren’t perfectly parallel, give that adjustment screw a quarter turn. It is incredibly satisfying to see them snap back into a perfect line and realize you don’t need a full remodel to make things look sharp again.
The Hardest Lessons I Learned from My Worst Dust-Magnet Projects
Looking back at my early years, I realize I focused too much on how a room looked in a photograph and not enough on how it felt on a Tuesday morning with three muddy dogs. I’ve learned the hard way that every inch of floor contact is essentially an invitation for dust bunnies to set up a permanent residence. I now realize that knowing when to choose legs over a solid base is a decision that dictates your cleaning schedule for the next decade. Another lightbulb moment for me was accepting that wood is a living material; understanding why solid wood door panels still need room to breathe in summer changed how I scribe my end panels to avoid cracking. Finally, never underestimate the power of the ‘Roomba test’—if your robot vacuum can’t reach it, you will eventually hate cleaning it. [image placeholder]
My Personal Toolkit for Flawless Cabinetry Installs
To get professional results, you don’t need a warehouse of heavy machinery, but you do need a few non-negotiable tools. I never walk into a project without a high-quality aluminum hardware jig; it is the only way to ensure your pulls look uniform. For those planning a larger project, I highly recommend browsing an ultimate guide to custom cabinets for a stylish kitchen overhaul to see how these mudroom principles of elevation and airflow apply to the heart of the home. I also suggest keeping a set of plastic shims and a long-reach scribe tool in your kit. These items, combined with expert tips on selecting storage solutions for a perfect kitchen upgrade, are what turn a basic DIY job into a piece of craftsmanship that adds real value to your property.
Your Path to a Frictionless Home Starts Here
Creating a home that serves you shouldn’t feel like a never-ending battle against grit and grime. When you prioritize smart geometry and high-performance hardware over traditional, floor-heavy designs, you reclaim hours of your life every month. Whether you are just starting to sketch a new bench or you are ready to implement innovative storage solutions for modern kitchen remodels, remember that the goal is a home that works with you, not against you. You now have the blueprint to move from a high-maintenance entryway to a sanctuary that stays clean by design. Have you ever struggled with a specific ‘crumb canyon’ in your current mudroom, or are you planning to go fully floating for your next build? Let me know in the comments below!