The Hidden Toe-Kick Step Stool for Reaching Top-Shelf Spices
I still remember the sharp crack of my shins hitting the edge of a half-open drawer. I was perched precariously on a wooden kitchen chair, one hand gripping the cabinet face and the other stretching toward an elusive jar of saffron buried in the rafters. The chair groaned. My heart skipped. In that moment, I realized that my beautiful kitchen was essentially a vertical obstacle course. If you have ever used a heavy stockpot as a makeshift ladder, you know exactly what I am talking about. We spend thousands on modern kitchen remodels only to end up climbing the furniture just to find the salt. I used to think the answer was those little plastic folding stools. I bought three of them early in my DIY journey. Huge mistake. They were always buried behind the trash can or taking up precious real estate in the pantry. They were never where I needed them, which usually led back to the chair maneuver. Then I discovered the hidden toe-kick step stool, and honestly, it changed the way I look at cabinetry. It is a built-in solution that stays out of sight until you need a six-inch boost to reach those high-up spice pull-outs that are otherwise useless for anyone under six feet tall.
Stop Risking Your Shins for the Cinnamon
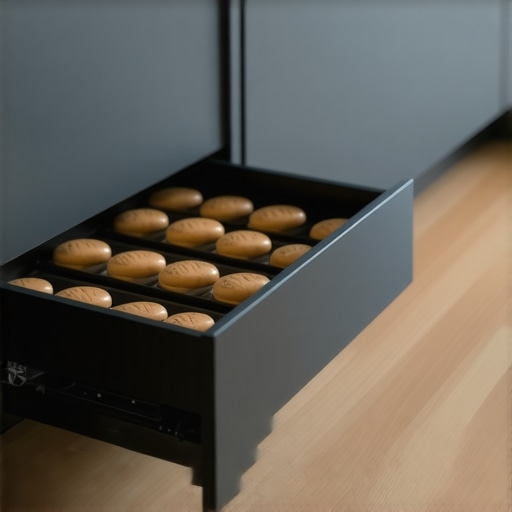
Most people think the space under their cabinets is just wasted air or a graveyard for dust bunnies. But that four-inch gap—the toe-kick—is actually prime real estate for innovative storage solutions. According to data from the National Safety Council, falls are a leading cause of unintentional injury in the home, often involving the improper use of furniture to reach high places. A built-in step stool eliminates the need for the kitchen chair climb entirely. When I first started designing custom cabinets, I was obsessed with deep drawers and sleek lines. I completely overlooked the utility of the floor level. I once tried to build a secret toe-kick drawer just for flat items, but quickly realized that a folding step mechanism was the real game-changer for daily life. Today, we are going to look at how these stealthy additions can make your kitchen safer and more functional without ruining the aesthetic.
Is a Toe-Kick Stool Really Sturdy Enough?
I get this question all the time from neighbors who see mine. Does it feel flimsy? Or is it going to break my cabinet base? It is a fair concern. Nobody wants to step on a piece of wood and hear a snap. The truth is, if you use a high-quality hardware kit that anchors directly into the floor or the cabinet frame, it is actually sturdier than most standalone step stools. It is about the engineering, not just the wood thickness. Have you ever felt like your kitchen was built for someone much taller than you?To get started, you have to look at the anatomy of your lower cabinets. Most standard toe-kicks are 4 inches high and 3 inches deep. This is where innovative storage solutions like the hidden stool live. If you are doing modern kitchen remodels, you can actually design the toe-kick slightly taller—say 5 or 6 inches—to accommodate a beefier mechanism. I recommend checking the clearance around your appliances first. Nothing is worse than installing a beautiful step only to realize it blocks the dishwasher from opening or clashes with your plumbing.
Avoid the Flimsy Hardware Trap
Think of the hardware as the suspension on a truck. If you use cheap slides, they will bottom out under pressure. I learned this the hard way during my first house renovation. I tried to save about $40 by using a standard drawer slide for a toe-kick step. I thought since it was rated for 100 lbs it would be fine, but drawer slides are designed for horizontal pull, not vertical stomp. The first time I stood on it to reach the top shelf of my custom cabinets, the ball bearings shot out like silver marbles across the kitchen floor. It was a disaster that left me with a scratched floor and a bruised ego. For built-ins and storage hacks for a sleek functional kitchen, you need a specialized step-stool kit that locks into place when weight is applied so the unit doesn’t roll while you are on it.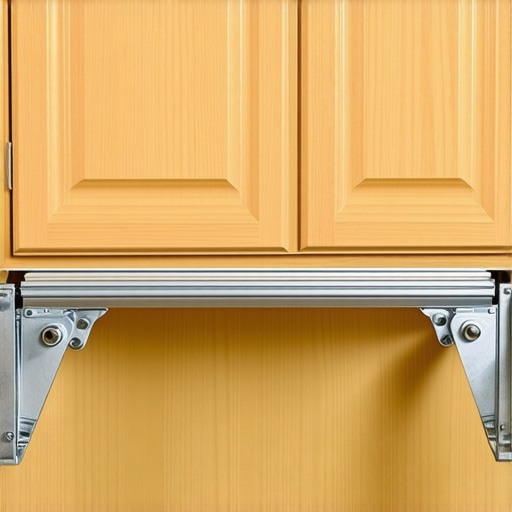
The Plywood Rule for Base Cabinets
When you are putting your full weight on a structure that is usually just meant to hold plates, the material of the cabinet box becomes your primary safety feature. Why plywood box construction still beats particle board for kitchens becomes incredibly obvious when you start screwing in heavy-duty step mechanisms. Particle board is essentially compressed sawdust and glue; it can crumble under the sheer force of a grown adult stepping on a concentrated point. Plywood, with its cross-grain layers, grips the screws and distributes that weight without cracking or bowing. If you have existing particle board cabinets, you should reinforce the base with a 3/4-inch plywood sleeper before installing the hidden toe-kick drawer move for storing step ladders.
Why Your Base Cabinets Need 3-Inch Screws
Stability does not just come from the step itself; it comes from how the cabinet is anchored to the wall studs. If your cabinet is just tacked on with finishing nails, the leverage of you standing on the very front edge could actually pull the entire cabinet box away from the wall. This is why your base cabinets should be secured with 3-inch rugged screws directly into the wall framing. It turns the entire row of cabinetry into a single, immovable unit. Imagine it like a cantilever bridge; the back anchor has to be significantly stronger than the weight on the front edge. Without those long screws, you are essentially trusting gravity to keep you from tipping over, which is a gamble you do not want to take while holding a heavy stack of ceramic dinnerware.Most homeowners start their custom cabinets as a game-changer in your kitchen remodel journey by looking at color swatches and door profiles. It is an easy trap to fall into. We want the ‘wow’ factor. But here is the contrarian truth: a beautiful door on a weak box is just a ticking time bomb. If you are planning to install heavy-duty storage solutions for a perfect kitchen upgrade, like our hidden toe-kick step, you have to ignore the finish for a second and look at how the box is actually built. Most big-box retailers use a ‘dowel and glue’ or a simple ‘staple’ method. For a cabinet that houses a person’s weight, you need to know why your cabinet boxes should be stapled, glued, and screwed. Without that triple-threat of fasteners, the vibrations and sheer force of daily use will eventually wiggle the joints loose.
Stop Obsessing Over the Door Style
If you are building a kitchen to last twenty years, you need to look past the surface. I have seen stunning kitchens where the paint starts chipping after six months because the contractor used the wrong product. This is why using standard interior paint on your kitchen cabinets is a five-year mistake. Beyond the paint, the structural ‘Oops’ factor usually happens in the drawer slides. I once consulted on a project where the homeowner installed heavy-duty drawers for cast iron pots but used standard #6 screws. They sheared right off. Understanding the cabinet screw mistake that causes heavy drawers to fail is the difference between a functional kitchen and a pile of broken hardware. 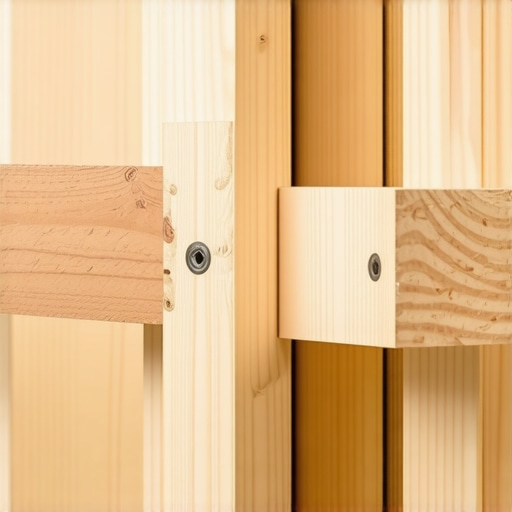
The Joinery Method That Actually Holds Weight
According to the National Kitchen & Bath Association (NKBA), structural integrity is the most frequent point of failure in high-traffic custom installations. When you add a toe-kick step, you are essentially asking a vertical box to handle a lateral shifting load. This is a nuance most DIYers miss. You cannot just slap a step into any old cabinet. If your base cabinets are not properly leveled and shimmed, the weight of a person stepping on that toe-kick will cause the drawer to bind or, worse, crack the face frame. This is why we insist on plywood box construction for any cabinet that integrates weight-bearing storage.
How Do You Calculate the Load Capacity for Hidden Pull-outs?
It comes down to the static vs. dynamic load. A slide might be rated for 100 lbs of static weight (stuff sitting still), but the moment you step on it, it becomes a dynamic load. You need hardware rated for at least 200% of the intended weight to account for the ‘stomp’ factor. This is where advanced planning in modern kitchen remodels pays off. By choosing the right technical specs early, you avoid the heartbreak of a failed system two years down the road. Have you ever fallen into the trap of choosing looks over build quality and regretted it? Let me know in the comments.Once the sawdust is vacuumed up and your spice jars are perfectly aligned, the real challenge begins: keeping it that way. I’ve seen enough ‘dream kitchens’ turn into creaky nightmares within three years to know that maintenance isn’t optional. I recommend a ‘Maintenance Sunday’ every daylight savings. Grab your Pozi-drive screwdriver—yes, the one specifically for European hinges—and check your reveals. If your doors are touching or the gaps look uneven, it’s time for the 5-minute hinge adjustment for fixing wonky cabinet reveals. Don’t wait until the wood starts rubbing, or you’ll be looking at a much more expensive repair for your finish. Also, if you hear a crunching sound, don’t just push harder. I’ve written about the real reason your cabinet drawer slides are grinding, and usually, it’s a simple lack of lubrication or a stray crumb that needs to be cleared before it shears the ball bearings.
Stop Letting Crooked Doors Ruin Your Aesthetic
Precision is the hallmark of luxury. When I’m installing modern kitchen remodels, I never rely on my ‘good eye’ alone. There is the one tool you need for perfectly aligned cabinet knobs every time—a dedicated hardware jig. It’s an aluminum template that locks onto the door and ensures every single pull is within a fraction of a millimeter of its neighbor. If you are doing a DIY upgrade, this is the one tool that will make your work look like it came from a five-figure custom shop. It eliminates the ‘stepped’ look where handles are slightly higher or lower across a run of cabinets, which is a total dead giveaway of a rushed job. #IMAGE_PLACE_HOLDER_D#
How do I keep my custom pull-outs working like new?
Longevity comes down to hardware health. Most people ignore their hinges until they start squeaking, but why your slow-close hinges are suddenly sluggish and how to clean them is actually a frequent topic in my inbox. According to the Architectural Woodwork Institute (AWI) Quality Standards for Casework, high-performance hardware is rated for a specific number of cycles, but that rating assumes a relatively clean environment. In a high-use kitchen, flour, grease, and pet hair are the primary enemies of smooth motion. Every year, use a vacuum attachment to clear the slide tracks and apply a dry PTFE lubricant. Unlike oil, dry lube won’t attract more gunk. It’s one of those expert tips on selecting storage solutions for a perfect kitchen upgrade that people forget: buy the best hardware, but treat it like a precision instrument.
Where Smart Tech Meets Traditional Custom Cabinetry
Looking forward, I predict the next big shift in innovative storage solutions won’t just be mechanical; it will be sensory. We are already seeing integrated LED lighting that triggers when a drawer opens, but soon, we’ll have weight-sensing shelves that alert your phone when you are low on staples. For now, focus on the structural fundamentals. Go into your kitchen right now, pull out your heaviest drawer—the one with the cast iron—and check the slide for any debris or loose screws. A thirty-second cleaning today can save a hundred-dollar hardware replacement next year.
The Brutal Truth About Retrofitting Hidden Steps
Over the years, I have discovered that the hardest part of adding a toe-kick stool isn’t the wood—it’s the floor itself. Most people assume their kitchen floors are perfectly level, but in reality, they often have a slight pitch or are just uneven from settling. If you do not learn the proper way to shim a cabinet on a slanted slab floor, that expensive step mechanism will bind every time you try to pull it out. Another lightbulb moment was realizing that a 5-inch toe-kick is vastly superior to the standard 4-inch version. That extra inch provides significantly more room for your foot to clear the cabinet face, which prevents those annoying scuff marks on your modern kitchen remodels and keeps the finish looking pristine for a decade.
The Precision Kit Every DIYer and Pro Should Own
To get that high-end look without the high-end price tag, you need to invest in tools that guarantee repeatability. I swear by an aluminum hardware jig; it is the one tool you need for perfectly aligned cabinet knobs every time, and it works wonders for lining up toe-kick faces too. For the mechanical parts, I only use PTFE-based dry lubricants because they won’t gum up with kitchen grease or pet hair. Lastly, ensure you have a box of rugged 3-inch fasteners because why your base cabinets should be secured with 3-inch rugged screws becomes a matter of safety the second you put 180 pounds of pressure on the front edge of a cabinet box. I trust these specific tools because they eliminate the margin for error that usually leads to hardware failure.
Reclaim Your Kitchen Workflow Today
Your kitchen should work for you, not the other way around. By integrating these innovative storage solutions, you are not just adding a step; you are reclaiming the top 20% of your storage space that was previously out of reach for daily use. Don’t be afraid to start small—even adding one hidden stool under the pantry can change how you navigate your cooking routine. Remember, custom cabinets as a game-changer in your kitchen remodel journey start with the decision to prioritize function over just a pretty exterior. Have you ever had a kitchen feature that was beautiful but totally impossible to use safely? Let me know in the comments below!