The Best Way to Store Baking Sheets in a Narrow Cabinet
I was halfway through a batch of ginger snaps when I heard it—that unmistakable, metallic crash echoing through my kitchen. I’d reached for one single cooling rack, and because I had them all stacked horizontally like a game of high-stakes Jenga, the entire pile decided to make a run for it. It’s a relatable frustration, isn’t it? You have that one awkward, narrow cabinet next to the oven that seems destined to become a graveyard for misfit pans and greasy muffin tins.
Stop the Cookie Sheet Avalanche for Good
I spent years fighting my cabinets. I honestly thought that my tiny 9-inch wide slot was a design flaw, a leftover space that the builder didn’t know what to do with. I tried stacking my heavy baking sheets, pizza stones, and cooling racks on top of each other. It was a nightmare. Every time I needed the one at the bottom, I had to move five others. I even made the mistake of buying those cheap, plastic-coated wire organizers from a big-box store that eventually bent and snapped under the weight of my cast iron griddle. If you are planning a modern kitchen remodel, you know that every inch counts. Today, we are going to fix that ‘clatter’ once and for all by turning that narrow space into a high-functioning dedicated baking zone. We aren’t just talking about cleaning out a cupboard; we’re talking about reclaiming your sanity and your kitchen workflow.
Is vertical storage really worth the extra effort?
Some people worry that installing dividers is too permanent or that they won’t be able to fit their larger, oddly-shaped items. I had the same skepticism. I thought I’d lose valuable width by adding partitions. However, according to research from the National Association of Home Builders, homeowners consistently rank specialized storage for bulky items like baking sheets as one of the most desired features in a functional kitchen. The ‘effort’ is actually just a one-time setup that pays off every single time you bake a tray of roasted veggies.
Why Vertical Storage Changes Everything
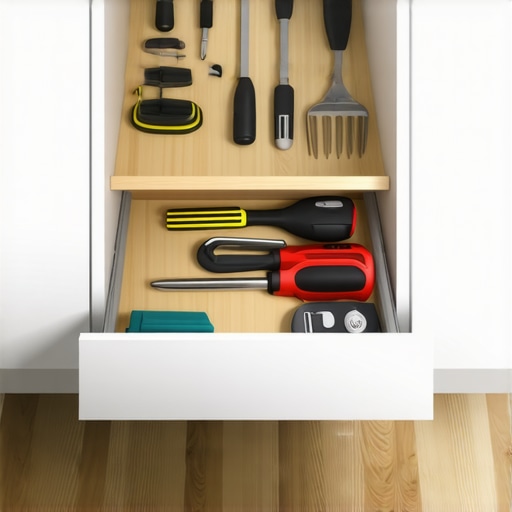
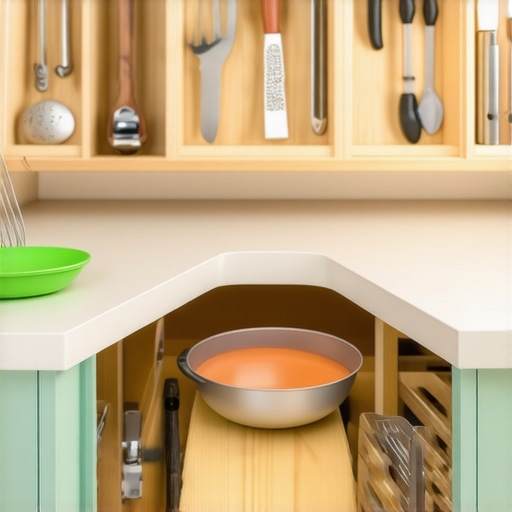
The secret to a peaceful kitchen isn’t more space; it’s better access. By using a vertical cookie sheet divider, you eliminate the friction of digging through a stack. You can see every pan at a glance. It’s the difference between a library and a messy pile of books. In my own home, I eventually realized that smart storage ideas to maximize your kitchen space aren’t just for luxury mansions. Even in a narrow cabinet, organizing your baking sheets with simple dividers allows you to slide a single tray out with one hand while holding a bowl of batter in the other. [IMAGE_PLACEHOLDER] Have you ever reached for a pan only to have the entire cabinet contents spill out onto your toes? It’s a painful rite of passage for most home cooks, but it doesn’t have to be your reality anymore. Let’s dive into how we can transform that narrow abyss into the most organized spot in your house.
Give Every Pan a Personal Parking Spot
To start this transformation, you need to treat your cabinets like a high-end filing system rather than a junk drawer. Empty every single item from that narrow slot. I mean everything. When I first did this, I discovered three identical rusted cookie sheets and a muffin tin that was so warped it looked like modern art. If you haven’t used it in a year, it doesn’t deserve a spot in your new modern kitchen remodels featuring custom cabinets and built-ins. This is the time to evaluate what actually needs a vertical home. Group your items by height and thickness—your thin cookie sheets in one group, and your thick stoneware or cooling racks in another. This initial audit ensures your smart storage solutions for small kitchens in 2025 are actually solving your specific problems, not just moving the mess around.
Custom Built-ins Beat Flimsy Wire Racks Every Time
There is a massive difference between a flimsy, store-bought wire organizer and true built-in dividers. I once tried the budget route with those tension-style rods. I thought I was being clever until I tried to pull out a heavy pizza stone and the rod shot across the room like a projectile. It was embarrassing and ineffective. In a real custom cabinets as a game changer in your kitchen remodel journey, these dividers are usually made of sturdy plywood or melamine that slides into pre-routed grooves. This structural support is vital because baking sheets are surprisingly heavy when they are all leaning against one another. Built-in solutions provide the rigidity needed to keep everything upright without the ‘accordion effect’ where one falling pan knocks over the rest. For those looking for versatility, remember that why your pantry shelves should be adjustable not fixed applies here too; having the ability to move a divider over an inch can make the difference between fitting a thick Dutch oven lid or leaving it on the counter.
Find the Perfect Spacing for Heavy Cast Iron
Spacing is the most critical part of the ‘how-to’. If you set your dividers too close together, you’ll be fighting to wedge a tray in; too far apart, and they’ll lean and clatter. I recommend a 2-inch gap for standard cookie sheets and a 3-to-4-inch gap for bulky items like muffin tins or cooling racks. When I redesigned my own baking zone, I made the mistake of making every slot the same width. I quickly realized my heavy roasting pan needed its own dedicated wide lane. If you are also dealing with heavy cookware, you might want to look into the best way to organize heavy dutch ovens in a deep drawer for those really massive pieces, but for everything else, the vertical slice is king. Think of it like a library for your kitchen: you want to be able to pull out ‘The Great Gatsby’ without the entire bookshelf collapsing onto your hands. This is the level of precision that built-ins and storage hacks for a sleek functional kitchen provide. By securing the dividers at both the top and the bottom of the cabinet, you create a rigid ‘comb’ that keeps even your heaviest cast iron griddles perfectly vertical and silent.
I see it in almost every high-end kitchen I visit: beautiful exterior finishes that hide a fundamental structural flaw. People often assume that the more ‘flexible’ a cabinet is, the better it serves them. In my experience, that is a total myth. While we often discuss why your pantry shelves should be adjustable not fixed for light items like cereal boxes, your baking zone requires the exact opposite. For heavy-duty items like stoneware and cast iron sheets, fixed structural dividers are the gold standard. They provide the lateral support needed to prevent the ‘domino effect’ that eventually warps your cabinet floor. If you are looking for expert tips on selecting storage solutions for a perfect kitchen upgrade, start by prioritizing rigidity over modularity in these high-stress zones.
What is the maximum weight a custom vertical divider should carry?
According to the Woodwork Institute’s standards for architectural woodwork, the primary cause of cabinet failure isn’t the finish; it’s the horizontal deflection. When you lean multiple heavy sheets against a divider, you are exerting lateral pressure that most thin, store-bought inserts can’t handle. This is why I always advocate for transform your kitchen with custom cabinets expert guide for 2025 where the dividers are integrated into the cabinet box itself. In a true modern kitchen remodel, these partitions should be part of a ‘box-within-a-box’ construction. This ensures that even if you have fifty pounds of baking steel leaning to one side, your cabinet walls won’t bow or crack.
Here is the ‘oops’ factor that ruins many beautiful remodels: the silicone trap. Many DIY enthusiasts and even some contractors try to secure dividers using silicone or standard construction adhesive. Please, don’t do this. I’ve explained before why you should never use silicone for cabinet joinery—it lacks the structural bond needed for long-term durability and will eventually peel away under the friction of sliding pans. Instead, ensure your cabinet boxes are stapled, glued, and screwed using professional-grade wood glue and mechanical fasteners. This level of detail is what separates a cabinet that looks good for a year from one that stays silent and sturdy for a decade. Have you ever fallen into the trap of buying a ‘convenient’ wire rack only to have it collapse under your heavy pans? Let me know in the comments. Reclaiming your kitchen workflow isn’t just about smart storage solutions for small kitchens in 2025; it is about building a foundation that respects the weight of your tools. Using built-ins and storage hacks for a sleek functional kitchen ensures that every time you reach for a tray, the only sound you hear is the oven preheating, not a metal-on-metal crash.
Once you’ve installed your structural dividers, the real work is making sure they stay as silent as the day they were put in. In my own kitchen, I noticed that after about a year of heavy use—roasting chickens, baking bread, and sliding heavy stones—the motion started to feel a bit gritty. This is why I always recommend understanding why your soft-close slides grind and how a quick application of a dry-film lubricant (PTFE) can make them feel like new. Unlike standard grease, dry lubricants won’t attract the inevitable cloud of flour that exists in every dedicated baking zone.
Keep Your Heavy Trays Sliding Smoothly
Long-term durability isn’t just about the build; it’s about the environment. According to the Kitchen Cabinet Manufacturers Association (KCMA) A161.1 standard, a high-quality finish should withstand 24 hours of exposure to substances like vinegar and lemon juice. If you are opting for modern kitchen remodels featuring custom cabinets and built-ins, make sure you are wiping down the interior of those vertical slots. Moisture from a ‘mostly dry’ cookie sheet can sit in the bottom of the divider and slowly swell the wood. I’ve found that expert tips on selecting storage solutions for a perfect kitchen upgrade usually involve choosing a pre-finished maple interior because it is much more resistant to this kind of wear than standard melamine.
How can I prevent my baking dividers from wearing out?
The secret is in the hardware. If your dividers are adjustable, check the shelf pins every six months to ensure they haven’t started to lean. For fixed dividers, check the points where they meet the floor of the cabinet. If you notice any racking or wobbling, it’s likely that the original installers didn’t use enough support. I always insist that base cabinets are secured with 3-inch rugged screws. This prevents the entire cabinet box from shifting when you’re pulling out fifty pounds of baking steel or cast iron. A shifting box leads to misaligned doors and dividers that eventually start to rub.
What’s Next for the Vertical Storage Trend?
Looking ahead, I see storage solutions moving toward even more automation and integrated technology. We’re already seeing hidden magnetic catches for touch-to-open doors becoming the standard in minimalist kitchens. I predict that in the next few years, we will see integrated LED lighting within these narrow slots that activates via motion sensor, so you aren’t squinting into a dark 9-inch gap trying to find your cooling rack. To ensure your current setup lasts long enough to see these innovations, learn how to clean matte black cabinet hardware without scratches to keep the aesthetic as sharp as the functionality. I challenge you to grab a can of dry-film lubricant this weekend and give your slides or divider channels a two-minute tune-up—your ears and your expensive pans will thank you.
The Secret Differences Between Good and Great Dividers
If I could go back to the start of my journey, I would have skipped every ‘universal’ fit organizer. The hardest lesson I learned is that cookie sheets come in wildly different thicknesses. If you build your slots all one size, you’ll end up with a pan that doesn’t fit or a rack that rattles like a bag of tin cans. When you revolutionize your kitchen remodel using built-ins and creative storage, always include at least one double-wide slot for that oversized turkey roaster. Also, never underestimate the power of a smooth finish; rough edges on DIY dividers will scratch your expensive non-stick coatings within a week. Finally, remember that accessibility is more important than capacity—it is better to have six easy-to-reach pans than twelve you have to struggle to pull out.
My Go-To Resources for a Professional Finish
[IMAGE_PLACEHOLDER_E]
When you are deep in the weeds of a project, having the right materials is the difference between a headache and a masterpiece. I always lean toward why pre-finished maple interior is better than melamine because it handles the weight of heavy stoneware without chipping or bowing. For hardware, I always look for KCMA-certified components to ensure everything is built for a lifetime of use. If you are looking for expert tips on selecting storage solutions for a perfect kitchen upgrade, I highly recommend investing in a high-quality dry-film PTFE lubricant. It keeps the dividers from binding and ensures the drawers glide silently without attracting the inevitable dust and flour of a busy baking zone.
Build a Kitchen That Actually Inspires You
Transforming that one annoying cabinet isn’t just about the pans; it’s about how you feel every time you walk into the room. You deserve a space that supports your creativity rather than fighting it. When you commit to the ultimate guide to custom cabinets for a stylish kitchen overhaul, you are investing in your own daily peace of mind. Don’t let a narrow slot intimidate you—it’s actually the greatest opportunity for organization in your entire house. Have you ever tried to install a DIY organizer only to have it fail under the weight of your heavy pans? Let me know in the comments below!