The Best Way to Organize Heavy Dutch Ovens in a Deep Drawer
I’ll never forget the sound of my favorite 7-quart enameled Dutch oven sliding across the bottom of a flimsy drawer and slamming into its neighbors with a bone-jarring thud. It wasn’t just the noise; it was the realization that my expensive cookware was chipping, and my drawer tracks were screaming for mercy. I’d spent years dreaming of a custom kitchen remodel, but I hadn’t actually thought about the physics of storing twenty-pound pots. If you’ve ever had to squat down and play a high-stakes game of cast-iron Tetris just to make a batch of chili, you know exactly what I’m talking about. It’s heavy, it’s awkward, and if you don’t do it right, it’s expensive. We need more than just empty space; we need a strategy that keeps our backs safe and our cabinets intact. I am going to show you how to turn that chaotic pit of metal into a smooth-gliding masterpiece of efficiency.
Stop Stacking Your Heavy Pots Like They Are Plastic Bowls
I made the classic mistake of thinking I could just pile my Dutch ovens on top of one another. I figured as long as the drawer closed, I was winning. I was wrong. Not only did I scratch the beautiful enamel, but I also learned the hard way about the cabinet screw mistake that causes heavy drawers to fail. Those slides aren’t invincible. Heavy cast iron, like a classic Lodge 7-quart, weighs nearly 15 pounds empty, and when you have four or five of them in a single spot, you are testing the limits of physics. According to industry guidelines from the Architectural Woodwork Institute, drawer bottoms intended for heavy storage should be at least 1/2 inch thick to prevent permanent warping or “bottoming out” over time. If you are using 1/4 inch bottoms, you are living on borrowed time. Today, I’m going to walk you through how to distribute that weight and use innovative storage solutions that make these heavy beasts feel weightless. I want to help you avoid the frustration of a drawer that won’t open because a stray lid has wedged itself against the cabinet frame.
Is it actually possible to keep drawers from sagging under all that weight?
It’s the number one thing people ask me when they see my setup. They worry that over time, the bottom of the drawer will bow or the glides will start grinding. And honestly? They’re right to worry if they’re using standard builder-grade materials. That’s why I always advocate for plywood box construction because it handles the structural stress so much better than particle board. You can even fix a sagging pot and pan drawer with a center support if you’re dealing with an existing setup that’s struggling. Tell me, have you noticed your large drawers getting a bit “sticky” or loud lately? That’s usually the first sign your storage plan needs an overhaul. I’ve been there, staring at a drawer that just won’t glide, wondering if I should have just left the pots on the counter. But trust me, once you get the layout right and reinforce your storage solutions, it changes your entire cooking rhythm. You’ll go from dreading the cleanup to actually enjoying the “click” of a perfectly balanced drawer. Let’s dive into the specifics of spacing, padding, and the magic of peg systems.
Switch to 3-Inch Rugged Screws for Maximum Support
The biggest mistake most people make during a kitchen remodel isn’t the color of the paint; it’s the invisible hardware holding everything together. If you are mounting base cabinets that will eventually hold eighty pounds of cast iron, standard 1.25-inch wood screws are simply not going to cut it. You need to ensure why your base cabinets should be secured with 3-inch rugged screws. Think of these screws as the literal backbone of your storage; without them, the shear weight of your pots can actually pull the cabinet box away from the wall studs. I’ve seen beautiful custom cabinets lean forward like a tired athlete because the installer saved five dollars on hardware. These specialized screws feature a built-in washer head that bites into the wood without splitting it, creating a connection that can withstand the vibrations of a busy kitchen. In a professional remodel, this is the difference between a cabinet that stays level for twenty years and one that starts to sag within eighteen months.
Why Bottom-Mount Slides Save Your Heavy Drawers
Standard side-mount slides are great for silverware, but they often struggle with the lateral torque created when you pull out a drawer filled with Le Creuset. This is why your trash pull-out needs a bottom-mount slide for better weight handling, and the same logic applies to your pots. Heavy-duty undermount slides transfer the weight directly to the cabinet floor rather than hanging it off the side walls. It’s the difference between carrying a heavy box in your arms versus dragging it on a sled. The glide stays smoother, and the hardware lasts decades instead of years.
#IMAGE_PLACE_HOLDER_B#
Ditch the Stack and Use Pegs Instead
I once hosted a high-stakes Sunday roast for eight people, and when I went to grab my favorite 12-inch skillet from the bottom of a stack, the entire drawer jammed. I had to manually lift the drawer face and wiggle it like a loose tooth just to get it open. That was the day I realized stacking is the enemy of efficiency. Instead of piling pots, use a peg board system. You can maximize space with innovative storage solutions for every room by installing a perforated bottom in your drawer and using wooden pegs to create custom slots for each pot. By using a 5/8-inch plywood base with pre-drilled holes, you can reposition the pegs whenever you add a new piece to your collection. This flexibility is the hallmark of truly functional storage solutions. For thinner items, the vertical cookie sheet divider that ends the cabinet clatter is a lifesaver, allowing you to slide pans out like books on a shelf.
Stop the Sag Before Your Drawer Bottom Blows Out
If you look at your current drawer and see a slight curve in the wood at the bottom, you are looking at a structural failure in progress. You don’t have to replace the whole unit to fix it. You can learn how to fix a sagging pot and pan drawer with a center support by adding a stiffening rail underneath. This simple piece of wood acts like a bridge girder, preventing the plywood from bowing under the weight of those heavy built-ins. When combined with other built-ins and storage hacks for a sleek functional kitchen, you turn a potential breakage into a rock-solid feature. Don’t wait for the bottom to pop out of its groove; reinforce it now while the wood is still pliable.
Stop Chasing Deep Cabinets If You Actually Want to Find Your Stuff
Everyone will tell you during a kitchen remodel that you need ‘more storage,’ which usually translates to ‘deeper cabinets.’ I’m here to tell you that’s a trap. Depth without access is just a burial ground for expensive cookware. In my experience, a 24-inch deep base cabinet is the absolute limit of functionality unless you have full-extension hardware. People assume a walk-in pantry is the dream, but I’ve found that why a pull-out pantry beats deep walk-in shelves for visibility every single time. When you pull the shelf to you, the light hits everything at once. When you reach into a dark cave, you end up buying a third jar of paprika because you couldn’t see the first two. This logic is central to creating seamless kitchen remasters with built-in storage solutions that actually work for the cook, not just the photographer. Let’s dig deeper into the structural reality of these systems.
Can you really trust those ‘heavy-duty’ wire pull-outs with a 15-pound Dutch oven?
The short answer is: probably not for long. Many retailers sell wire basket inserts as a premium upgrade, but they are notorious for lateral wobbling. According to the National Kitchen & Bath Association (NKBA) guidelines, a standard residential drawer should handle at least 75 pounds of dynamic load, but many off-the-shelf wire systems start to deflect at 40. This is why I advocate for custom cabinets with solid wood sides. If you’re planning modern kitchen remodels featuring custom cabinets and built-ins, you need to look at the joint construction. I’ve seen dovetail joints hold up under decades of cast-iron abuse, while ‘staple-and-glue’ boxes fall apart when a heavy pot is dropped just an inch. You should always prioritize why we use solid-maple for drawer boxes instead of poplar because the higher density of maple holds the slide screws much more securely over thousands of open-close cycles.
#IMAGE_PLACE_HOLDER_C#
Why Your Corner Cabinet Is Probably a Black Hole
We’ve all had that corner cabinet—the one where the Tupperware lids go to disappear. Most people think a standard Lazy Susan is the answer, but the center pole is a massive waste of space and a structural weak point for heavy items. If you want to keep your heavy pots in the corner, why your corner cabinet needs a super susan not a pole mount becomes obvious the moment you try to store a 12-inch cast-iron skillet. A Super Susan sits on a fixed shelf with a ball-bearing swivel, meaning it can handle double the weight without that annoying ’tilt’ that happens when a pole-mount gets overloaded. This is one of those expert tips on selecting storage solutions for a perfect kitchen upgrade that separates a ‘nice’ kitchen from a professional-grade workspace.
The Heat Trap Most Designers Overlook
Here is the ‘oops’ factor I see all the time: placing high-end storage too close to the heat source without the right materials. If your storage solutions involve sleek, modern finishes, be careful with the stove placement. Specifically, why your canton kitchen remodeling project should skip cheap thermofoil near the oven is a lesson learned in peeling plastic and bubbling glue. The intense heat from a self-cleaning cycle can delaminate cheaper materials in seconds. When you are looking at transform your kitchen with custom cabinets expert guide for 2025, always ensure your built-ins near the range are finished with high-heat resistant lacquers or solid wood. Have you ever fallen into the trap of choosing style over structural integrity, only to have a drawer fail a year later? Let me know in the comments—I’d love to hear your storage horror stories.
Why a Professional Jig is Better than Your Best Guess
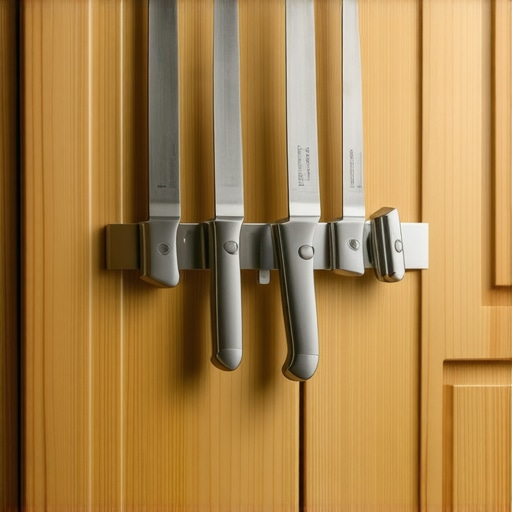
When I first started doing modern kitchen remodels featuring custom cabinets and built-ins, I thought I could eyeball the hardware placement. I was wrong. A fraction of a millimeter off, and your eyes will catch it every single time you walk into the room. This is why I swear by a dedicated cabinet hardware jig. It is the one tool you need for perfectly aligned cabinet knobs every time. It removes the human error from the equation, ensuring that every handle is identical across thirty different drawers. If you are investing in high-end custom cabinets, don’t ruin the aesthetic with crooked pulls. I personally use an aluminum alloy jig with stainless steel bushings because the plastic ones tend to warp after the first fifty holes. It is about repeatability and precision.
#IMAGE_PLACE_HOLDER_D#
How do I maintain my custom storage systems over time?
Maintenance isn’t just about wiping the dust off the surface; it is about ‘hardware hygiene.’ If you notice your drawers starting to resist or making a faint scratching sound, do not just push harder. You need to understand why your soft-close slides grind and the quick lubrication fix that can save them. Usually, it is a buildup of kitchen grease and household dust that creates a sticky paste inside the ball-bearing races. A quick blast of pressurized air followed by a dry-film lubricant will restore that ‘new kitchen’ feel instantly. The same goes for your doors; why your slow-close hinges are suddenly sluggish and how to clean them is often a matter of a simple five-minute adjustment rather than a mechanical failure.
Stop Seasonal Humidity from Ruining Your Reveal
If you have built-ins or inset cabinetry, you have likely noticed the gaps change when the heater kicks on in the winter. This is the inset cabinet gap re-aligning doors after seasonal humidity changes. According to the Blum Technical Manual, the gold standard for hardware engineering, European-style hinges are designed with three-way independent adjustments specifically to manage this. You should learn how to adjust european hinges for a perfectly level door reveal to keep those lines crisp. I recommend doing a tune-up every six months as the seasons shift. It is the difference between a kitchen that looks aged and one that looks meticulously cared for.
Look Out for Integrated Tech in 2025
I predict the next big thing in storage solutions isn’t just better wood; it is ‘active’ storage. We are moving toward smart storage solutions for small kitchens in 2025 that include integrated LED lighting triggered by motion sensors and even motorized assist for heavy drawers. Imagine a kitchen remodel where the heavy trash pull-out opens with a tap of your knee because your hands are full of prep waste. This level of creating seamless kitchen remasters with built-in storage solutions is becoming the new baseline for luxury. If you are ready to stop struggling with your space, I highly recommend you transform your kitchen with custom cabinets expert guide for 2025 and try the hardware jig method for your next small project. It is a game-changer for your confidence as a DIYer or a homeowner overseeing a pro crew.
What I Would Tell My Past Self Before My First Big Remodel
Looking back at that loud thud in my old kitchen, I realize I lacked the ‘insider wisdom’ that only comes from breaking a few drawer slides. Here are the lightbulb moments that changed my approach to storage solutions forever. First, don’t underestimate the weight of a lid; they are often the silent killers of structural integrity, sliding into gaps and jamming systems. Second, follow the 10% rule: always design your storage to handle 10% more weight than you think you need. Third, always remember that ‘good enough’ hardware usually fails exactly two weeks after your warranty expires. If you are investing in the ultimate guide to custom cabinets for a stylish kitchen overhaul, do not skimp on the screws or the slide ratings. Finally, the biggest secret is access; if you have to move more than two items to get to your Dutch oven, your system has failed you.
Resources for a Kitchen That Outlasts Your Mortgage
I don’t trust marketing brochures; I trust field-tested results. When I’m planning modern kitchen remodels featuring custom cabinets and built-ins, I rely on a few specific standards and tools. I highly recommend checking the Architectural Woodwork Institute (AWI) standards for load-bearing cabinetry; they provide the technical ‘why’ behind the 1/2-inch drawer bottom rule. For precision, the one tool you need for perfectly aligned cabinet knobs every time is a professional-grade aluminum jig—it is the only way to ensure your custom cabinets look as good as they function. I also suggest looking into heavy-duty silicone mats to protect your plywood interiors from the inevitable scratches of cast iron. If you’re struggling with smaller appliances, you might find the 3-best ways to hide a toaster on a small countertop helpful for maintaining that sleek, professional aesthetic.
It Is Time to Build the Kitchen You Actually Enjoy Using
The journey from a chaotic, rattling cabinet to a whisper-quiet, organized workspace is one of the most rewarding parts of homeownership. You don’t have to live with sagging drawers or the fear of a ‘pot avalanche’ every time you want to make soup. By focusing on structural integrity and utilizing the right built-ins, you turn your kitchen into a tool that works with you, not against you. Whether you are just starting to plan or are in the middle of a DIY upgrade, remember that every screw and every slide matters. Your dream kitchen is within reach if you prioritize the physics of storage. If you ever feel stuck or need professional guidance on your next project, feel free to reach out through our contact page. Which of your heavy pots is currently causing the most trouble in your cabinets? Let me know your storage horror stories in the comments below!