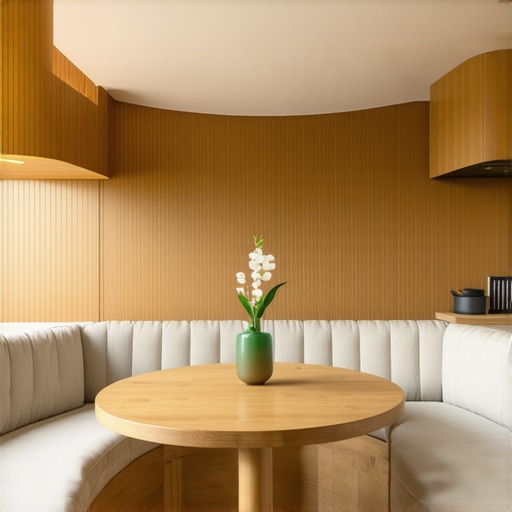
The Built-In Bench Move That Adds Extra Seating to Small Kitchens
I vividly remember the night I nearly tipped over a stray chair leg while carrying a pot of boiling pasta. My kitchen isn’t tiny by most standards, but with three people trying to “help” and chairs jutting out like obstacle course hurdles, it felt like a broom closet. I was frustrated. I kept buying slimmer stools, thinking that was the answer. It wasn’t. The real breakthrough came when I realized the floor wasn’t my problem—the empty space under my window was. That’s when I discovered the magic of the built-in bench. I want to share how this simple pivot changed my morning coffee routine from a cramped struggle into a cozy ritual.
You Can’t Keep Living in a Kitchen Where Everyone is Underfoot
If you are tired of the constant “excuse me” dance, you are not alone. Most of us think we need a bigger floor plan, but what we actually need are smart storage solutions for small kitchens in 2025 that work with the space we have. I made a massive mistake early on by thinking I could just push a standard bench against the wall and call it a day. It looked terrible, and because the height was off, I ended up with a sore back after every meal. It wasn’t until I looked into built-ins and storage hacks for a sleek functional kitchen that I realized the power of custom dimensions. According to design experts at Architectural Digest, a built-in banquette can reclaim nearly 12 inches of “push-back” space that traditional chairs require, which is why your kitchen island seating feels cramped right now. That extra foot of breathing room is the difference between a kitchen that flows and one that feels like a bottleneck. Have you ever felt like your kitchen chairs were just expensive trip hazards designed to ruin your day?
Does losing the flexibility of movable chairs ruin the room?
I hear this all the time from neighbors. People worry that “bolting” things down will make the kitchen feel smaller or less versatile. In my experience, it’s actually the opposite. When you anchor your seating, you define the “zone,” which stops the furniture creep that usually eats up your walkway. I used to be obsessed with the idea that I might need to move the table for a huge party, but let’s be honest: that happened once in three years. For the other 1,094 days, I was just fighting for space. By committing to a built-in, you aren’t just adding seats; you are adding a destination. It becomes the place where kids do homework or where you sit to scroll through recipes. It’s about making the room work for your real life, not a “what if” scenario. Plus, the hidden benefit is the storage. You can’t tuck a vacuum or a slow cooker inside a standard kitchen chair, can you? We are going to look at how to build that storage in a way that actually stays organized.
Stop Guessing and Start Measuring the 18-Inch Sweet Spot
Dimensions are the hill most DIYers and homeowners die on. If the bench is too high, your legs dangle like a toddler; too low, and you are eating with your chin on the table. The magic number for a standard dining experience is 18 inches from the floor to the top of the seat. But here is the kicker: you must subtract the thickness of your cushion before you build. I once built a gorgeous oak bench, threw a four-inch plush cushion on top, and suddenly everyone felt like they were sitting at a bar instead of a breakfast nook. It was an awkward disaster that required me to rip the entire base apart and shorten it. You also need to account for the ‘toe kick’ recess. Just like your lower cabinets, a bench needs a 3-inch inset at the bottom so your heels have a place to rest. Without it, you’ll find yourself leaning forward uncomfortably just to reach your fork.
Why You Should Abandon Nails for Rugged Screws
When you are anchoring a built-in bench that will eventually hold three adults and a restless dog, friction-based nails just won’t cut it. Over time, the weight shifts and the wood expands, causing nails to ‘creep’ out. This is exactly why your base cabinets should be secured with 3-inch rugged screws rather than standard finish nails. I have seen beautiful banquettes pull away from the drywall because the builder thought glue and brads were enough for a high-traffic area. It is not just about stability; it is about long-term safety. When I remodeled my first kitchen, I used heavy-duty structural screws driven directly into the studs. Ten years later, that bench hasn’t moved a millimeter, and there isn’t a single squeak when someone sits down. 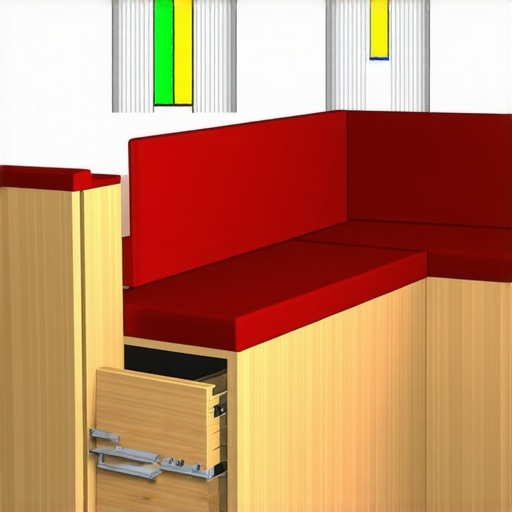
The Secret to Storage That Does Not Require a Gym Membership
We have all seen those ‘lift-top’ benches where you have to move every cushion and ask three people to stand up just to get a casserole dish out. That is not a storage solution; that is a chore. If you want innovative storage solutions for modern kitchen remodels, you should opt for deep drawers. Specifically, look at the hidden toe kick drawer move for storing step ladders or heavy items that you only need occasionally. By using 24-inch heavy-duty drawer slides, you turn that deep, dark space under the seat into a fully accessible pantry. I used this trick to store my heavy cast-iron Dutch ovens; now, I just slide the drawer out with one hand instead of digging through a cavernous box on my hands and knees.
Match the Finish Without Losing Your Mind
One of the biggest hurdles in choosing custom cabinets as a game changer in your kitchen remodel journey is making the new built-in look like it was always part of the original architecture. You need to know how to match new cabinet doors to an existing stain without the guesswork. If your existing cabinets are 10-year-old cherry, a fresh ‘cherry’ stain from the store will look far too orange because it hasn’t aged under UV light. If you are going for a modern look, consider the best wood species for painted cabinets that wont show grain, such as maple or MDF, to ensure a smooth, seamless finish. In my own kitchen, I ended up using a toner coat—a tinted clear coat—to bridge the color gap. It is the subtle difference between a ‘weekend project’ and a professional, integrated look.
Design for Your Actual Workflow
Think about where you are placing this built-in in relation to your prep areas. This is why your kitchen workflow needs a dedicated baking zone nearby. I once installed a bench that doubled as a landing spot for heavy flour sacks in the bottom drawer, which saved me from hauling 25-pound bags across the room. Every inch of a built-in should have a specific job description that makes your daily life easier, not harder.Most homeowners assume that any corner cabinet should automatically get a Lazy Susan. It is the default setting in the industry, but in my experience, it is often a massive waste of usable volume. If you want to truly optimize your layout, you should skip the lazy susan and install lemans pull outs instead. Why? Because the circular motion of a Susan leaves the corners of the cabinet box completely unreachable, effectively throwing away twenty percent of your storage space. According to the National Kitchen and Bath Association (NKBA), ergonomic accessibility is the primary driver of long-term kitchen satisfaction, and a pull-out system brings the items to you rather than making you dive into a dark spinning abyss.
Is plywood always superior to high-density fiberboard for painted doors?
This is a major point of contention among purists, but here is the nuance: while plywood is great for cabinet boxes, the best wood species for painted cabinets that wont show grain often involve stable composites for the center panels. Real wood expands and contracts with the seasons, which leads to those hairline cracks at the joints of your doors—a phenomenon known as bridge cracking. If you ignore this, you will be staring at unsightly lines within six months of the installation. Another expensive trap is the finish itself. I have seen countless DIYers and even some contractors claim that a high-end trim paint is enough. However, using standard interior paint on your kitchen cabinets is a five-year mistake because it lacks the chemical resistance to withstand skin oils and steam. You need to understand the difference between pre-catalyzed and post-catalyzed cabinet lacquer to ensure your investment does not peel under the pressure of daily use. Have you ever fallen into this trap of choosing pretty over durable? Let me know in the comments. 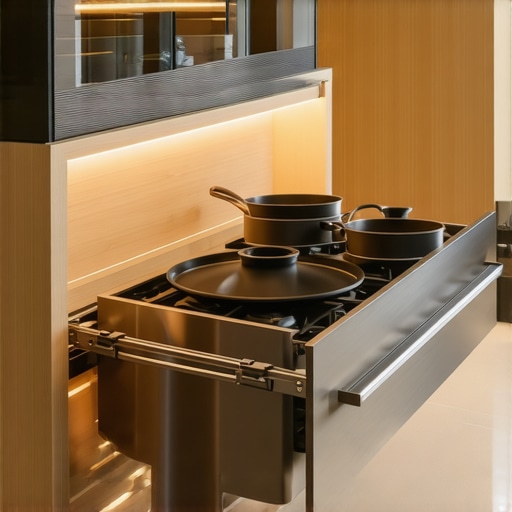
The Real Reason Your Soft-Close Drawers Start to Fail
We all love that silent whoosh of a soft-close drawer, but most people treat them as set it and forget it furniture. In reality, heavy-duty storage requires actual maintenance. If you are implementing innovative storage solutions for modern kitchen remodels, you have to account for the weight load on those slides. When you pack a drawer with fifty pounds of cast iron, the ball bearings eventually struggle. If you do not keep the tracks clear of debris, you will end up with an annoying grinding sound. It is a small detail, but ignoring it can turn a luxury kitchen into a noisy frustration in less than a year. Real expertise isn’t just about the new look; it’s about how that kitchen functions on day one thousand. If you are ready to move past the basics and design a space that lasts, check out custom cabinets as a game changer in your kitchen remodel journey for more advanced layout tips.Maintaining a custom kitchen isn’t about deep cleaning once a year; it’s about the small, mechanical resets that keep everything fluid. I’ve seen expensive remodels feel low-quality after just 18 months because the homeowner didn’t realize that why your soft-close slides grind and the quick-lubrication-fix is usually just a matter of proper clearing. If you start hearing that tell-tale sand-against-metal noise, don’t wait for the slide to fail. I personally use a dry PTFE spray—never a wet oil or WD-40, which just attracts dust like a magnet—to keep the motion silent. Understanding the real reason your cabinet drawer slides are grinding usually comes down to simple debris in the ball-bearing tracks that can be blown out with compressed air.
How do I keep my built-ins looking fresh over the years?
The biggest enemy of a high-end finish isn’t actually your kids; it’s cooking grease and UV light. You might notice why your white cabinets are turning yellow and how to prevent it if your kitchen gets heavy direct afternoon sun. I recommend applying a specialized UV-filtering film on windows, but for daily maintenance, stick to a damp microfiber cloth with a drop of pH-neutral soap. Avoid those ‘orange-scented’ oil cleaners; they leave a wax-like film that eventually softens the lacquer. According to the Blum Technical Guide, professional-grade undermount slides are rated for 100,000 open-and-close cycles, but only if they remain free of chemical buildup and excessive grit. If you’re worried about the integrity of your finish or mechanicals, contact-us for a consultation on professional-grade maintenance.
Ditch the tape measure for a precision jig
When it comes to scaling your storage or adding new pulls to existing doors, don’t trust a standard tape measure. I’ve seen perfectly good doors ruined by being off by just an eighth of an inch, creating a visual ‘staircase’ effect across the kitchen. That is why I swear by an adjustable aluminum hardware jig. It’s the one tool you need for perfectly aligned cabinet knobs every time. By locking in the vertical and horizontal offsets once, you can fly through 40 doors with zero variation. It’s the subtle difference between a kitchen that looks like a weekend DIY attempt and one that looks like a professional showroom. 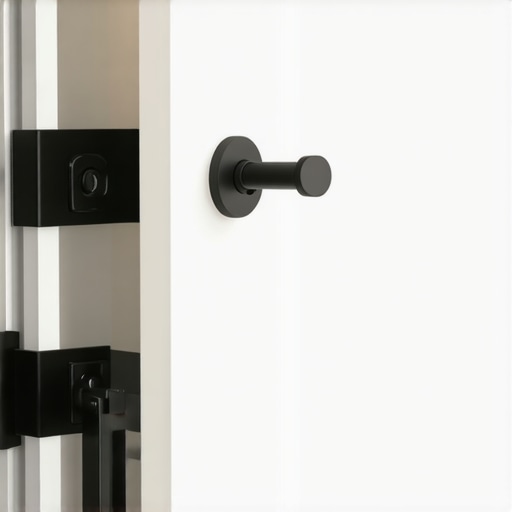
The next decade of kitchen tech
Looking ahead, I see the ‘hidden kitchen’ trend only growing as we demand more from our floor plans. We are moving away from appliances sitting on counters and toward fully integrated ‘garages’ and stations. This is why every kitchen should have a dedicated charging station for laptops and small electronics tucked inside a ventilated cabinet. In the next few years, I expect to see wireless charging pads built directly into the underside of stone countertops and voice-activated drawer openers as standard features. If you want to stay ahead of the curve, start thinking about how to integrate power and tech into your custom cabinets as a game-changer in your kitchen remodel journey now. My best advice for an immediate upgrade? Take five minutes this weekend to perform the 5-minute hinge adjustment for fixing wonky cabinet reveals—it’s the fastest way to make your kitchen look expensive again without spending a dime.
Hard-Won Lessons From My Middle-of-the-Night Kitchen Epiphanies
Building a custom kitchen isn’t just about the physical wood; it’s about the psychology of movement. I’ve learned the hard way that the ‘one-butt rule’ is real—if you can’t comfortably pass behind someone seated at your new bench without a struggle, the design has failed. One lightbulb moment for me was realizing that lighting matters almost as much as the wood species. A beautiful built-in can look like a dark cave if you don’t account for the shadows cast by the table. Another hard lesson? Never trust a floor to be level. In my first project, I assumed the subfloor was flat and ended up with a bench that leaned like the Tower of Pisa. Now, I always use expert tips on selecting storage solutions for a perfect kitchen upgrade to ensure my base is shimmied and structural before the first screw goes in. Finally, remember that your needs change; building in a little bit of adaptability, like adjustable shelf heights within the bench drawers, is the difference between a 5-year solution and a 20-year legacy.
The Gear and Guides That Provide a Professional Edge
If you are ready to stop dreaming and start building, I recommend keeping these three resources in your back pocket. First, the NKBA Kitchen & Bath Planning Guidelines are the ‘bible’ for ensuring your 18-inch seat heights and walkway clearances are legally and ergonomically sound. For the actual construction, I never start a project without my aluminum hardware jig; it is the one tool you need for perfectly aligned cabinet knobs every time. When it comes to the finish, don’t settle for big-box store poly; look into the ultimate guide to custom cabinets for a stylish kitchen overhaul to understand why professional-grade lacquers are worth the extra effort. These tools turn a hobbyist project into something that looks like it belongs in a design magazine.
Reclaiming Your Kitchen One Smart Corner at a Time
Your kitchen should be the heart of your home, not a source of daily frustration. By moving away from standard, bulky chairs and embracing the efficiency of built-ins, you are doing more than just saving space—you are creating a destination for your family to gather. Whether you are tackling this as a DIY weekend warrior or seeking transform your kitchen with custom cabinets expert guide for 2025, the key is to prioritize function and durability over fleeting trends. A well-built bench is an investment in your daily peace of mind. If you find yourself overwhelmed by the technical details of dimensions or finishes, don’t hesitate to contact-us for a professional perspective. Are you planning to build your own banquette, or are you looking for a pro to handle the heavy lifting? Let me know in the comments below!