Why You Need a Flush-Mount Outlet Inside Your Toaster Garage
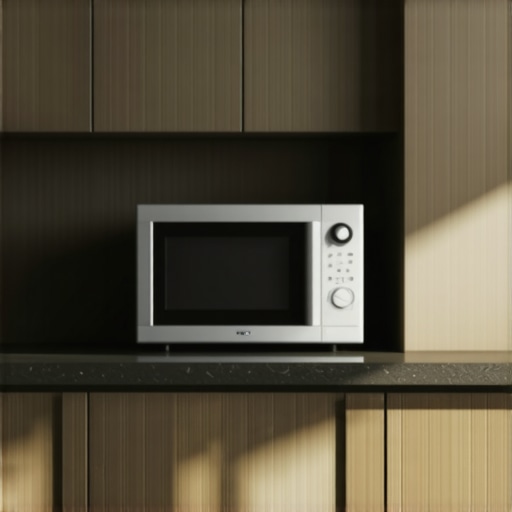
I remember the morning I almost threw my expensive four-slice toaster out the window. My brand-new appliance garage looked stunning—a sleek masterpiece of walnut—but every time I wanted a bagel, I was wrestling with a thick, coiled cord that kept getting jammed in the door. I had spent thousands on custom cabinets as a game-changer for my kitchen, yet here I was, defeated by a standard three-prong plug. It felt like buying a luxury car and finding out the keys didn’t quite fit the ignition. The clutter was gone from the counters, sure, but the internal chaos was maddening. If you have ever spent five minutes shimmying an appliance just to get a cabinet door to close, you know exactly the frustration I am talking about. Does this sound like your morning routine too?
Stop Fighting the Cord and Reclaim Your Counter Space
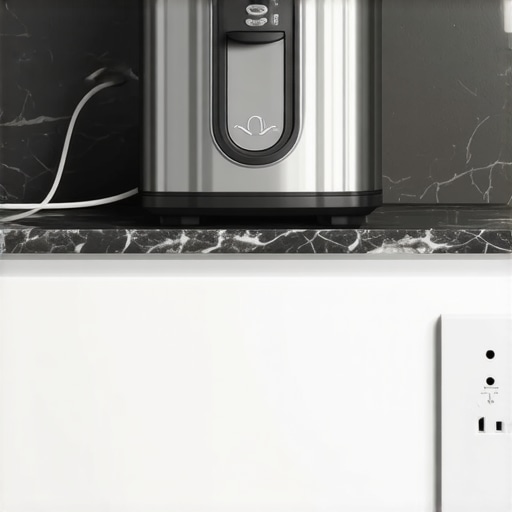
The biggest mistake I made early in my design career was assuming a standard outlet would be ‘good enough’ for a hidden storage nook. I installed a regular duplex outlet, thinking I was being clever. What I didn’t account for was the two inches of space the plug itself consumes. In a tight appliance garage, those two inches are the difference between a door that glides shut and one that bounces off a plastic cord. This is why innovative storage solutions for modern kitchen remodels must include flush-mount or recessed outlets. By moving the connection point back into the wall cavity, your toaster can sit right against the back wall. It sounds like a small detail, but in the world of high-end ways to hide a toaster, it is the secret to true functionality. According to data from the National Kitchen & Bath Association (NKBA), integrated power is now a top-three priority for homeowners, yet improper placement remains a leading cause of ‘remodeler’s remorse.’
Is a specialized outlet really worth the extra electrical work?
I get the skepticism. You are already paying for cabinet boxes, hardware, and labor; the last thing you want is to call the electrician back for a ‘fancy’ socket. But let me tell you, the first time you slide that toaster back and hear the door click shut without any resistance, you will realize it is the best twenty dollars you ever spent. We are aiming for a seamless experience where the technology serves you, not the other way around. Proper planning here prevents the cord-fray and heat-trapping issues that plague shallow cabinets. We aren’t just hiding the mess; we are creating a dedicated workstation that actually works.The math of a hidden storage nook is unforgiving. If your toaster is 10 inches deep and your cabinet is 12 inches deep, you might think you have plenty of room. You don’t. You are forgetting the ‘ghost space’—that 2-inch buffer required for the power cord to loop and plug into the wall. I once designed a gorgeous coffee station for a client during a high-end kitchen remodel, only to realize on installation day that the espresso machine’s heavy-duty cord meant the door wouldn’t close by a fraction of an inch. We had to move the entire cabinet back three-quarters of an inch into the drywall just to make it functional. To avoid this, always plan for smart storage ideas to maximize your kitchen space this year by measuring the appliance with the cord plugged in.
Recess Your Outlets to Save Every Inch
The most effective way to gain back that lost space is to use what electricians call a ‘clock outlet’ or a recessed box. Think of it like a basement for your plug; instead of the outlet sitting on top of the drywall, it sits two inches inside the wall cavity. This allows the plug to be flush with the wall surface, letting your appliance sit right against the back of the cabinet. This is a crucial step when considering the secret to hiding outlets in a kitchen island with waterfall edges or tight appliance garages. If you skip this, you are essentially shrinking your usable shelf depth by ten percent before you even start. 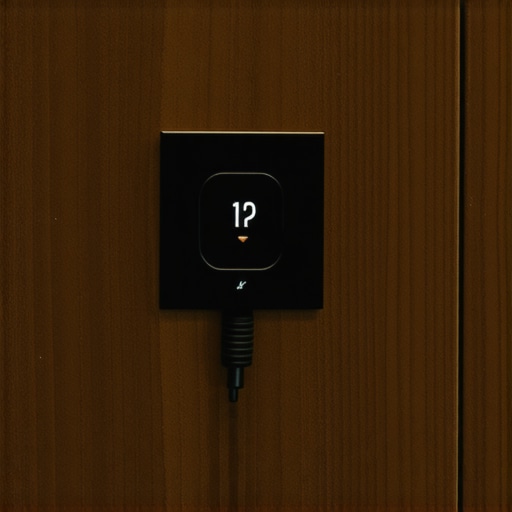
Build the Box to Withstand Heat and Daily Use
Heavy appliances like stand mixers or commercial-grade blenders put immense stress on cabinet bottoms. If you are using the deep drawer move for storing blenders and food processors, the joinery must be superior to standard stock cabinets. I learned the hard way that a simple stapled back won’t cut it when a heavy Vitamix is sliding in and out every day. This is why we stopped using nails for cabinet backing and switched to screws. A screwed-in back panel provides the structural rigidity needed to prevent the cabinet from racking over time. Furthermore, ensure your appliance garage has some form of ventilation or heat-resistant lining if you plan on using the toaster while it is still inside the nook.
Stop the Door From Binding
Finally, the hardware you choose for these hidden spots is just as important as the electrical. If you are using a ‘lift-up’ or ‘tambour’ door, the alignment must be millimetre-perfect. A slight sag in the cabinet box will cause the door to bind, leading to the same frustration I felt years ago. If things feel tight, you can often perform the 5-minute hinge adjustment for fixing wonky cabinet reveals to get that perfect clearance. We always recommend using 3/4-inch plywood for the base shelf rather than particle board, as it prevents the ‘bowing’ effect that often traps doors. Proper hardware ensures that your sleek, minimalist look doesn’t turn into a mechanical nightmare.
People often tell me they want to maximize every single square inch of their kitchen layout. It sounds logical, right? But here is a hard truth from a decade in the woodshop: chasing ‘maximum storage’ is the fastest way to ruin a high-end design. If you cram a cabinet into every awkward corner, you end up with ‘graveyard zones’—places where that expensive bread maker goes to be forgotten for three years because it is too much of a hassle to dig out. In my experience, a well-placed ‘dead space’ is often better than a poorly accessible one.
This brings me to the great corner cabinet debate. Many homeowners insist on a traditional Lazy Susan because it is what they grew up with. I strongly disagree. If you want a kitchen that feels truly premium, you should skip the lazy susan and install LeMans pull-outs instead. Why? Because a LeMans unit brings the entire shelf out to you, rather than forcing you to spin a plastic tray until a rogue spice jar jams the mechanism. It is about ergonomics, not just volume. This is a core part of any expert guide for 2025 kitchen upgrades.
How do you prevent a hidden coffee station from damaging your wood?
Here is the advanced nuance most ‘big box’ designers miss: heat and moisture management. If you are building a beautiful nook for a high-end espresso machine, you aren’t just housing an appliance; you are housing a steam engine. Without proper consideration, that steam will eventually cause the finish on your upper cabinets to fail. According to a study by the Wood Components Manufacturers Association (WCMA), prolonged exposure to heat and moisture cycles is the number one cause of finish delamination. This is exactly why solid wood door panels still need room to breathe. If you are tucking a kettle or coffee maker away, ensure the shelf pulls out completely so the steam dissipates into the room, not into the underside of your walnut cabinets.
One of the biggest ‘oops’ factors I see is people ignoring the vertical height of their workspace. I’ve seen 6-foot-tall clients struggle with a built-in desk or prep station that was set at a ‘standard’ 30 inches. Standards are just averages; custom cabinets should be tailored to your literal height. Have you ever fallen into this trap of following ‘standard’ rules only to find they don’t fit your life? Let me know in the comments.
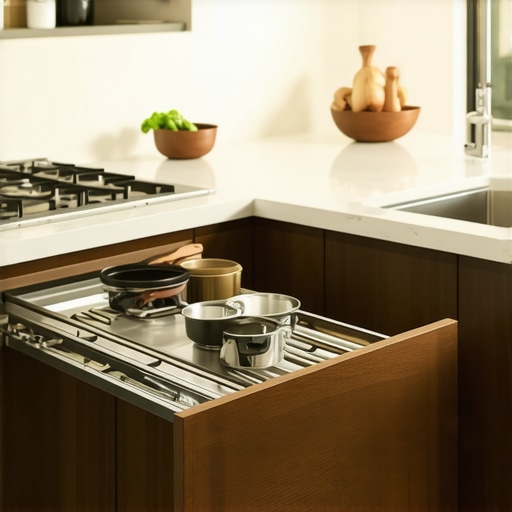
Lastly, don’t overlook your lighting. It is easy to remember the overheads, but lighting glass-front cabinets without glare requires knowing exactly where the LEDs sit relative to the eye line. If you place them too far forward, you see the dots; too far back, and you only light the dust on the shelves. Precision matters when you are striving for seamless kitchen remasters.
Even the most expensive custom cabinets as a game-changer will eventually require a tune-up to maintain that ‘showroom’ feel. I’ve seen homeowners invest $50,000 into a kitchen only to let the hardware fail three years later because of simple neglect. If you start hearing a gritty, crunching sound when you reach for a spoon, you need to identify why your drawer slides are grinding and how to clear the ball bearings before the metal actually begins to shed. High-end hardware manufacturers like Blum specify in their technical documentation that while their ‘Movento’ systems are tested for 100,000 open-and-close cycles, environmental dust and kitchen grease can act as an abrasive. A quick application of a dry-film lubricant can be the quick lubrication fix that saves you from a total hardware replacement.
Keep Your Drawers Moving Like Butter
Beyond just the slides, your doors will eventually sag—it is a law of gravity. Instead of calling a contractor, you can handle this yourself. Once you learn how to adjust european hinges for a perfect level door reveal, you will realize that a screwdriver and five minutes are all that stand between a sloppy kitchen and a precision-engineered masterpiece. This is a vital skill for anyone looking into creating seamless kitchen remasters. If a door is hitting the frame, don’t force it; use the adjuster screw to pull it back into alignment.
My Secret Weapon for Perfect Hardware Alignment
When I am in the shop, I don’t guess where a handle goes. I use a dedicated aluminum jig. If you are a DIYer or just want to swap your pulls, I highly recommend using the one tool you need for perfectly aligned cabinet knobs every time. One misplaced hole in a $300 walnut drawer front is a mistake you only make once. Precision is what separates the ultimate guide to custom cabinets from a weekend hack job. 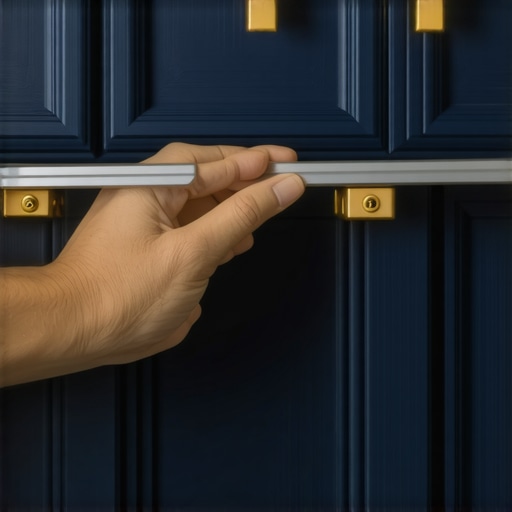
How do I keep my custom cabinets looking new for a decade?
Maintenance isn’t just about the mechanical parts; it’s about protecting the finish. I often get asked why your white cabinets are turning yellow and how to prevent it. The culprit is usually a combination of UV exposure and cooking grease that hasn’t been properly cleaned. For natural wood, knowing how to remove stubborn water rings without stripping the lacquer is the difference between a minor touch-up and a full refinish. As we look toward the future, I predict we will see more ‘smart’ finishes that resist microbial growth and self-heal minor scratches, but for now, elbow grease and the right cleaners are your best friends.
Look Toward Modular Internal Storage
If you want to scale your kitchen’s utility over time, stop thinking of cabinets as static boxes. Use adjustable shelf tracks so your storage can grow as your family does. This flexibility is a hallmark of innovative storage solutions for modern kitchen remodels. I challenge you to take five minutes this weekend and perform the 5-minute hinge adjustment for fixing wonky cabinet reveals on your most-used cabinet door. You’ll be amazed at how much ‘newer’ the whole room feels just by squaring up one line.
The Hardest Lesson I Learned About Kitchen Workflow
After years in the woodshop and on-site at installs, I realized that the most beautiful cabinets are essentially useless if they don’t solve your specific daily friction points. For me, that ‘lightbulb moment’ happened when I stopped looking at a kitchen as a collection of walnut or maple boxes and started seeing it as a series of movements. If you have to walk more than three steps to put away a heavy Dutch oven, the layout has failed you. Always prioritize the path of least resistance. Furthermore, never underestimate the power of expert tips on selecting storage solutions for a perfect kitchen upgrade early in the planning phase—it prevents those expensive ‘I wish I had’ thoughts once the paint is dry.
- Precision hardware isn’t just a luxury; it is the mechanical heart of your home that prevents drawer sagging.
- Light temperature matters just as much as placement to keep your wood grain looking natural.
- Planning for ventilation in hidden appliance nooks prevents thousand-dollar repair bills caused by trapped steam.
My Go-To Resources for Masterful Cabinetry
When I am planning a complex layout, I don’t rely on memory or guesswork. I trust specific tools and sources that ensure every drawer slide is level and every hinge is square. First, I always keep a high-quality aluminum drill jig nearby; it is the only way to ensure your handles are perfectly aligned. For long-term maintenance, a canister of dry-film lubricant is essential for keeping those built-ins and storage hacks for a sleek functional kitchen whisper-quiet for years. Finally, I frequently refer back to the NKBA standards for clearance and ergonomics to ensure my custom designs are as safe as they are stylish.
Building a Kitchen That Grows With You
Your home is a living environment, and your storage needs will inevitably change as your family does. By choosing custom cabinets as a game-changer, you are not just buying furniture; you are investing in an adaptable system. Don’t be afraid to break ‘the rules’ if a specific layout makes more sense for how you actually live and cook. If you ever feel stuck or need a professional eye to review your cabinet plans, feel free to contact us for a consultation. You deserve a space that works as hard as you do every single morning. Have you ever completed a kitchen project and realized there was one ‘ghost space’ or cord you completely forgot to account for? Let me know your biggest remodeling surprises in the comments below.