The Built-In Window Seat Secret: Using Top-Flip Hinges for Hidden Storage
I remember staring at the mountain of winter coats and board games spilling out of my hallway closet, feeling that specific brand of “small-house claustrophobia.” My wife wanted a cozy reading nook under the bay window, and I desperately needed a place to hide the clutter. It seemed like a match made in heaven. But my first attempt at a window seat was, to put it bluntly, a total flop. I focused so much on the paint color and the cushion fabric that I completely ignored the mechanics of how we’d actually get inside the thing. I didn’t realize back then that the real secret to a functional nook isn’t the upholstery—it’s the top-flip hinge system that makes the storage accessible without a fight. I spent two weeks building a beautiful box only to realize that every time we wanted a blanket, we had to move three heavy pillows and the cat just to pry the lid open. It was exhausting.[image_placeholder]
Stop Letting Your Living Room Lose the War Against Clutter
We all have that one “catch-all” area where blankets, board games, and random holiday decor go to die. In my house, it was the corner by the window. I spent years convinced I needed a larger house when I actually just needed innovative storage solutions for every room. A window seat is the ultimate double-agent: it looks like a serene spot for a morning brew, but inside, it’s a high-capacity vault. Today, I’m showing you why top-flip hinges are the only way to go if you want built-ins that elevate your living room’s functionality. By using a continuous piano hinge or a modern torsion-style lid stay, you eliminate the awkward “prop the lid open with your elbow” maneuver that ruins most DIY benches. It turns a static piece of furniture into an active part of your organization strategy.
Will these hinges actually hold up to my family’s daily abuse?
I know what you’re thinking because I thought it too: hinges are just metal flappy things, right? Wrong. When I first dove into custom cabinet ideas, I tried to save five bucks by using standard door hinges I had lying around in the garage. It was a disaster. The screws stripped out of the wood after a week because the leverage of a heavy 3/4-inch plywood lid is immense. You need hardware designed for the weight of the lid plus the occasional toddler who decides to jump on it. Research from the Journal of Environmental Psychology suggests that physical clutter can lead to increased cortisol levels, which is why a seamless, easy-to-use storage system isn’t just about decor—it’s about your sanity. If it’s hard to put things away, you won’t do it. Have you ever started a storage project only to have it fail because the hardware wasn’t up to the task? Let me know in the comments, because I’ve definitely felt that frustration of seeing my hard work literally pull apart. Next, we’re going to look at the specific hinge types that will actually survive your household and keep those fingers safe from accidental slams.
Stop the Slam with the Right Hardware
You wouldn’t use a screen door spring to hold up a garage door, so don’t expect tiny butt hinges to handle a forty-pound storage lid. The leverage exerted by a 3/4-inch plywood top is essentially a giant nutcracker for cheap screws. If you want a lid that stays open while you’re digging for that holiday tablecloth, you need a continuous piano hinge or a set of torsion stays. Think of a piano hinge as the backbone of your bench; it distributes the weight across the entire length of the lid, preventing the wood from sagging or pulling away at specific points. I learned this the hard way during a modern kitchen remodel where I tried to shortcut a banquet bench. Within a month, the middle of the lid was dipping like an old mattress. Now, I always emphasize that the hardware is just as critical as the frame itself. For those who want that high-end feel, learning the 5-minute hinge adjustment for fixing wonky cabinet reveals will ensure your bench lid sits perfectly flush every time it closes.
Build a Lid That Won’t Warp by Next Season
The material choice for your lid is where most DIY projects go off the rails. I once built a stunning window seat for a client near the Geist reservoir using standard pine boards from a big-box store. It looked great for exactly three weeks. Then the Indiana humidity hit, and that lid curled up like a dried leaf. It was a mess. Now, I exclusively use pre-finished maple interior plywood or stable hardwoods like white oak for the top. This ensures that even when the sun beats through that window all afternoon, the lid stays flat and functional. If you are going for a painted look, make sure you know the best wood species for painted cabinets that will not crack at the joints to keep your bench looking seamless for years.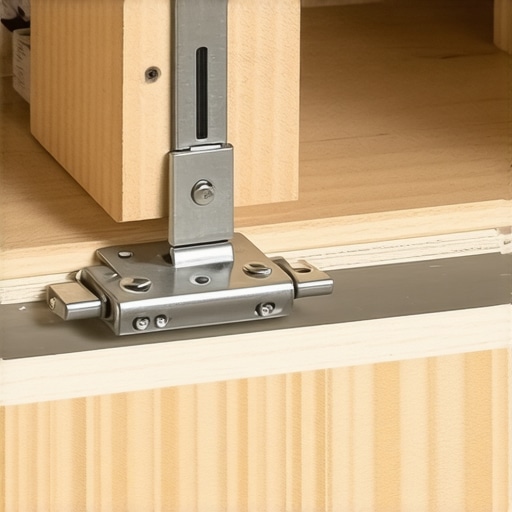
Nail the Scribe for a Built-In Look
The biggest difference between a piece of furniture sitting in a corner and a true built-in is the gap—or lack thereof—between the bench and the wall. Most walls are about as straight as a mountain road. If you just push a square box against a wonky wall, you’ll have a gap big enough to swallow a TV remote. This is where the ‘scribe’ technique becomes your best friend. You take a compass, track the contour of the wall onto your wood, and trim it to fit like a puzzle piece. It’s the same method used when you scribe a bench to a stone wall without any gaps. It’s a tedious extra twenty minutes of work, but it’s the difference between a project that looks like a weekend ‘oops’ and one that looks like a professional custom cabinet overhaul. Once the box is secured, you should use 3-inch rugged screws to anchor the unit into the wall studs. This prevents the bench from shifting when you sit down, which would otherwise eventually snap your expensive hinges or crack your paint lines. Integrating the built-in bench move into your home doesn’t just add a seat; it transforms the structural integrity of your room’s layout.
Most homeowners assume that the more cabinet boxes they cram into a room, the better their organization will be. This is the biggest myth in the industry. In my experience, high-volume storage is actually the enemy of high-functioning storage. When you focus solely on quantity, you end up with deep, dark corners where items go to be forgotten for a decade. This is particularly true during modern kitchen remodels where people prioritize wall-to-wall cabinetry over accessibility. True expertise isn’t about how much you can fit; it’s about how much you can reach without moving five other things first.
Why does my custom woodwork look different after the first winter?
One of the most sophisticated mistakes I see—even from seasoned contractors—is ignoring the hygroscopic nature of natural materials. Your house is a living, breathing organism that shifts with the seasons. Research from the Forest Products Laboratory (USDA) confirms that wood will always seek an equilibrium moisture content with its environment, meaning it expands and contracts regardless of how much glue you use. This is exactly why solid wood door panels still need room to breathe in summer. If you pin a panel too tightly within a frame during a dry winter, it will literally crack the stiles and rails come July. Professionals know to use space balls or allow for a floating panel design to accommodate this movement. Have you ever noticed your cabinet doors sticking or gaps appearing during seasonal changes? Have you ever fallen into this trap? Let me know in the comments.
The Invisible Trap of Standard Finishes
Another area where DIYers and even some ‘pro’ shops cut corners is the finish. If you are looking for custom cabinet ideas, you’ve likely seen beautiful painted finishes on Pinterest. But there is a massive difference between house paint and industrial coatings. I’ve seen countless projects ruined because someone thought they could save money by using a high-end wall paint on a built-in bench. This is why using standard interior paint on your kitchen cabinets is a five-year mistake; it simply lacks the chemical resistance and hardness to withstand the oils from your hands or the friction of sliding storage bins. You need a post-catalyzed lacquer or a specific urethane alkyd enamel that cures to a rock-hard shell. Using the wrong finish on built-ins and storage hacks for a sleek functional kitchen is like putting a lawnmower engine in a Ferrari—it might look the part, but it won’t survive the first real drive.
Refine Your Storage for Real Life
Finally, let’s talk about the ‘black hole’ of corner cabinets. Everyone thinks they need a lazy Susan, but they are often a waste of prime real estate. If you want to truly maximize space with innovative storage solutions for every room, you have to look at mechanical pull-outs. This is why you should skip the lazy susan and install lemans pull outs instead. They bring the entire contents of the cabinet out to you, rather than making you crawl on the floor to find a lost lid. When you combine these mechanical upgrades with the knowledge of how to adjust European hinges for a perfectly level door reveal, you transition from a ‘storage project’ to a precision-engineered piece of architecture. Don’t settle for the beginner’s approach of just ‘building a box.’ Focus on the physics of the materials and the ergonomics of the user.
I’ve learned the hard way that a project isn’t finished just because the last screw is in; the real test is the longevity of the movement. I never start a build without my 3-plane laser level. If you are trying to level a kitchen island on a significantly sloped floor, a standard bubble level is basically a toy. You need a reference line that wraps around the entire room to ensure your built-ins don’t look like they’re sliding downhill. For the jewelry of the cabinets—the handles—I swear by a dedicated hardware jig. It is the one tool you need for perfectly aligned cabinet knobs every time because being even one-sixteenth of an inch off is enough to make a perfectionist lose sleep.

How do I stop my drawers from grinding after a few years?
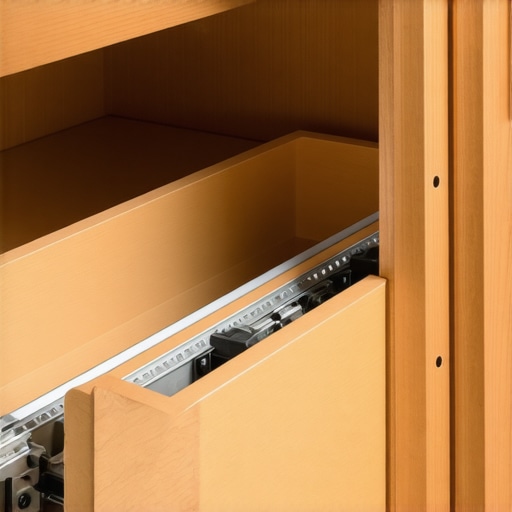
The most common complaint I hear years after a modern kitchen remodel is that the drawers don’t glide like they used to. Dust and kitchen grease are the natural enemies of precision ball bearings. According to technical maintenance guides from Accuride International, high-quality slides require periodic cleaning with a dry, lint-free cloth to remove debris that can gum up the mechanism. If you skip this, you’ll eventually find why your drawer slides are grinding and how to clear the ball bearings. A quick wipe-down and the occasional application of a dry-film lubricant will keep those drawers effortless for a lifetime.
Looking ahead, I see the world of storage becoming much more integrated with stealth technology. We are moving toward smart storage ideas to maximize your kitchen space this year that include built-in inductive charging pads and motorized pull-outs for those hard-to-reach upper corners. The goal is a living cabinet system that adapts to your physical needs rather than forcing you to bend to it. If your current cabinet doors are looking a little wonky, don’t just ignore them. Grab a screwdriver and learn how to adjust European hinges for a perfectly level door reveal right now. It is the single most effective way to give your kitchen an instant professional facelift without spending a single dime.
Hard-Won Secrets From My Bench-Building Disasters
Building a few dozen of these has taught me that the things you can’t see are always more important than the things you can. First, never trust a single fastener to do the job of three; I’ve seen bench lids pull apart because the builder skipped the glue, which is why your cabinet boxes should be stapled, glued, and screwed for maximum longevity. Second, always check the structural integrity of your home before anchoring. If you’ve ever wondered why your wall cabinets are pulling away from the drywall, it’s usually because they weren’t hitting studs or were overloaded—don’t let your new window seat suffer the same fate. Finally, if you are building a banquet bench for a kitchen, don’t just leave it as a big open tub. Integrating the vertical cookie sheet divider that ends the cabinet clatter inside the bench itself is a game-changer for organizing flat items that otherwise get buried at the bottom.
The Gear That Separates Amateurs From Pros
To get that high-end, factory-level look, you need a few specific resources in your back pocket. I never show up to a job site without the one tool you need for perfectly aligned cabinet knobs every time, because a crooked handle is the quickest way to ruin a thousand-dollar build. For design inspiration that actually works in the real world, I constantly refer back to the custom cabinets expert guide for 2025 to ensure my dimensions aren’t just “standard,” but optimized for modern ergonomics. And when it comes to the finish, I’ve learned to be incredibly picky about my topcoats to avoid the heartache of white cabinets turning yellow due to UV exposure or poor chemical choices. Use a post-catalyzed lacquer if you want it to look the same in ten years as it does today.
Take the Leap and Transform Your Space
Your home should be a place that serves you, not a place where you are constantly fighting against the mess. A well-designed window seat is more than just a piece of furniture; it is a commitment to a more organized, peaceful way of living. By choosing the right hardware and understanding the physics of the wood, you can create storage solutions that are as durable as they are beautiful. Don’t be afraid to get your hands dirty or hire a pro to nail those complex scribes—the result of a perfectly fitted built-in is worth every ounce of effort. What is the biggest storage struggle you are currently facing in your living room or kitchen? Let me know in the comments below!