How to Hide Your Electrical Sub-Panel Inside a Custom Pantry
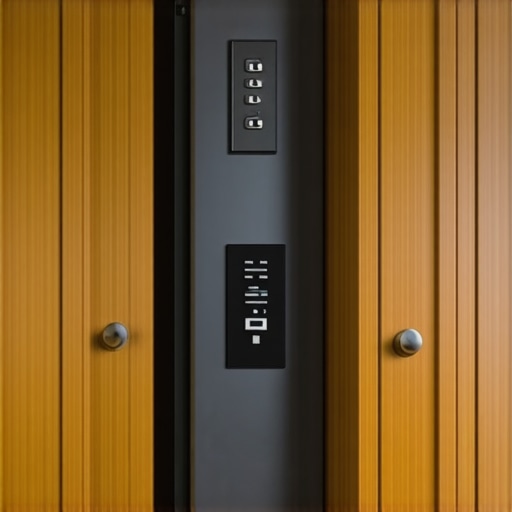
I stood in my kitchen, coffee cold in my hand, staring at the ugliest grey rectangle in the world. It was my electrical sub-panel, and it was sitting right in the middle of where I’d planned my dream pantry. It felt like putting on a tuxedo but forgetting to take off your muddy work boots. I actually tried to just ‘cover it up’ with a heavy framed mirror once—total disaster. Not only did it look like I was hiding something, but I almost got a citation because it wasn’t ‘readily accessible’ according to the local inspector. If you’ve ever felt that sinking feeling of an eyesore ruining your modern kitchen remodels featuring custom cabinets and built-ins, you aren’t alone. Today, I’m going to show you how to tuck that industrial beast inside a custom pantry so it vanishes without breaking the law.
Don’t Let Utility Boxes Dictate Your Design
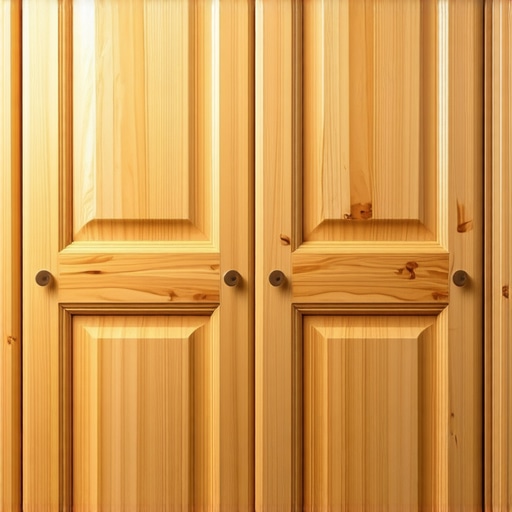
When I first started diving into the ultimate guide to custom cabinets for a stylish kitchen overhaul, I realized that most people just ‘live’ with their sub-panels. They paint them the same color as the wall and hope nobody notices. But you and I both know that doesn’t work; the texture is different, the latch still catches the light, and it just looks cheap. The real trick is building around it. In my early days, I made the mistake of mounting a cabinet directly over the metal flange without thinking about how the door would swing. I ended up with a mess that required me to rip out half a day’s work because the breaker door couldn’t open 90 degrees. It’s vital to ensure your tall pantry doors provide the necessary clearance without looking out of place. You want the grain to flow, not be interrupted by a weird access hatch.
Is it even legal to box this thing in?
This is the biggest hurdle I hear from neighbors and DIYers alike. The short answer is yes, but the long answer involves ‘clearance.’ According to the National Electrical Code (NEC) Section 110.26, you need a dedicated working space of at least 30 inches wide and 36 inches deep that remains unobstructed. You can’t just pile cereal boxes in front of your breakers. Designing a pantry with a false back or a dedicated ‘service door’ within the cabinetry is the secret move that keeps you safe and stylish. Otherwise, you might find that your wall cabinets are pulling away from the drywall because you didn’t account for the structural needs or the weight distribution around the panel box.
Building for Access and Aesthetics
Think of your pantry as a shell. When we talk about expert tips on selecting storage solutions for a perfect kitchen upgrade, we usually focus on jars and spices. But when a sub-panel is involved, the storage has to be ‘removable.’ I remember a client who built a permanent shelf right across the middle of their breaker box. Two years later, they had a power surge and the electrician had to use a sawzall to get to the panel. Talk about an expensive mistake. That’s why I advocate for modular inserts. You want the beauty of custom cabinets ideas that transform your homes style, but with the hidden functionality of a secret agent’s gadget wall. Have you ever stared at a circuit breaker and wished it would just go away? Well, let’s get into the blueprints of how to make that happen.To get started, you need to build what I call a sleeved cabinet. Instead of a standard box, you are creating a frame that slips over the panel area without actually touching the electrical housing itself. I learned this the hard way on a project where the homeowner had a panel smack in the middle of a mudroom. I tried to screw the cabinet directly to the metal flange—don’t ever do that. You will strip the screws and potentially hit a wire. Instead, I built a secondary structural frame that transferred the weight to the floor and the surrounding studs. This is a crucial part of modern kitchen remodels featuring custom cabinets and built-ins. You want the cabinet to be an independent structure that simply surrounds the utility.
Master the Friction-Fit Back Panel
Most people think they need to cut a giant hole in their cabinet and leave the ugly metal exposed inside. That looks unfinished and cheap. The professional move is to treat it like the removable cabinet back move that simplifies your next drain pipe repair. I use 1/4-inch plywood that matches the interior of the cabinet. I do not nail it in place; I use rare-earth magnets or a simple friction-fit cleat. If a breaker trips, you pull the panel out like a secret drawer, flip the switch, and snap it back in. It looks like a finished, high-end cabinet interior, but acts like a functional access door. This makes custom cabinets as a game-changer in your kitchen remodel journey because you aren’t sacrificing aesthetics for utility. 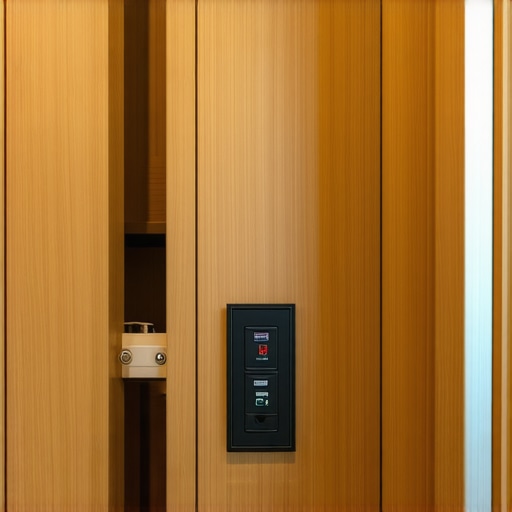
Use Tracks to Keep the Inspector Happy
Inside the pantry, you must install why you should design your pantry with adjustable shelf tracks. If you fix your shelves with permanent screws or nails, you have just built a permanent obstruction. I once had to spend three hours unscrewing permanent shelves for a city inspector because I didn’t think about the required clearance zone. Use the tracks; they give you the flexibility to move everything out of the way in seconds if a technician needs full access. This modularity is a hallmark of expert tips on selecting storage solutions for a perfect kitchen upgrade.
Build a Box That Won’t Rack or Sag
Because this cabinet essentially has a floating or removable section, the rest of the box needs to be incredibly rigid. This is not the time for cheap cam-locks or thin backing. This is why your cabinet boxes should be stapled, glued, and screwed. You need that structural integrity to keep the frame square even when the back panel is removed for service. If the box racks even slightly, your tall pantry doors will start dragging on the floor or binding against the sub-panel frame. I remember a project where the floor was slightly sloped, and because we didn’t use 3-inch rugged screws to secure the base, the whole pantry shifted when the shelves were loaded with heavy cans. Always over-build the frame when you’re working around electrical obstacles.
Most homeowners believe that ‘all-wood’ construction is the gold standard for every single component of their project. In my experience, that is a myth that leads to cracked joints and sticking doors. While solid wood is great for frames, using it for large, flat-painted panels is a recipe for disaster. Solid wood breathes; it expands in the humid summer and shrinks in the dry winter. This movement causes the paint to crack at the seams. If you want a flawless finish that lasts, you have to understand the best wood species for painted cabinets that wont show grain. The Architectural Woodwork Institute (AWI) actually suggests that engineered substrates like HDF are superior for painted door centers because they remain Dimensionally stable regardless of the weather. This is the level of detail that separates a ‘nice’ kitchen from transforming your kitchen with custom cabinets expert guide for 2025.
Can your shelving stand up to a full stock of heavy goods?
This is where the ‘Oops’ factor usually hits about six months after the renovation. I see people spend thousands on innovative storage solutions for modern kitchen remodels only to have their beautiful pantry shelves look like a mountain range after a year. The National Kitchen & Bath Association (NKBA) recommends a maximum shelf deflection of only 1/16 of an inch per foot of length. If you are using standard 3/4-inch particle board over a 30-inch span, those heavy Dutch ovens are going to win the battle. You need to know how to stop your pantry shelves from bowing under heavy cans by using a solid wood edge band or upgrading to 1-inch thick plywood for wider spans.

Another sophisticated trap I often see involves the adhesives used during assembly. Many DIYers and even some ‘pros’ reach for a tube of silicone to fill gaps or secure trim. This is a massive mistake. Silicone is an anti-contaminant; once it touches a surface, no paint or finish will ever stick to it again. I’ve seen entire creating seamless kitchen remasters with built-in storage solutions ruined because a installer used silicone near the crown molding, leaving the painter with a ‘fish-eye’ mess that required total replacement. You should strictly follow the rule of why you should never use silicone for cabinet joinery to keep your finish pristine. Instead, rely on mechanical fasteners and high-quality wood glues that are designed for the task.
Finally, we have to talk about the ‘settling’ factor. No house is perfectly level, and your cabinets shouldn’t pretend it is. If you bolt your base units straight to the floor without shimming, the whole box will twist. This is why your base cabinets should be secured with 3-inch rugged screws after they have been perfectly leveled with shims. If the box twists, your doors will never hang straight, no matter how much you play with the hinges. It is these small, technical details that determine if your built-ins will stand the test of time or become a source of frustration. Have you ever fallen into this trap? Let me know in the comments.
Fix Those Grinding Slides and Squeaky Hinges
Once you’ve successfully hidden that sub-panel and built out your dream storage, the real work shifts to long-term performance. I’ve seen beautiful pantries become annoying within six months because the owner didn’t know why your drawer slides are grinding and how to clear the ball bearings. When you are moving heavy stacks of canned goods daily, dust and debris become the enemy of smooth motion. I personally keep a can of dry PTFE spray in my junk drawer; unlike standard oils, it doesn’t attract the flour and sugar dust that naturally lives in a pantry. If you notice a door starting to sag under the weight of an over-the-door organizer, don’t panic. You just need to master the 5-minute hinge adjustment for fixing wonky cabinet reveals. It’s a simple turn of a screwdriver, but it’s the difference between a high-end feel and a kitchen that looks like it’s falling apart.
Grab This Tool for Perfect Hardware Alignment
If you’re scaling your project to include more built-ins throughout the house, I cannot recommend a dedicated hardware jig enough. It is the one tool you need for perfectly aligned cabinet knobs every time. I spent years using a tape measure and a prayer, only to end up with handles that were 1/16th of an inch off—which is incredibly visible on tall pantry doors. A professional jig like the True Position Tools or a high-end Kreg unit ensures that every handle is identical. This level of precision is non-negotiable when you’re investing in custom cabinets as a game-changer in your kitchen remodel journey. Precision isn’t just for show; it ensures the pull-force is centered on the screw, preventing the hardware from loosening over time.
How do I keep my custom cabinets looking new for a decade?
Maintenance isn’t just about tightening screws; it’s about environmental control. According to the Blum Technical Product Guide, their high-end runners like the Tandem plus Blumotion are rated for 100,000 opening and closing cycles under full load. However, those stats assume a clean, temperature-controlled environment. To protect your investment, you need to understand why your white cabinets are turning yellow and how to prevent it—often it’s a combination of UV exposure and cooking grease. I recommend a deep clean with a non-abrasive degreaser twice a year. Furthermore, always check your hinge plates after the first seasonal change. You will likely need to perform a how to adjust European hinges for a perfectly level door reveal session to account for the house settling and the wood expanding. Consistency is the secret sauce to a kitchen that stays ‘magazine-ready.’
Modular Storage is the Future of Home Design
Looking ahead to 2025 and beyond, I’m seeing a massive shift toward modularity. We are moving away from fixed shelving and toward systems that can be reconfigured in minutes. This is why I always push for why you should design your pantry with adjustable shelf tracks. As appliance sizes change—think of the move from giant blenders to sleek air fryers—your cabinetry needs to adapt. The future is built-ins that don’t just sit there but evolve with your lifestyle. If you’re ready to stop fighting your kitchen and start loving it, I challenge you to try the hardware jig alignment trick on just one cabinet this weekend. You’ll see exactly what a difference true precision makes. If you have questions about which jig fits your specific handle style, don’t hesitate to reach out on our contact us page.
Lessons from the Trenches: Why Good Enough Isn’t Enough
Over the years, I’ve realized that the difference between a DIY project and a professional installation is often invisible to the eye but obvious in the function. One of the hardest lessons I learned was the “Flashlight Rule.” I once hid a panel so well that when a breaker tripped at night, I couldn’t find the access panel in the dark. Now, I always mount a small, motion-sensor LED light inside the cabinet frame. It costs ten dollars and saves ten hours of frustration. Another lightbulb moment for me was realizing that custom cabinets ideas that transform your homes style should never come at the cost of safety. Always take a high-resolution photo of the panel with all its labels before you install the cabinet shell; print it out and tape it to the inside of the pantry door. It’s a courtesy to any future electrician and keeps you from having to guess which breaker controls the dishwasher. Finally, remember that wood moves but metal doesn’t. If you build too tight to the panel flange, the natural expansion of your pantry will eventually cause the wood to creak or even crack against the steel box.
The Gear That Saved My Sanity
If you are going to tackle this, you need the right arsenal. I never start a project without my True Position Drill Guide; it truly is the one tool you need for perfectly aligned cabinet knobs every time. For the actual finish, please skip the hardware store house paint. I’ve seen too many people realize why using standard interior paint on your kitchen cabinets is a five-year mistake when the shelves start sticking to the jars. I personally trust industrial coatings like Milesi or Renner for a factory-grade finish. For maintenance, keep a dry PTFE lubricant on hand to prevent that annoying grit that leads to why your drawer slides are grinding and how to clear the ball bearings. These specific tools and materials aren’t just recommendations; they are the insurance policy for your hard work.
Build a Kitchen That Works as Hard as You Do
You have the power to turn a structural eyesore into a feature that adds massive value to your home. Don’t let a metal box or a cluttered corner stop you from achieving the modern kitchen remodels featuring custom cabinets and built-ins you’ve been dreaming of. It takes a little extra planning and a few more measurements, but the satisfaction of seeing that ugly rectangle disappear into a seamless, functional pantry is worth every second. If you hit a wall or need a second pair of eyes on your design, you can always reach out via our contact us page. Your home is your sanctuary, and every inch of it—even the utilities—should reflect your style. Have you ever discovered a hidden utility box in your home that ruined a design plan? Let me know in the comments below.